Zebrafish Embryo Pick and Plate
Oregon State University
College of Agricultural Sciences
Department of Environmental and Molecular Toxicology
Sinnhuber Aquatic Research Laboratory


Summary
Timeline
Started
Joined SARL Engineering
Project Started
Initial Requirements Given
PCB Released: Driver Board
Revision: 1.0.0
PCB Released: Lighting Board
Revision: 1.0.0
PCB Released: Driver Board
Revision: 2.0.0
PCB Released: Lighting Board
Revision: 2.0.0
Project Finished
Delivered Units to Lab
Finished
Left SARL Engineering
Key Takeaways
- Delivered a design, and multiple built units, of a custom embryo pick-and-plate machine
- Reduced cost from ~$150,000 for previous generation to ~$10,000
- Reduced the size from 4.5'x4.5'x8' for previous generation to 1'x1'x1.5'
Relevant Skills
Software & Environments
- Version Control
- Git
- Programming
- Languages
- Python 2
- Bash Shell Scripting
- Low-Level Embedded C/C++ (Atmel Studio)
- Frameworks
- OpenCV
- Qt
- Languages
- Operating Systems
- Linux
- Debian
- Microsoft Windows
- Linux
Electrical
- Schematic & PCB Design
- Software
- Altium Designer
- Mentor Graphics PADS
- Manufacturing
- Gerber Export
- BOM Management
- In-House Assembly
- Software
- Electrical Diagnostics
- Multimeters
- Electronic Loads
- Oscilloscopes
- Harnessing Fabrication
- DC Low-Power & Signal
Mechanical
- Fabrication
- CNC
- Hand Tools
Details
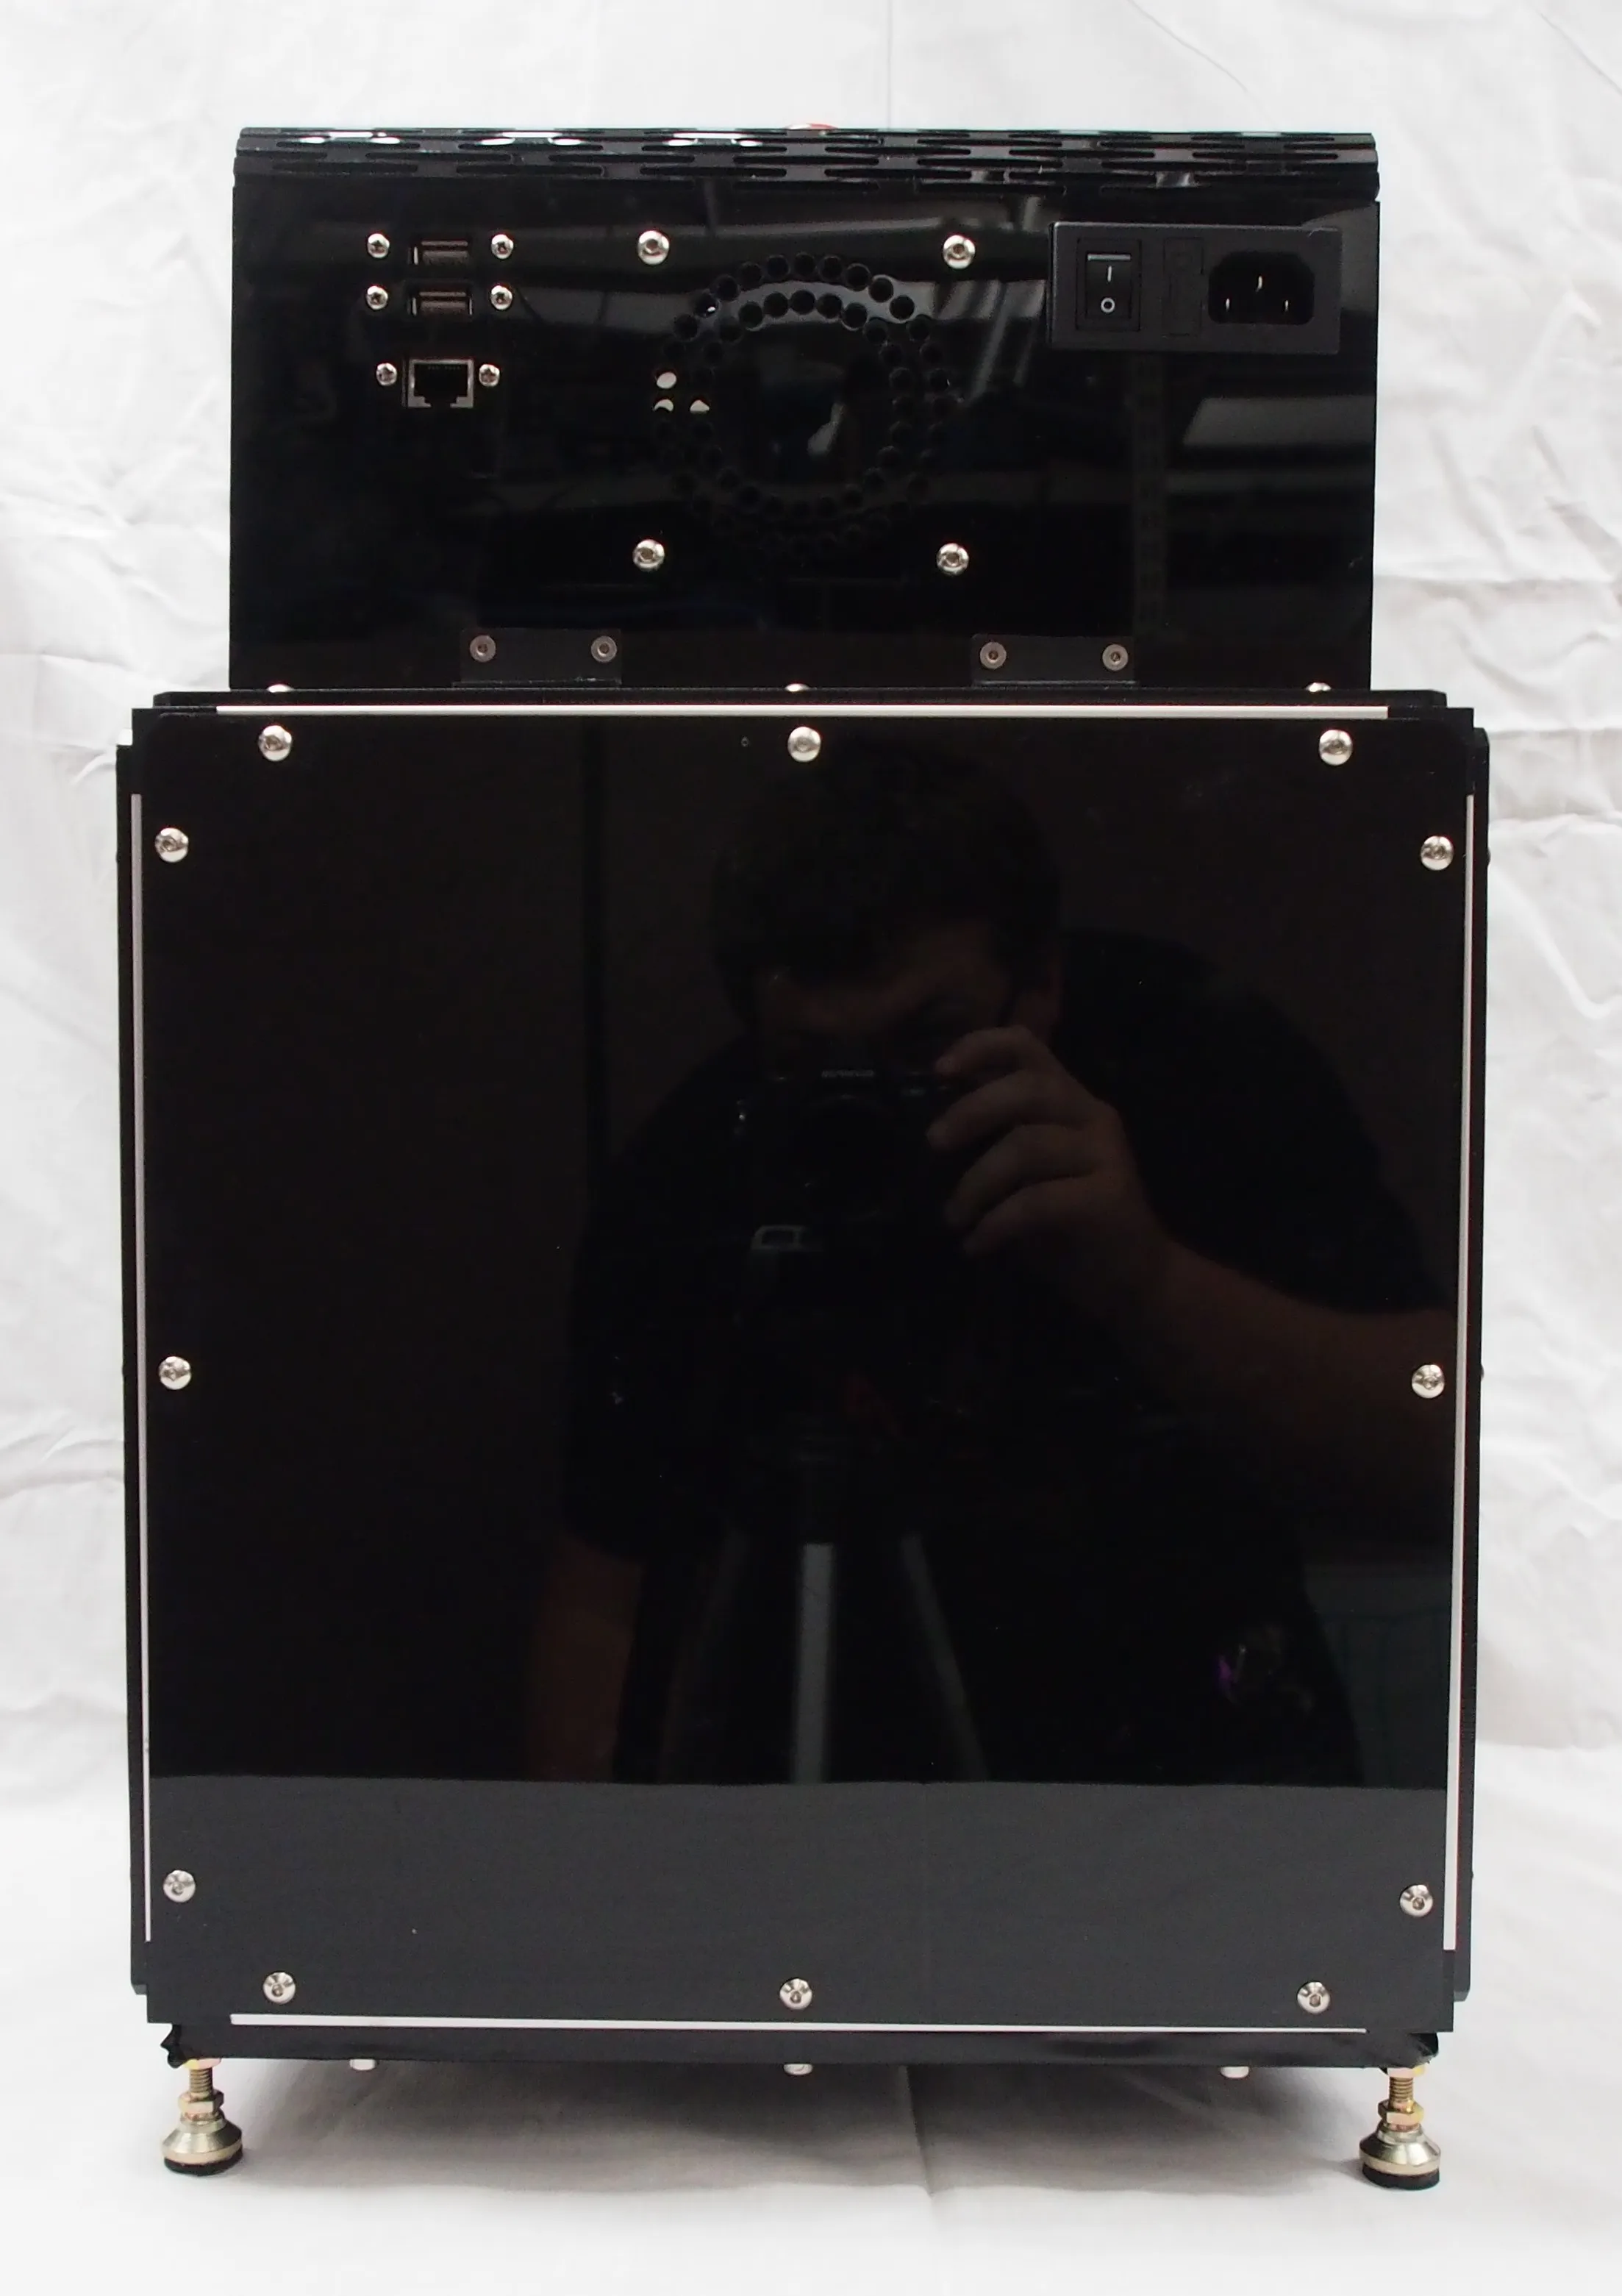
For some quick context on why such a machine was even needed, the
Sinnhuber Aquatic Research Lab performs toxicology research using
Zebrafish. This means tha the lab is also a breeding facility,
generating a few thousand eggs a day, which need to be processed and
isolated prior to being introduced to experimental conditions. At one
point in time, these processes were done by hand, with all researchers
spending a significant portion of their day simply prepping the embryos.
Later on, they hired a contractor to design an automated solution to the
isolation problem, and while they delivered, the units were industrial
overkill, using massive SCARA arms and enclosures
to pick up embryos which were roughly half a millimeter in diameter. They
were also very expensive, costing around $150k per machine, and the lab had
four installed. Thus, the engineering team was tasked with cost and size reducing
them so that more could fit in the same space and throughput could be higher.
SCARA
Selective Compliance Assembly Robot Arm
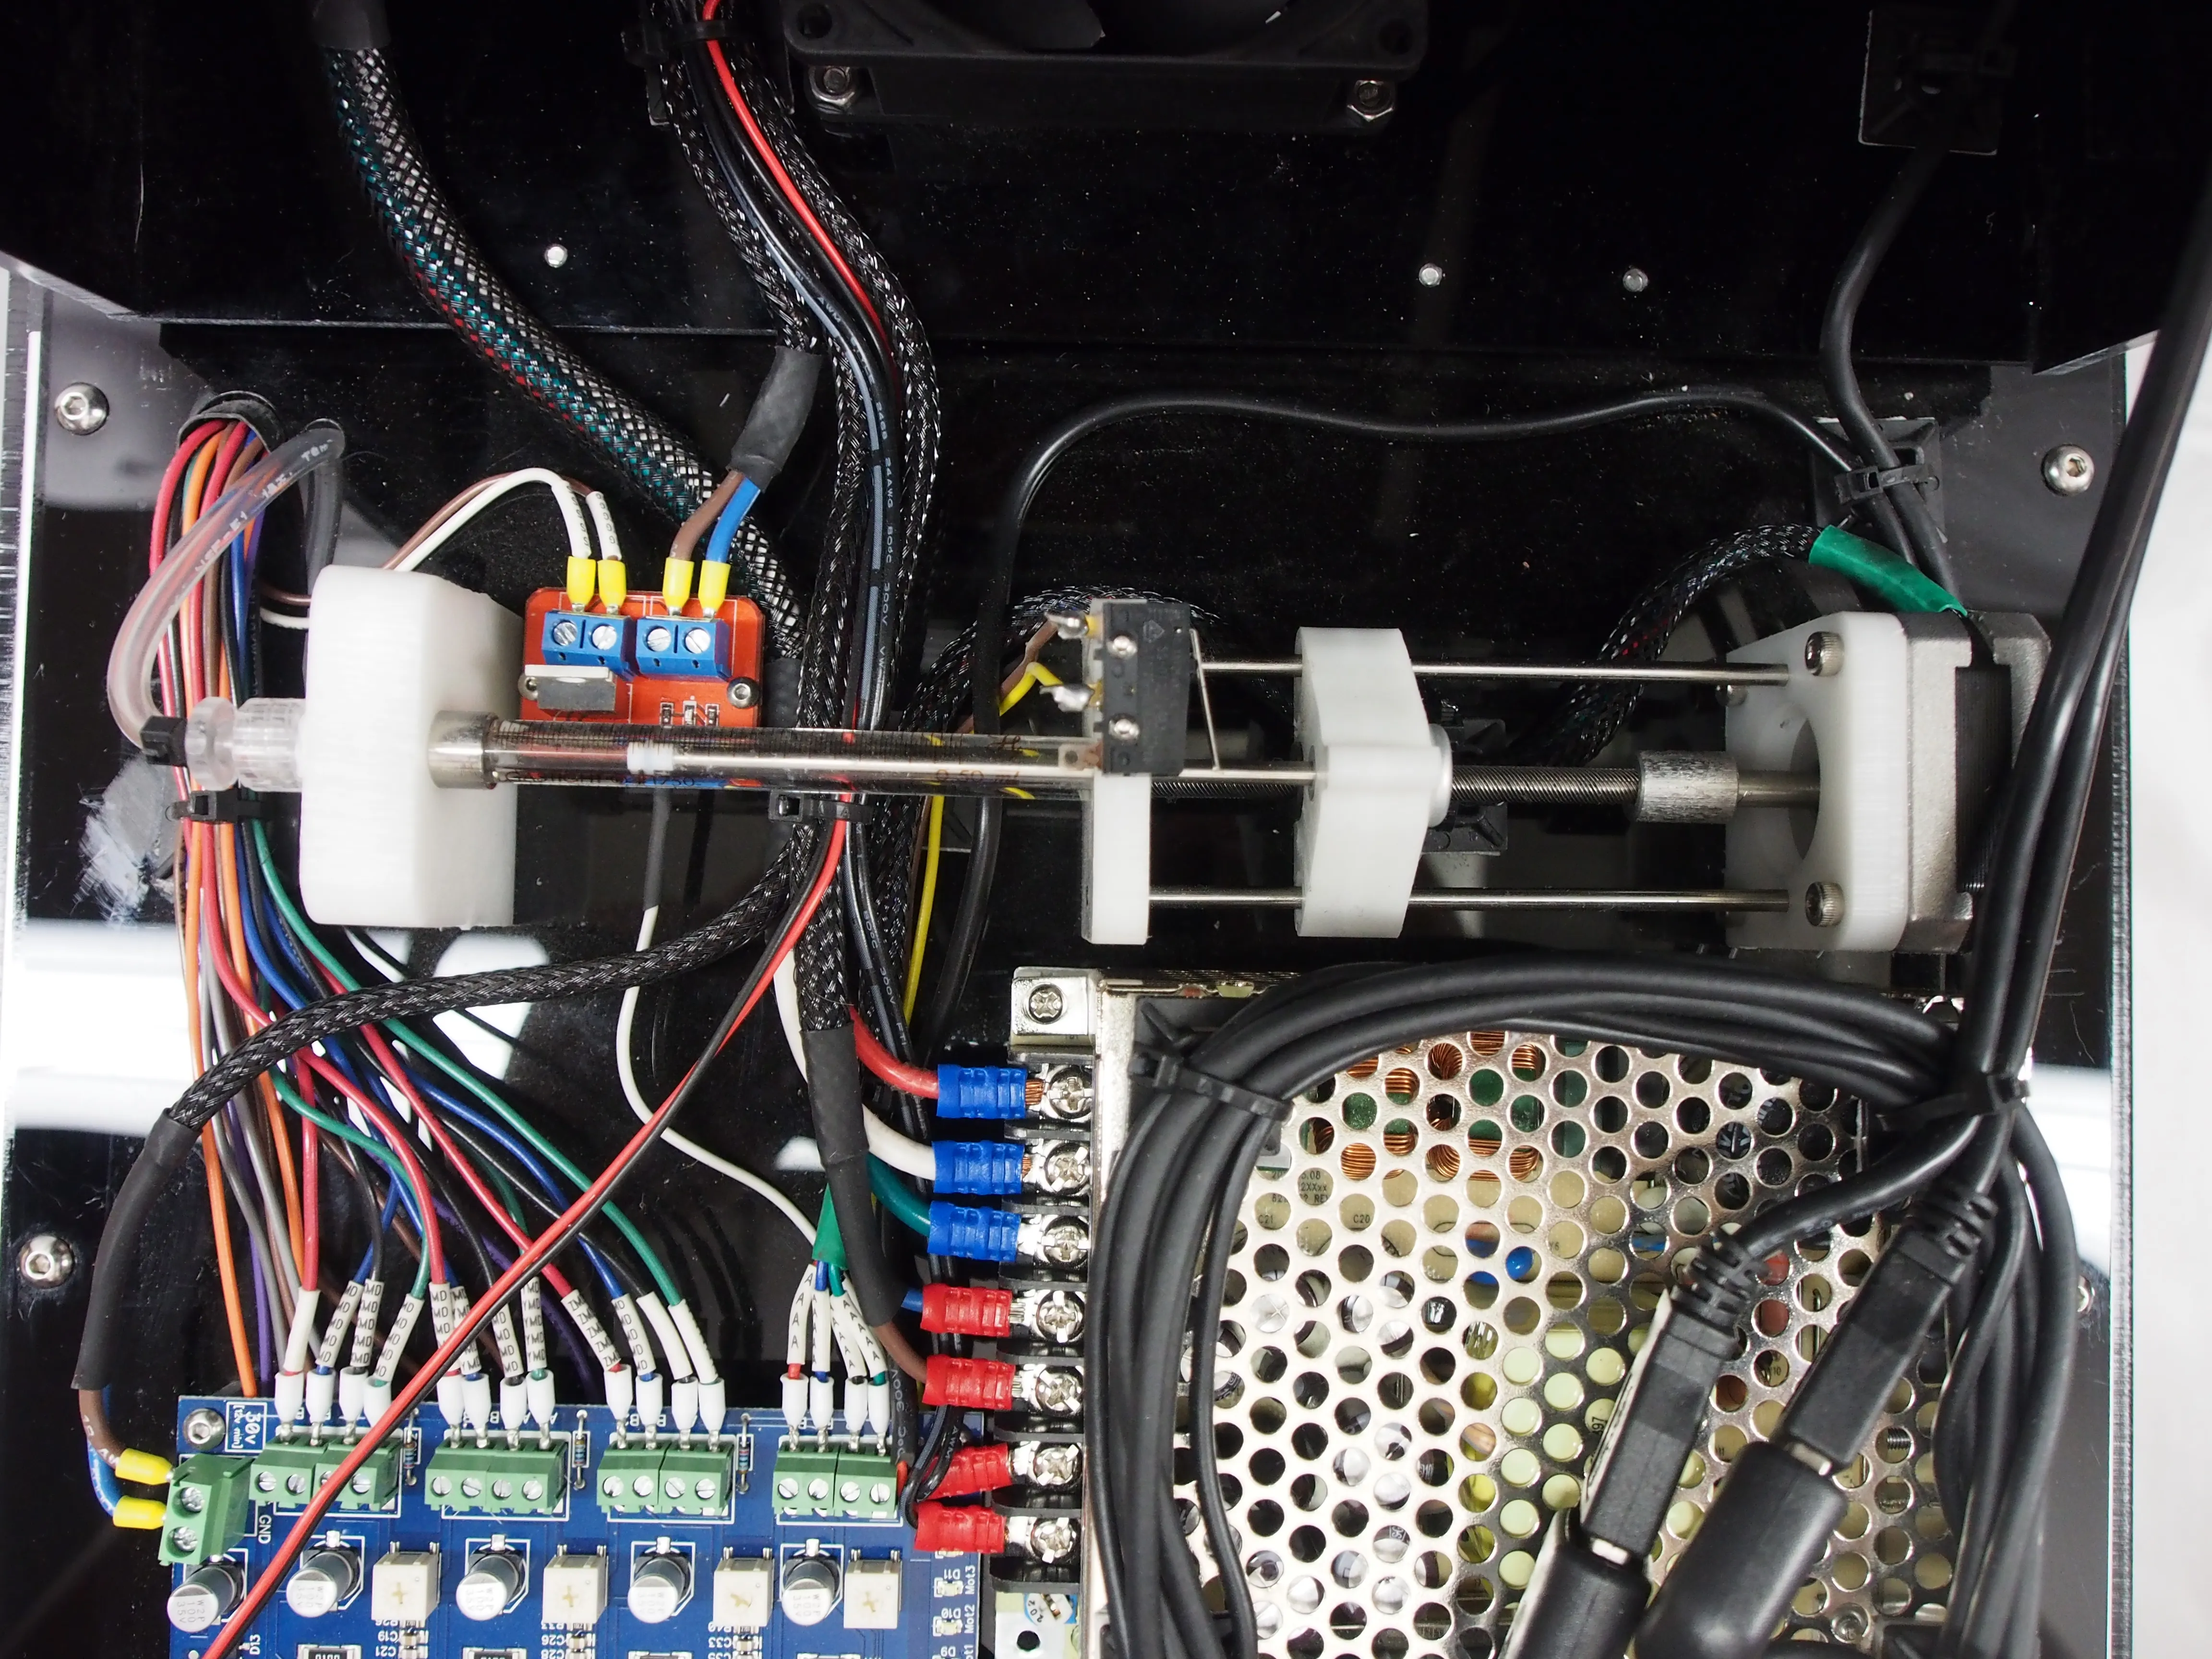
My coworker, Dylan Thrush, and I got to work. He focussed on the mechanical side, while I worked
on electrical and software. I had recently been learning PCB design
after becoming more familiar with it through the OSU robotics club, and
decided that a good place to start would be to create a motion
controller. Dylan and I had already landed on a simple stepper-motor
based system to more than meet the needs of a task like this, and both
of us already had experience with stepper-based CNC machines, making it
a great jumpoff point. My first PCB was unfortunately a massive failure,
because while I did include a quad stepper motor driver,
microcontroller, general purpose I/O, and usb to serial interface, I
failed to export the gerbers correctly. This resulted in a PCB with no
drills, making it completely useless (outside of a good learning
experience)! It was also just a poor layout overall, which isn't
surprising considering it was my first ever PCB design. If you want to
see this embarrassing result, check out the PCB section at the end of
this page!
For the second revision, we'd made some progress in other places, but
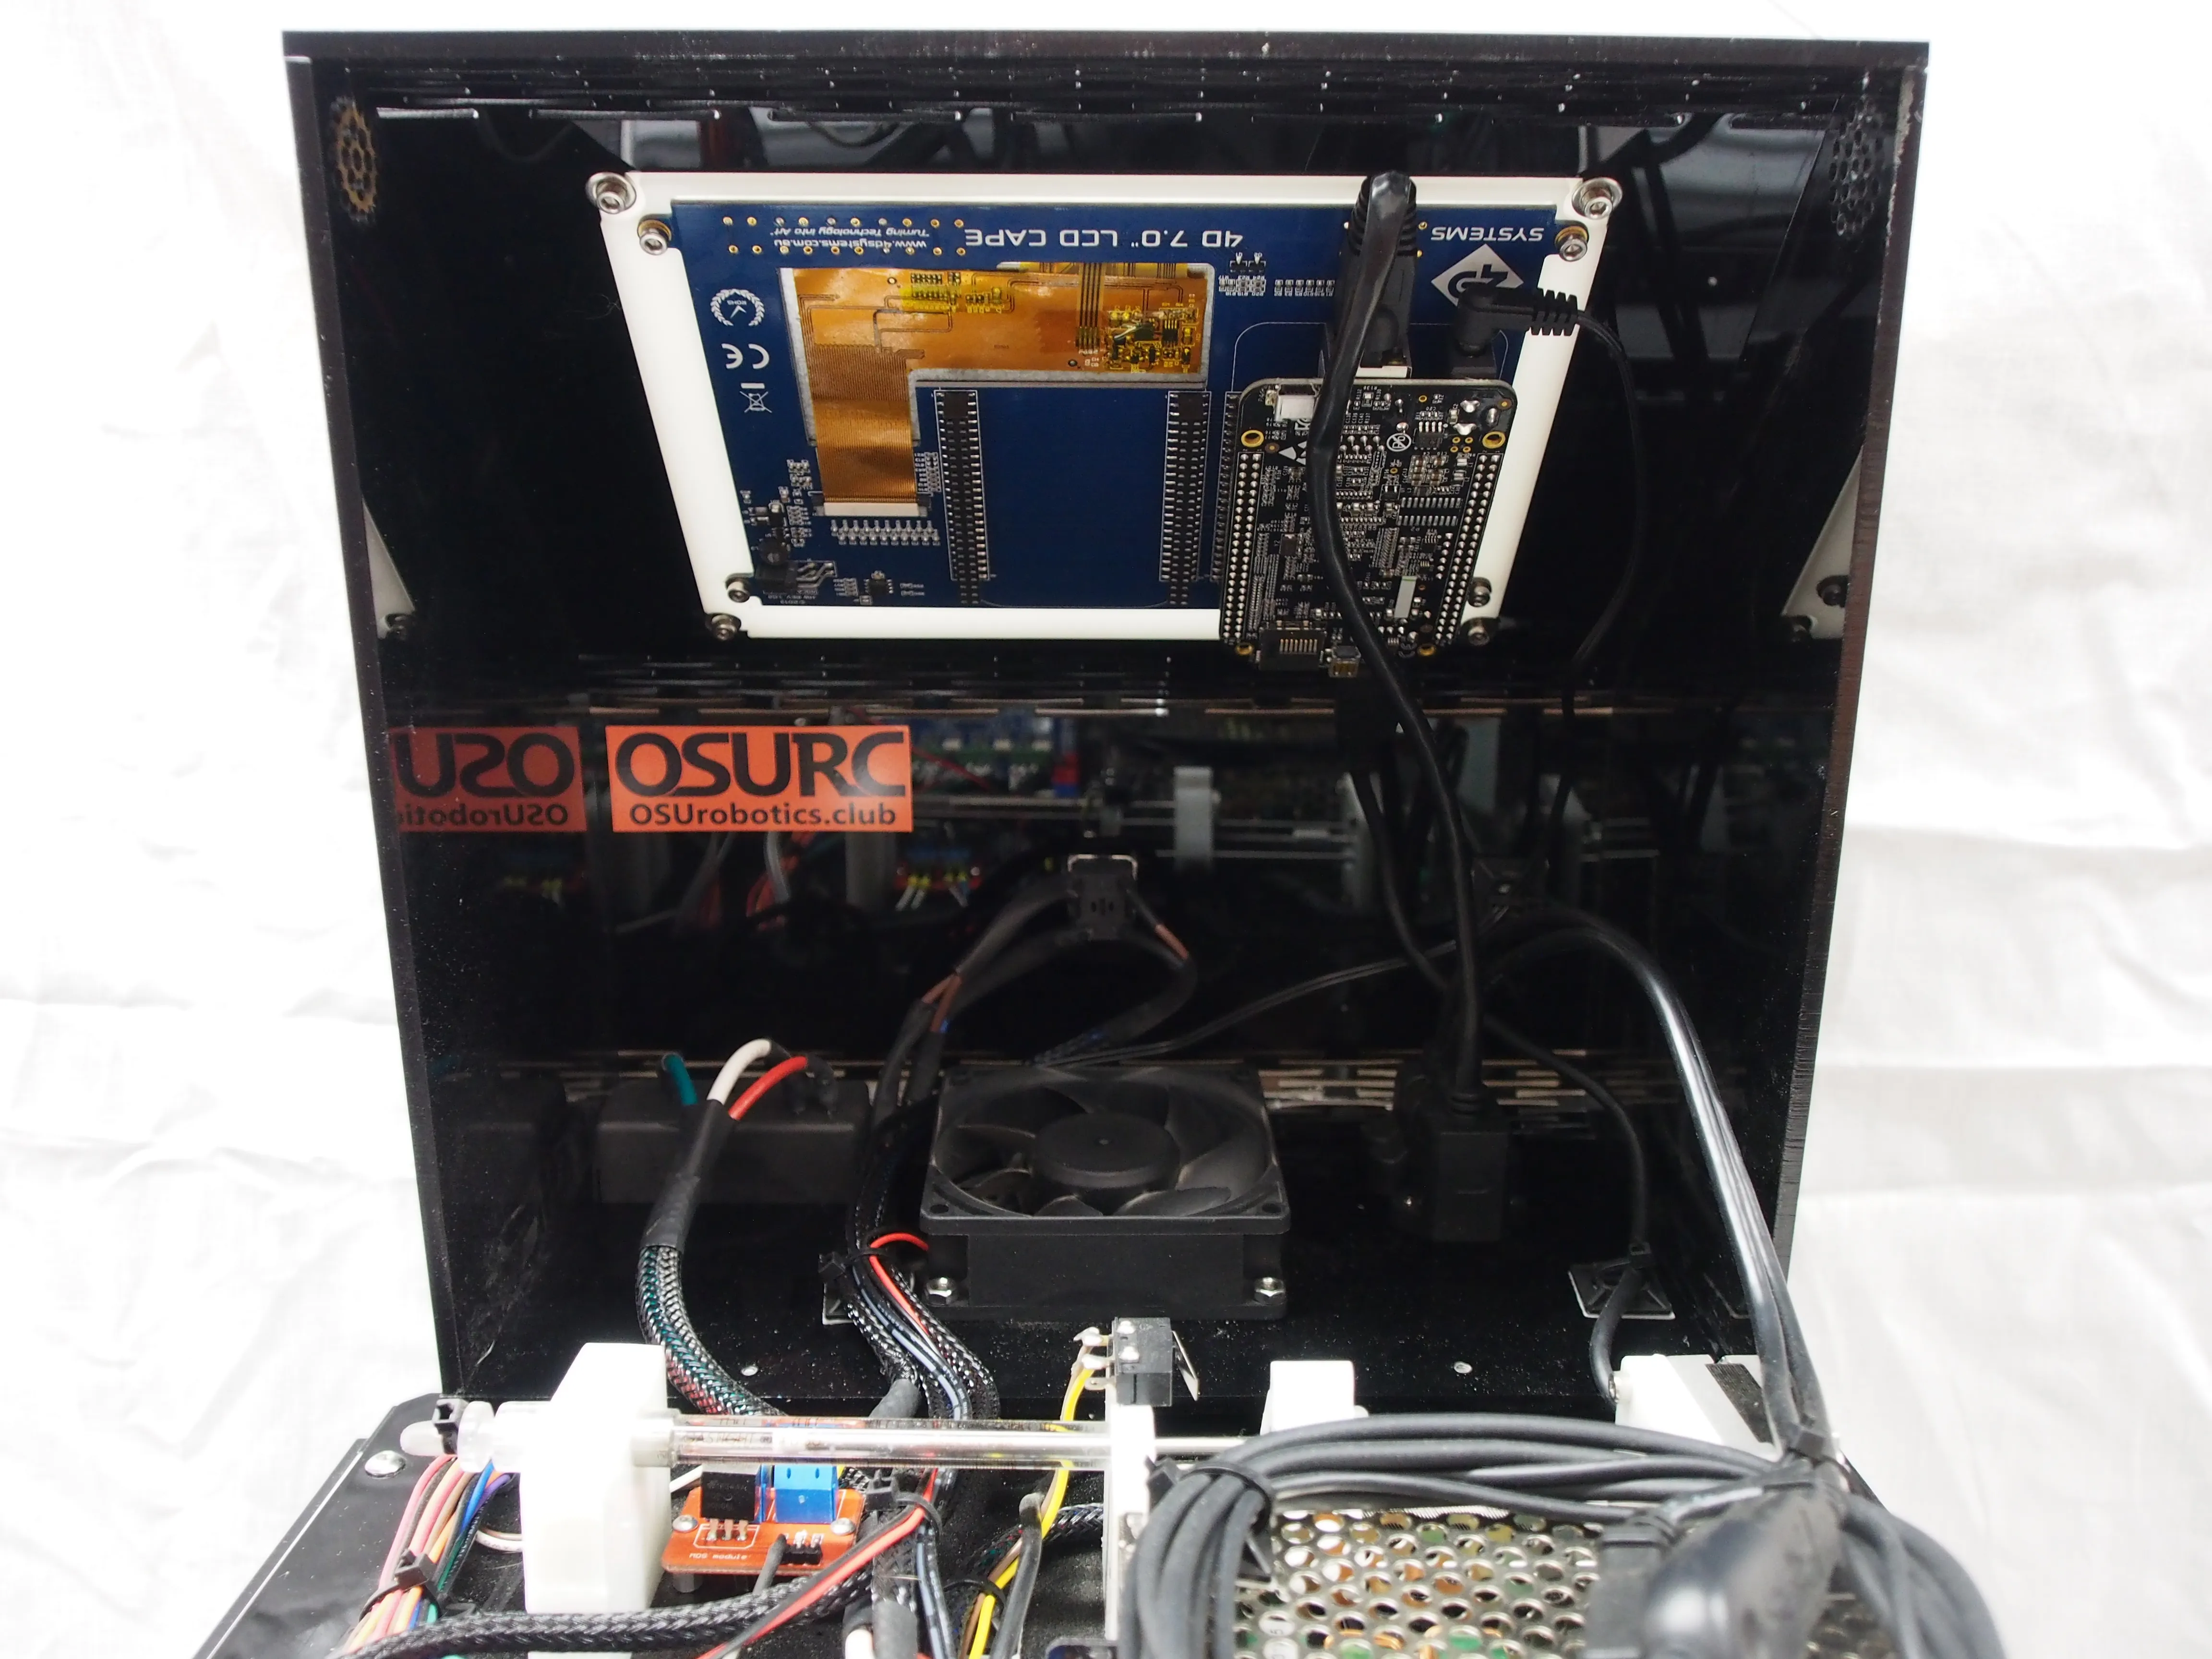
most importantly had decided that we would use a Beaglebone Black single-board-computer to run the whole system. In an effort to simplify
the assembly, I decided that the next revision would include headers to directly
mount the Beaglebone to the unit, providing power and a serial interface over
those pins. This version actually worked as expected, with only a few very
minor bodges to the microcontroller's crystal, and some bulk capacitance on
the power input. Since things were working, I began writing embedded C to
control motion through some higher-level interfaces. Not long into this process,
I realized I might have bitten off more than I could chew. Not only was I
having to learn the deep ins and outs of microcontroller programming, kinematics,
and serial interfaces, but I would still have to greatly improve my Python
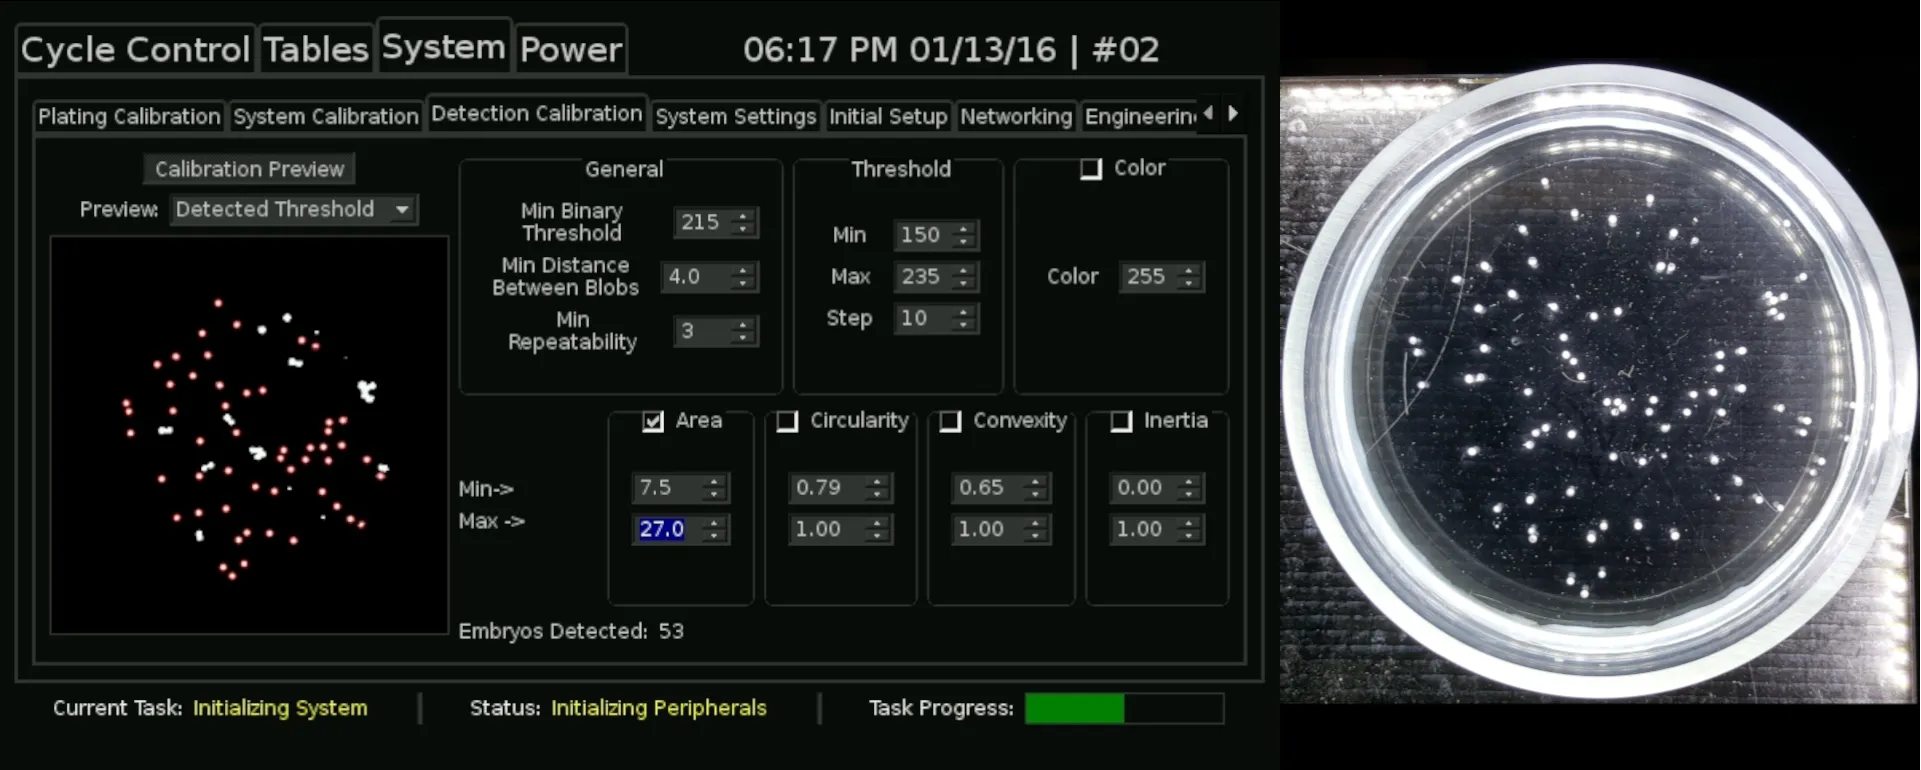
skills, learn to create graphical user interfaces, and figure out how to detect
embryos using a camera and computer vision. While I was sad to scrap this,
we decided to fall back on a motion controller called TinyG, which would simply require gcode to be sent over serial to function.
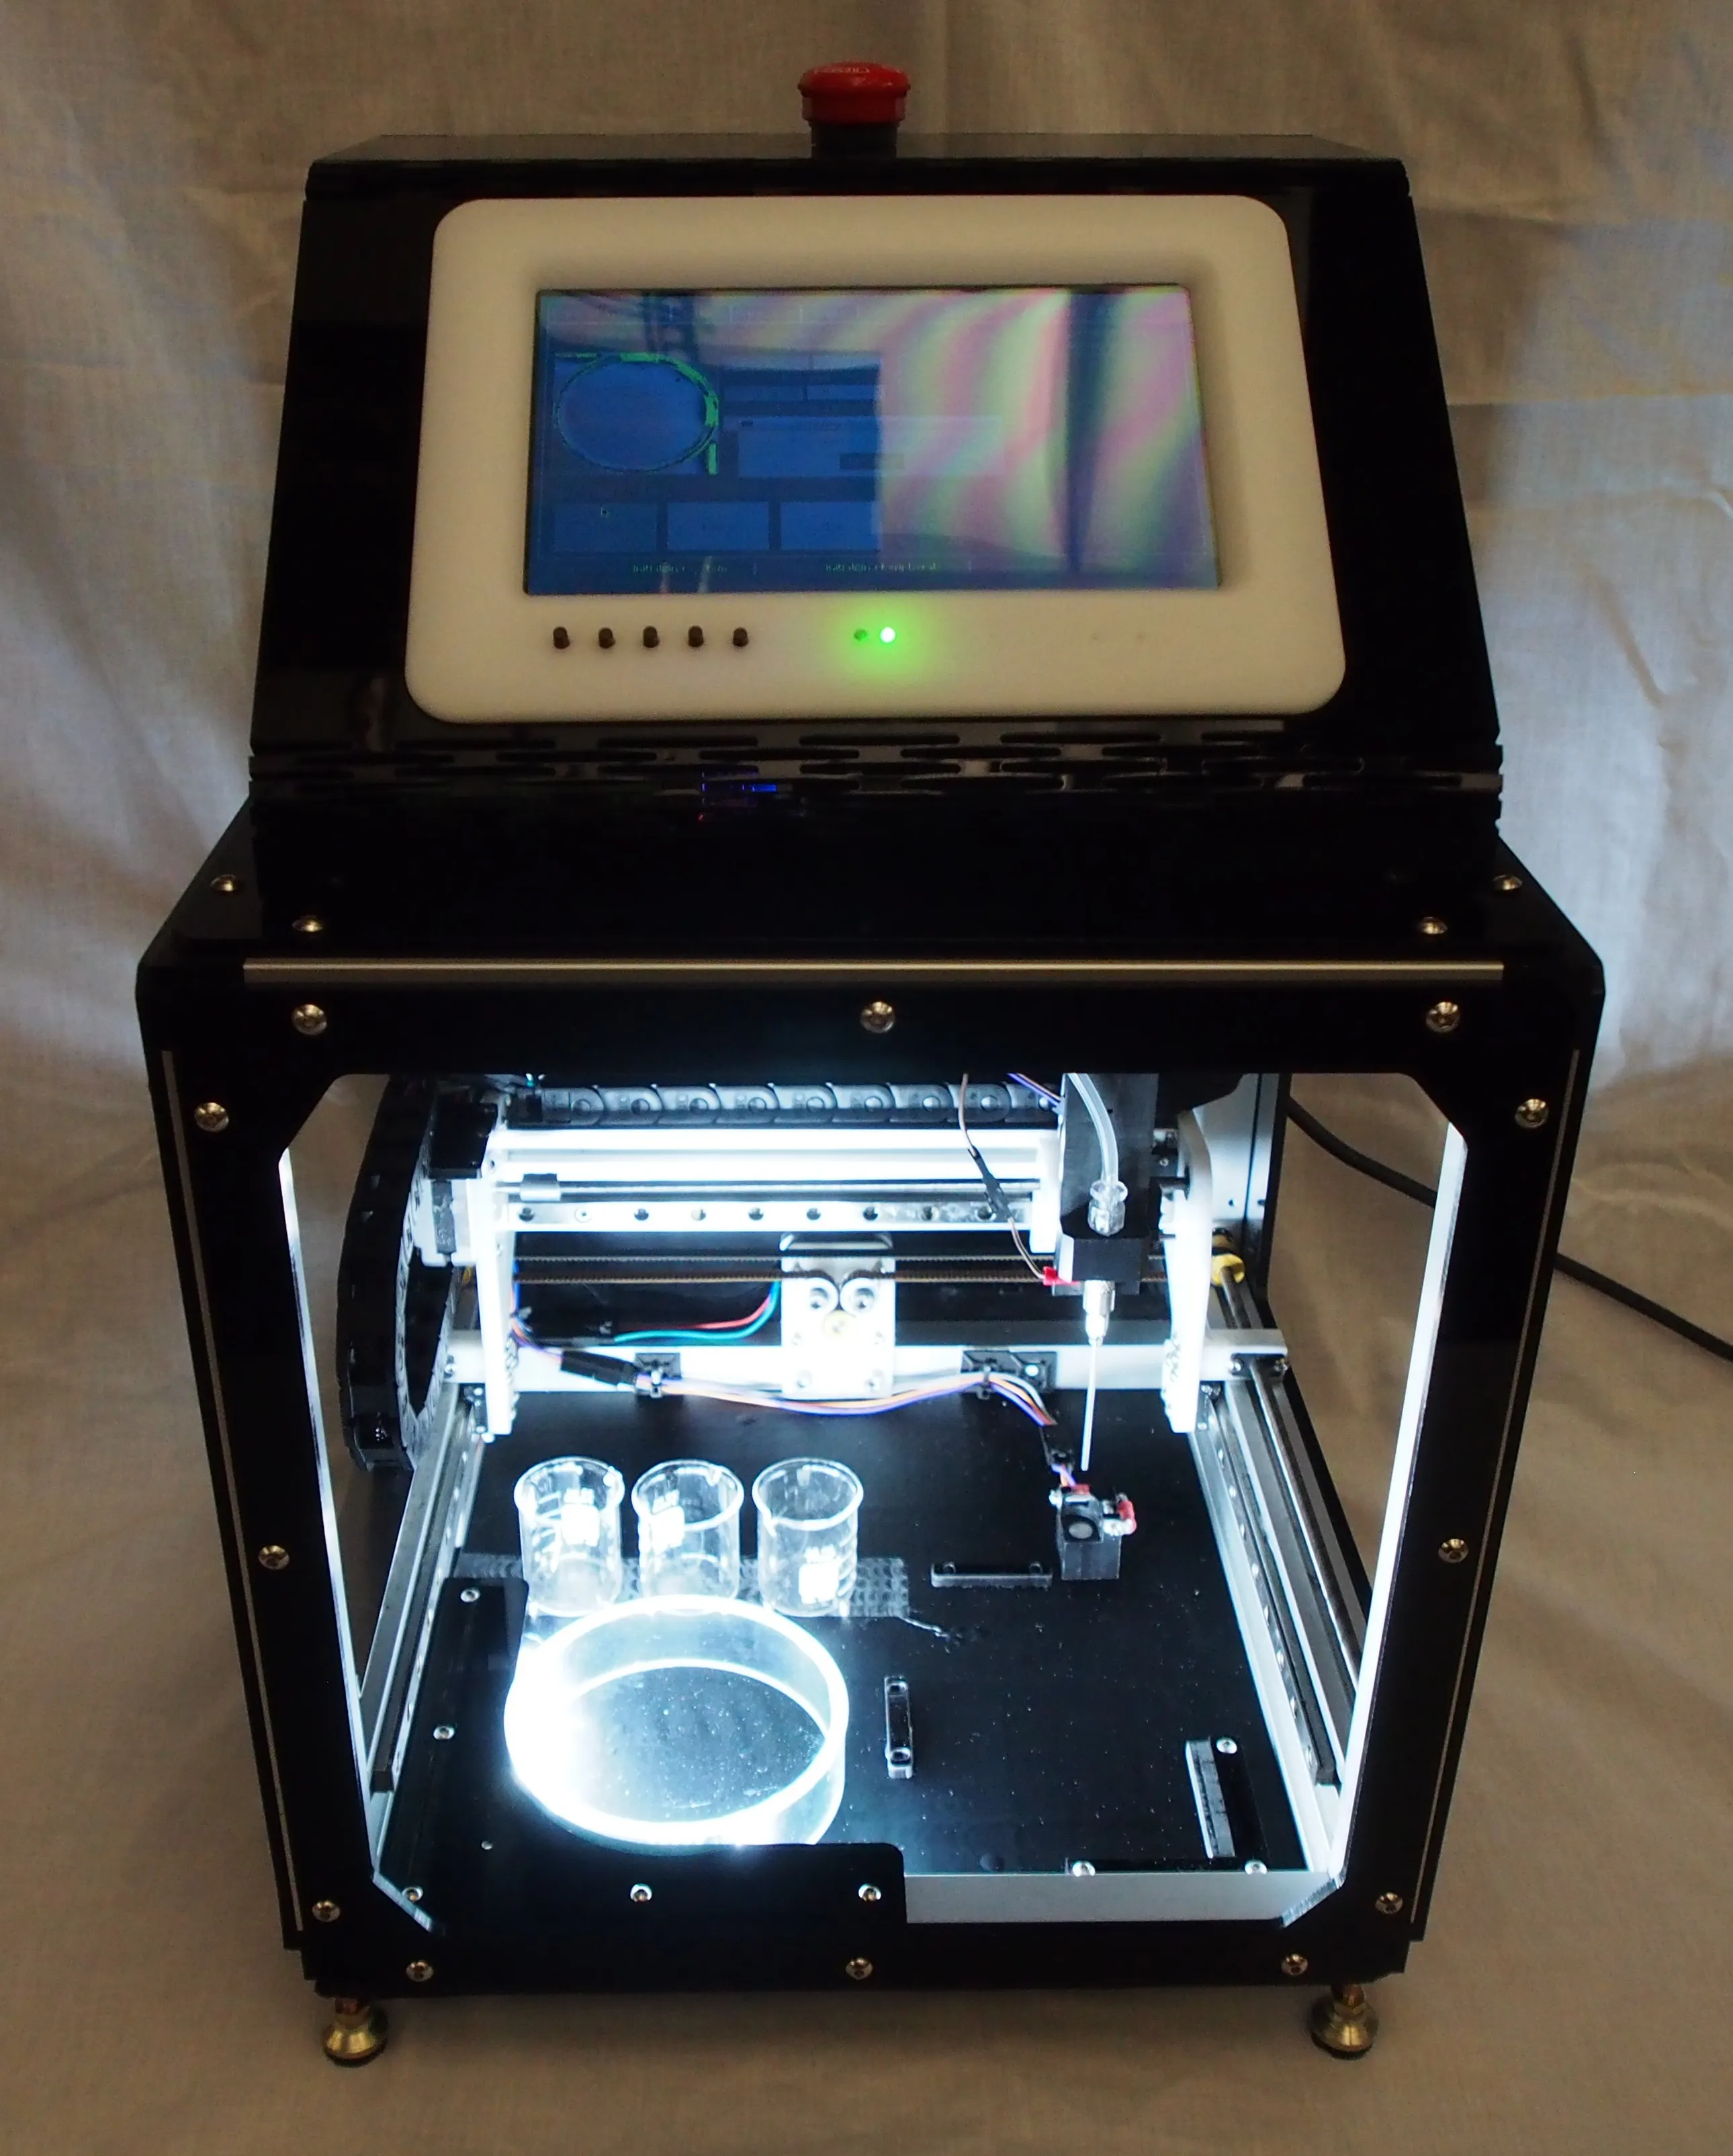
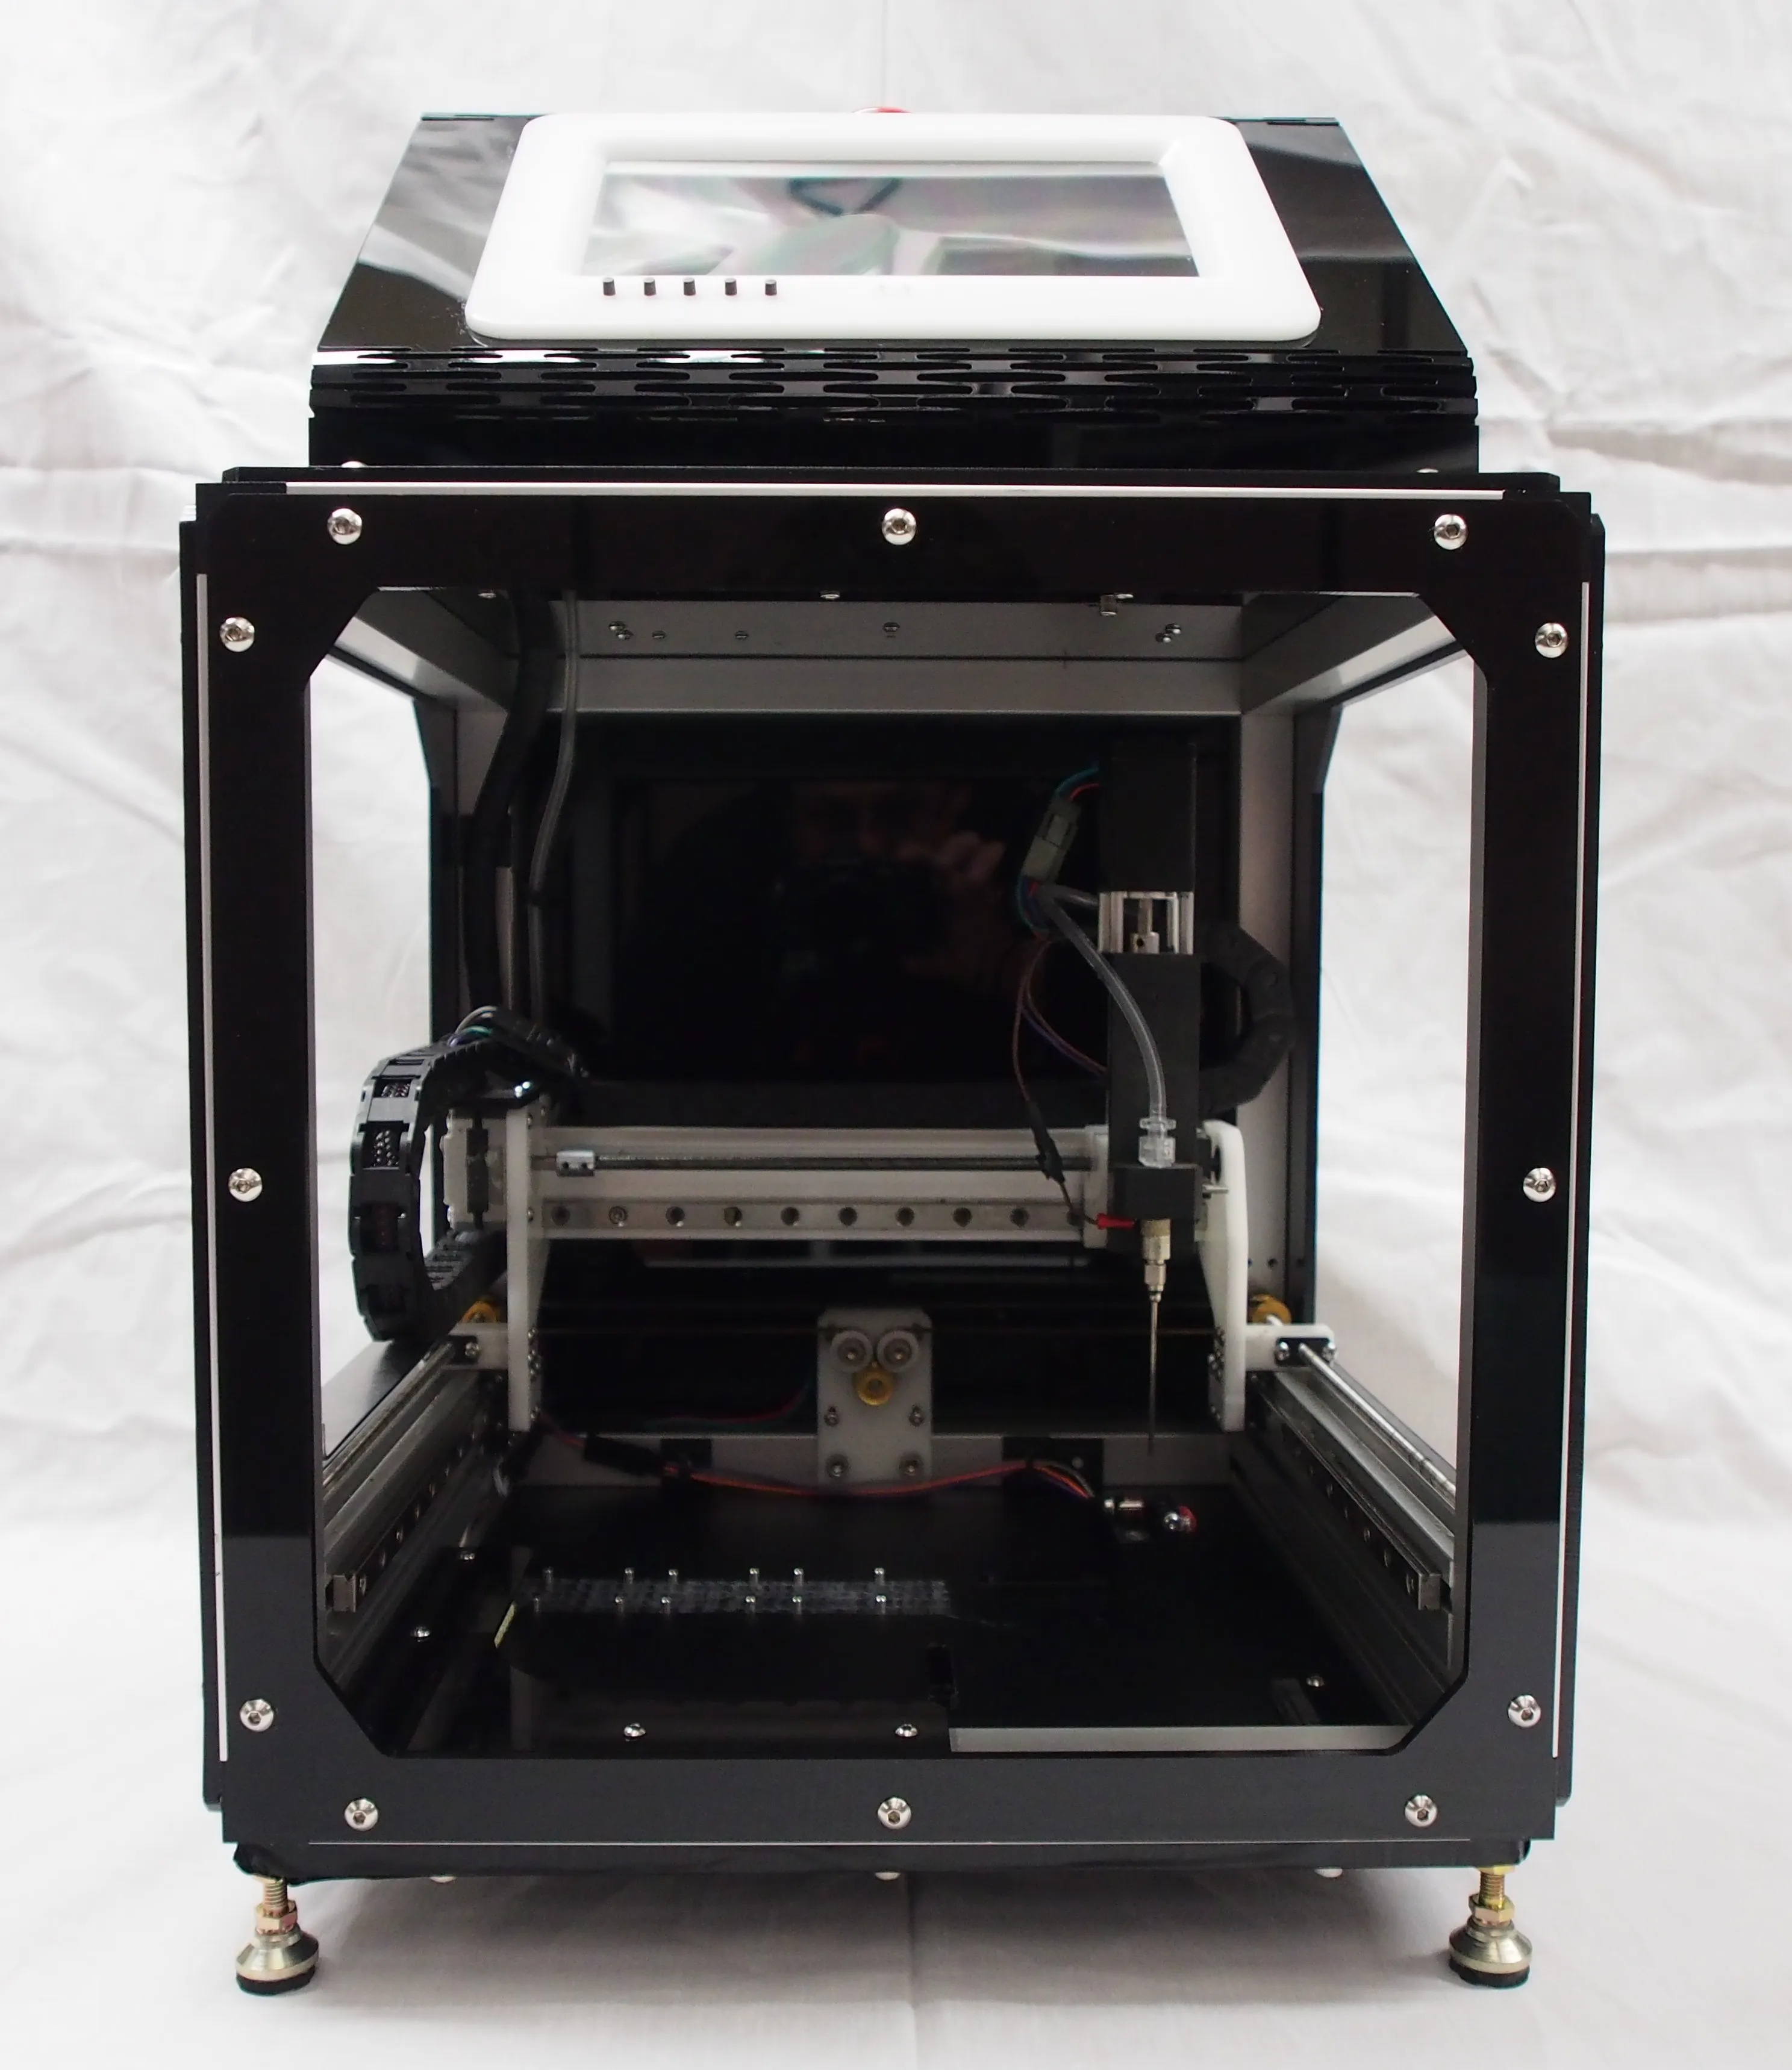
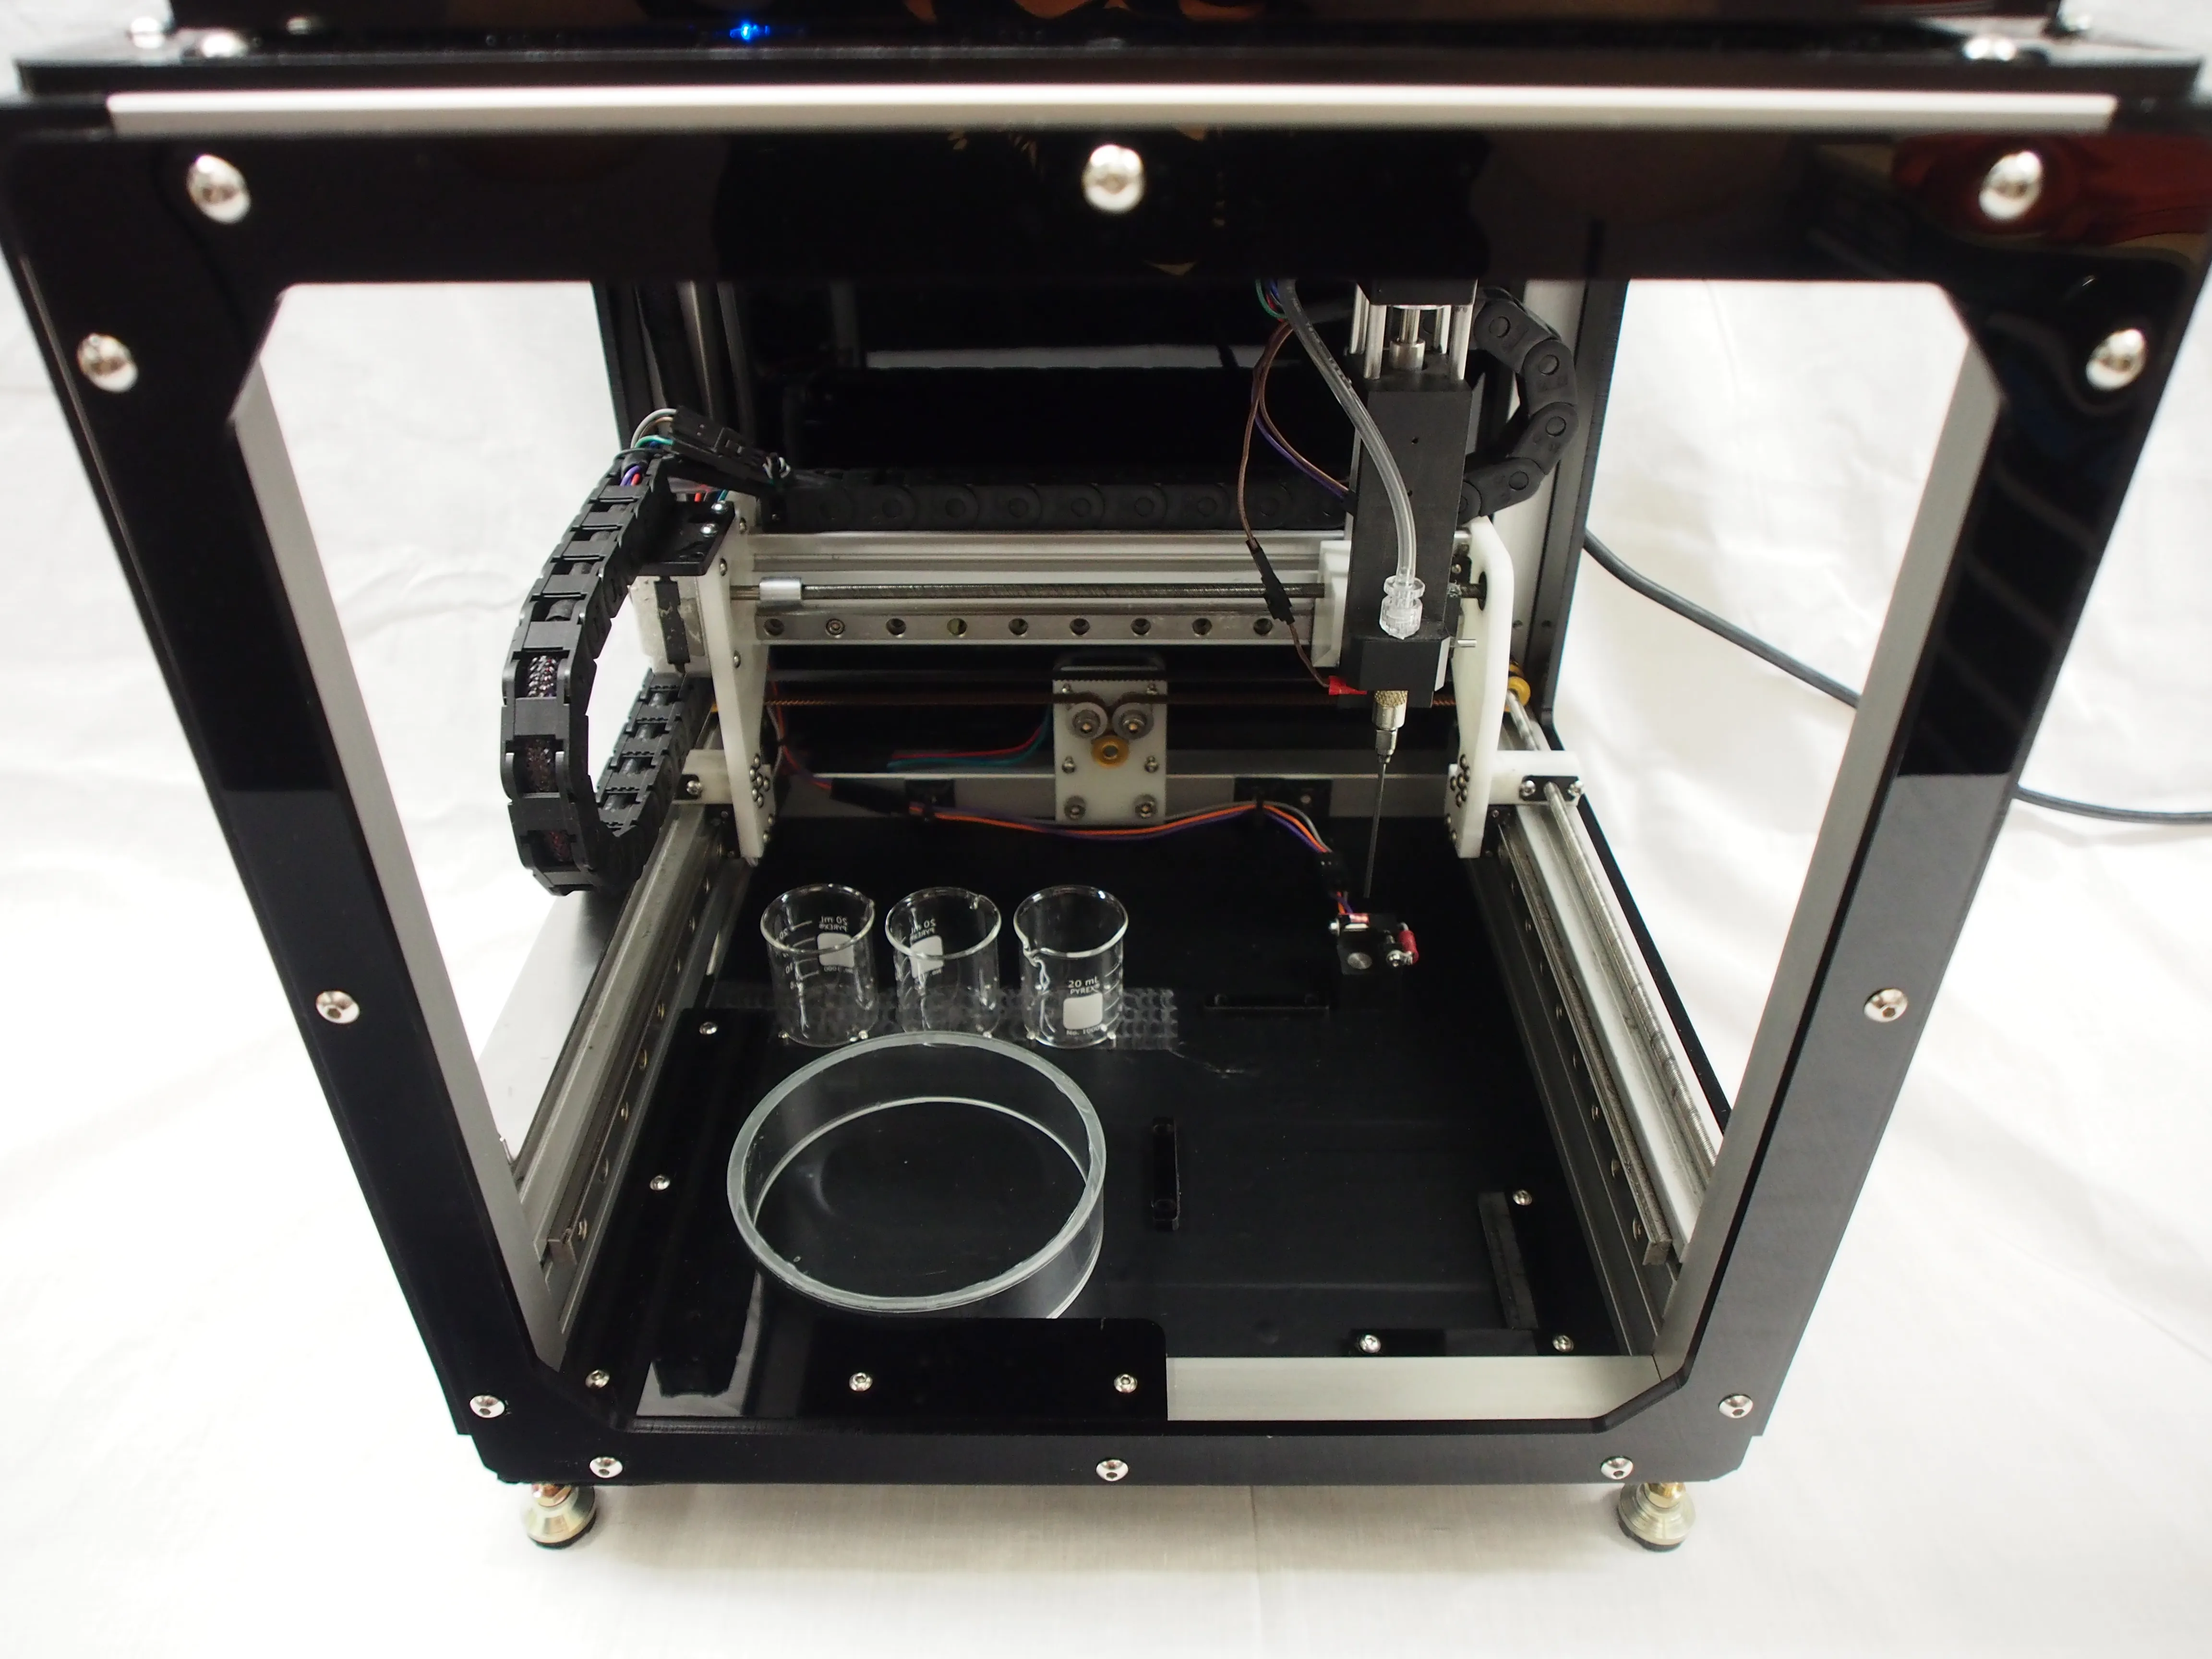
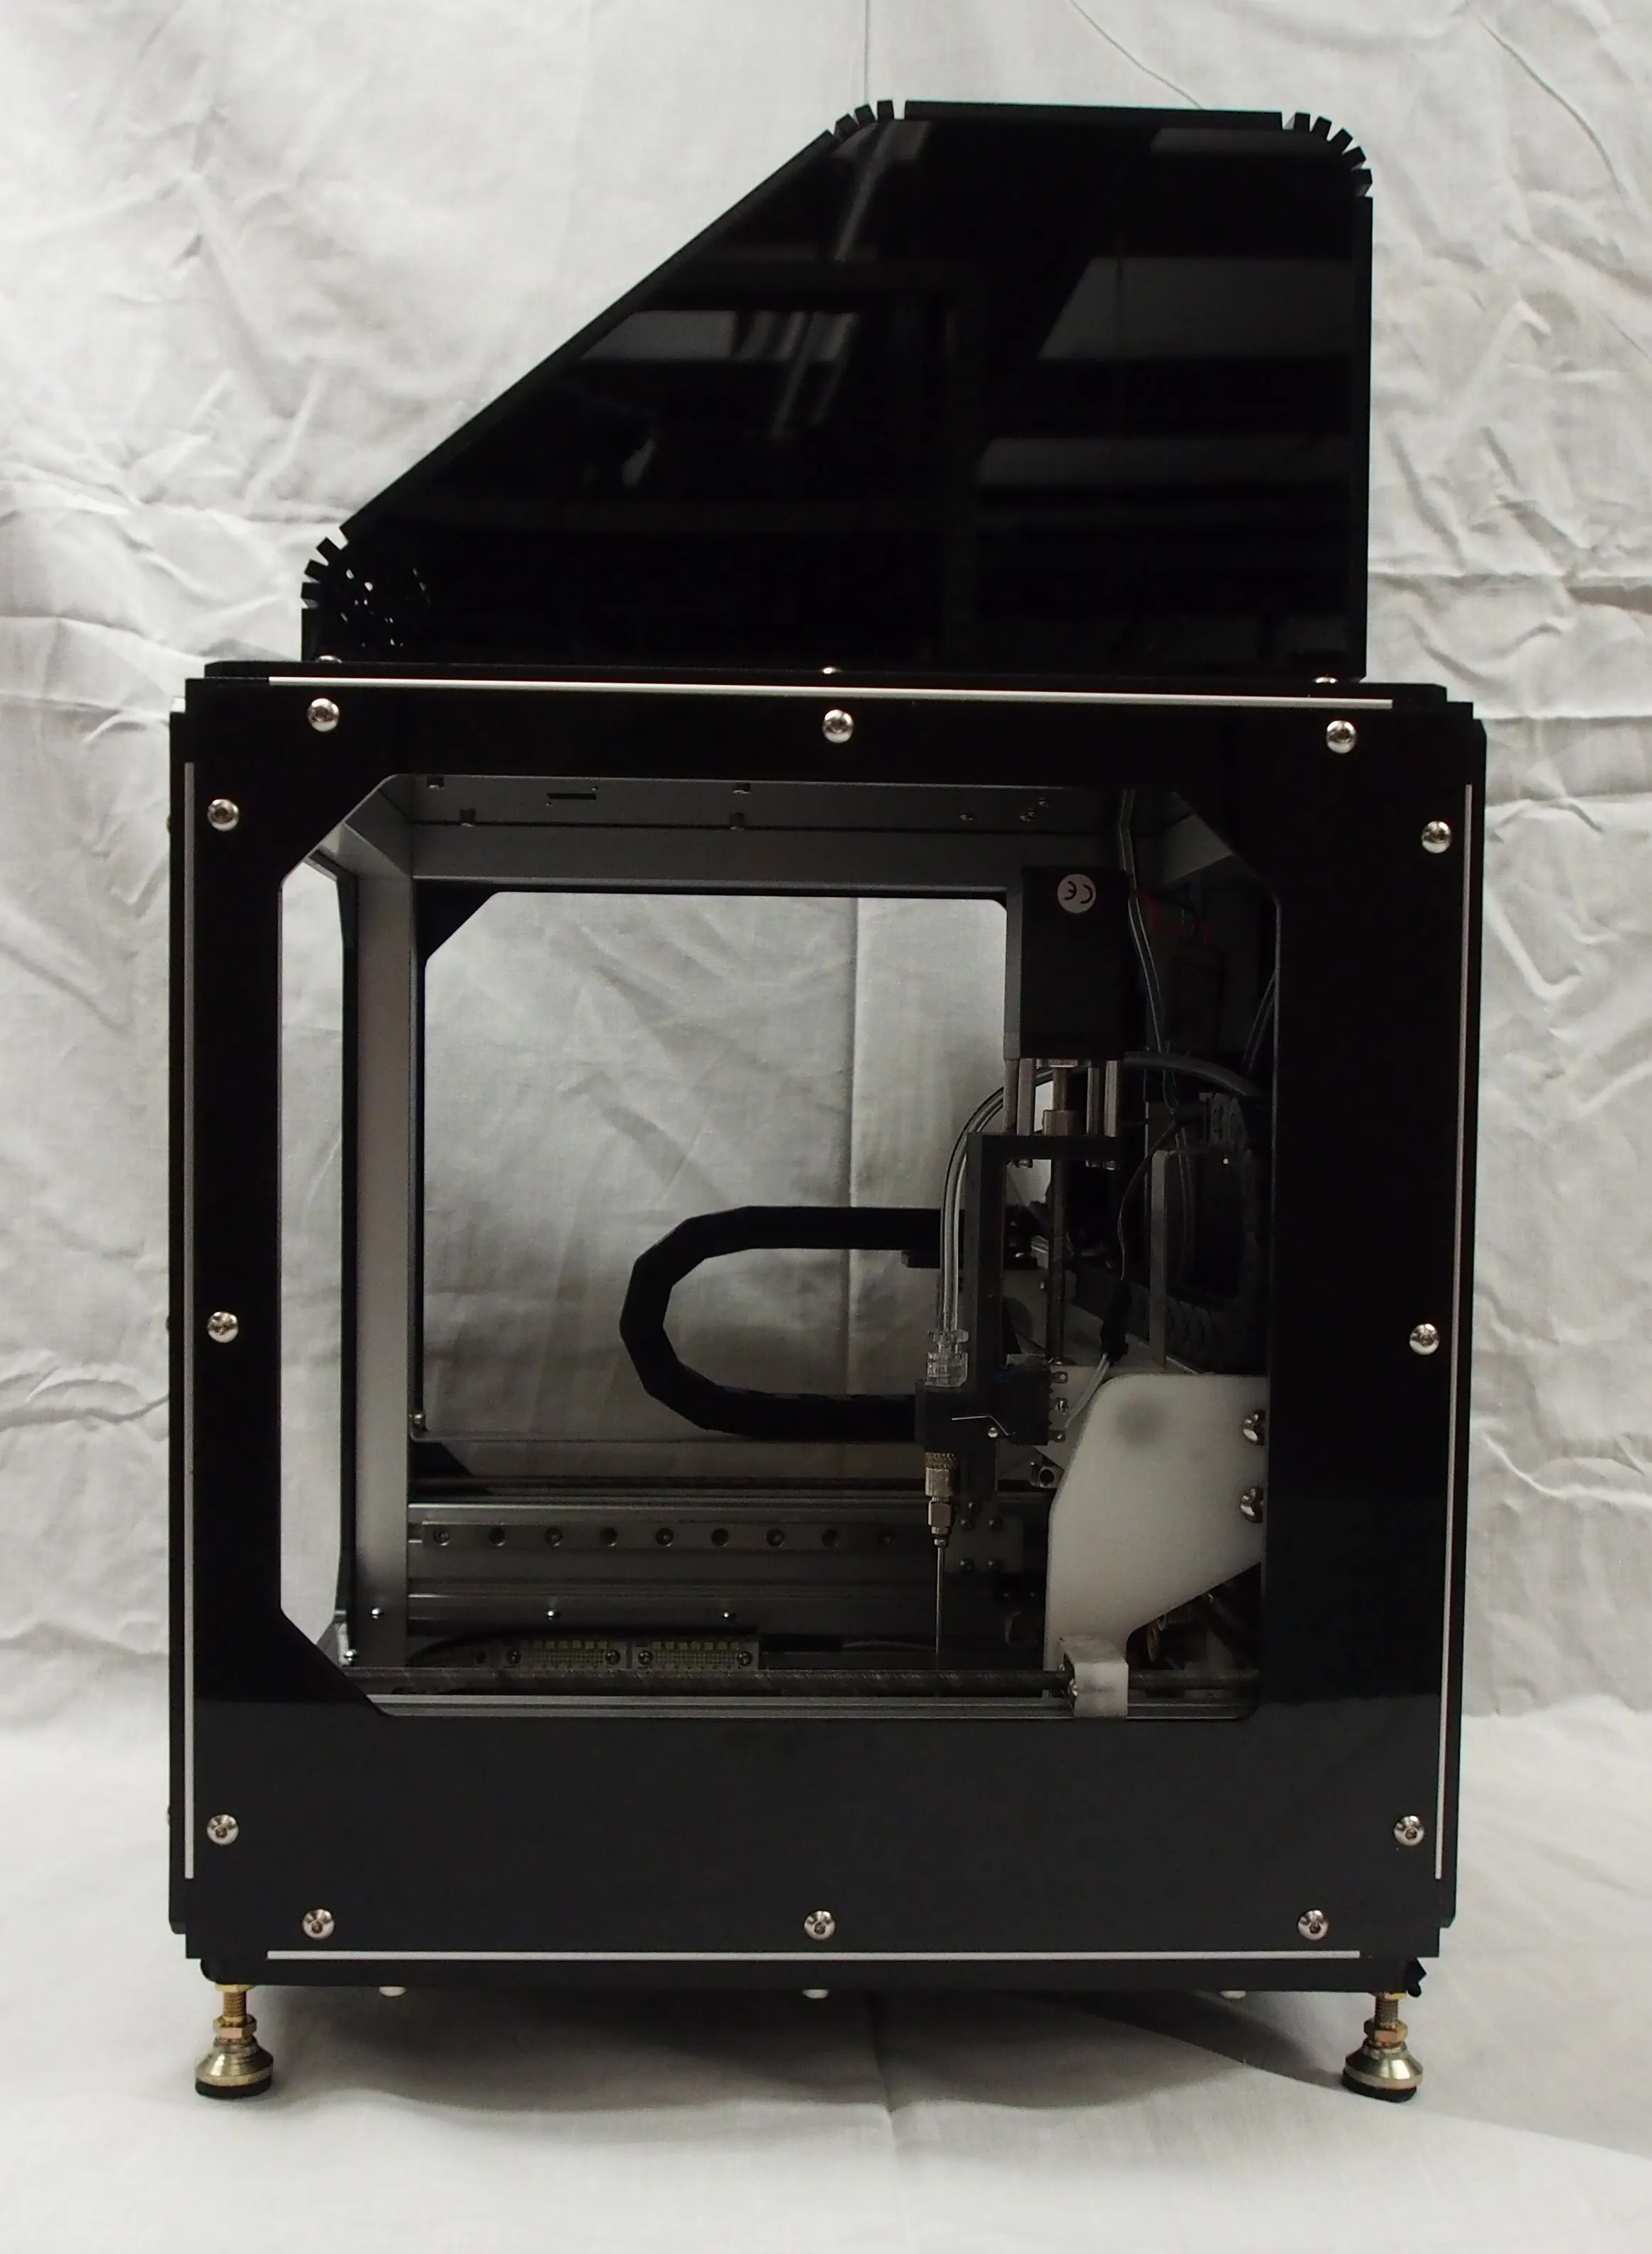
Dylan built up a mechanical testbed, which we could mount a camera to,
and I began to focus on embryo detection. I was relatively new to
Python, but quickly found the Qt framework for building decent-looking
interfaces, and OpenCV for providing generic detection capabilities via
webcams. Over the next few years (remember, we were students doing this
part time, and working on other projects simultaneously), I eventually
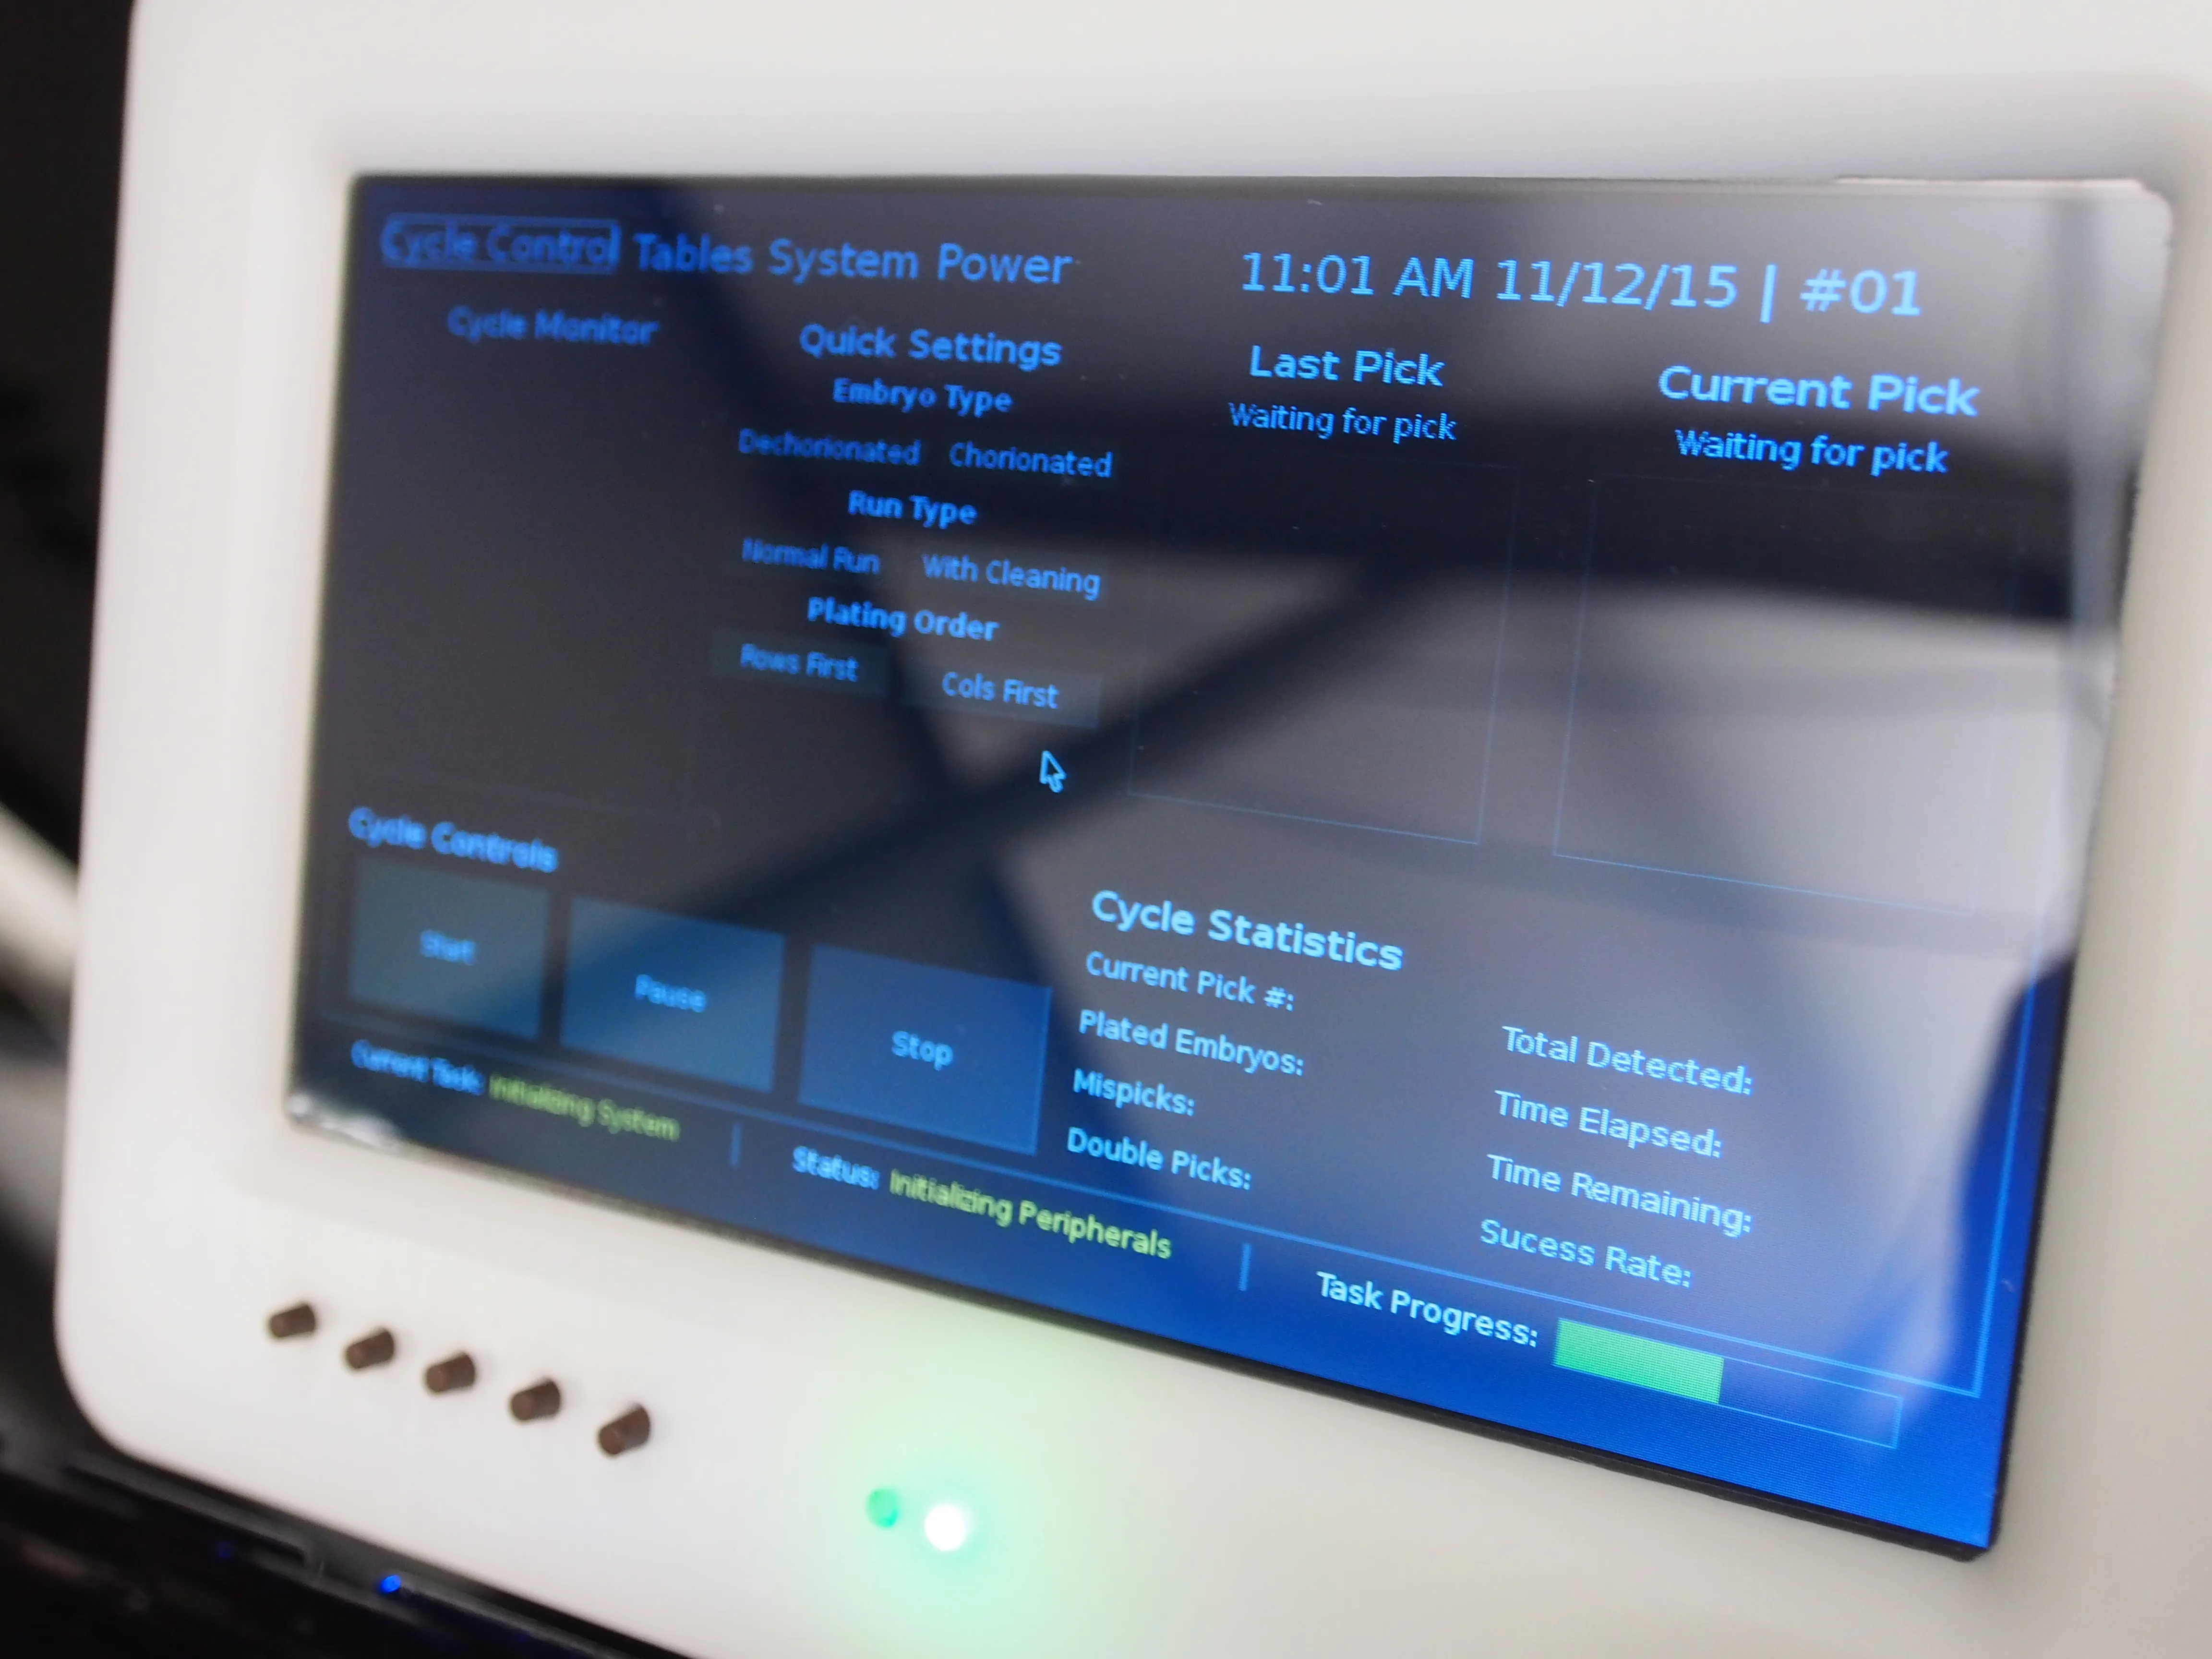
created a fairly comprehensive user interface that would allow
researchers to tune detection and motion parameters on-the-fly. This was
shown on a touchscreen that the beaglebone plugged into, making it quite
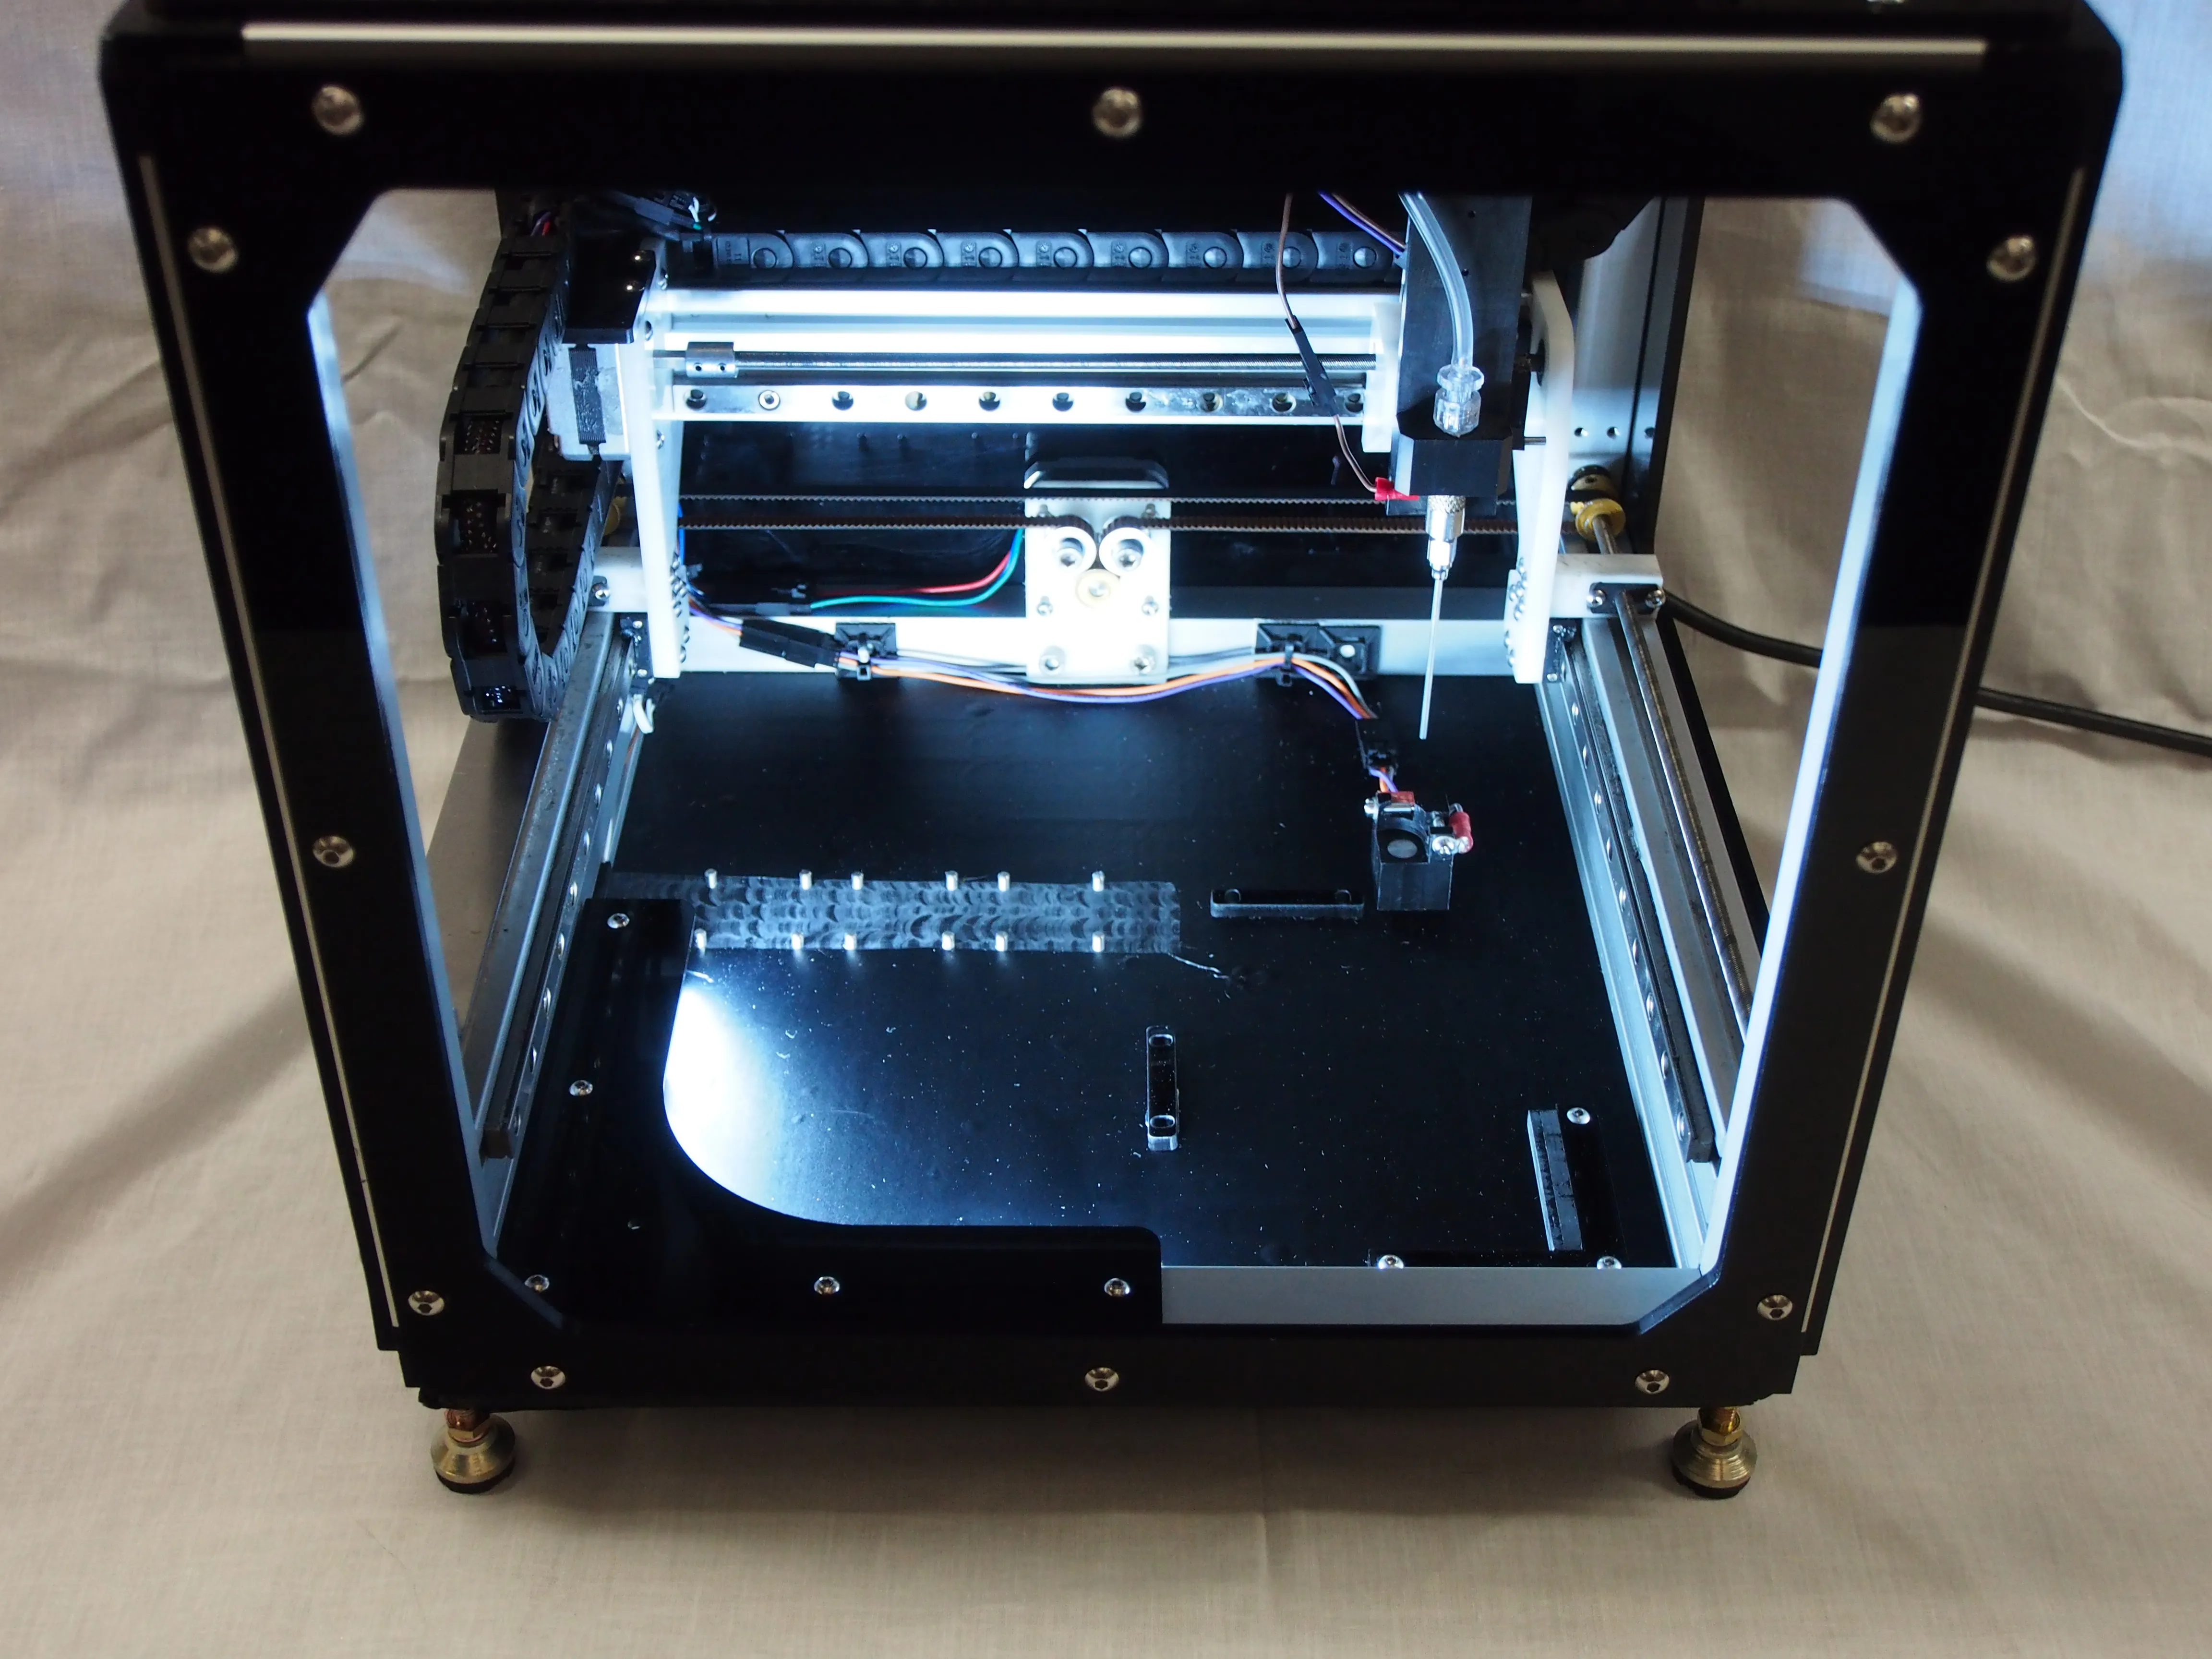
intuitive. Dylan had also created a mechanical foundation providing
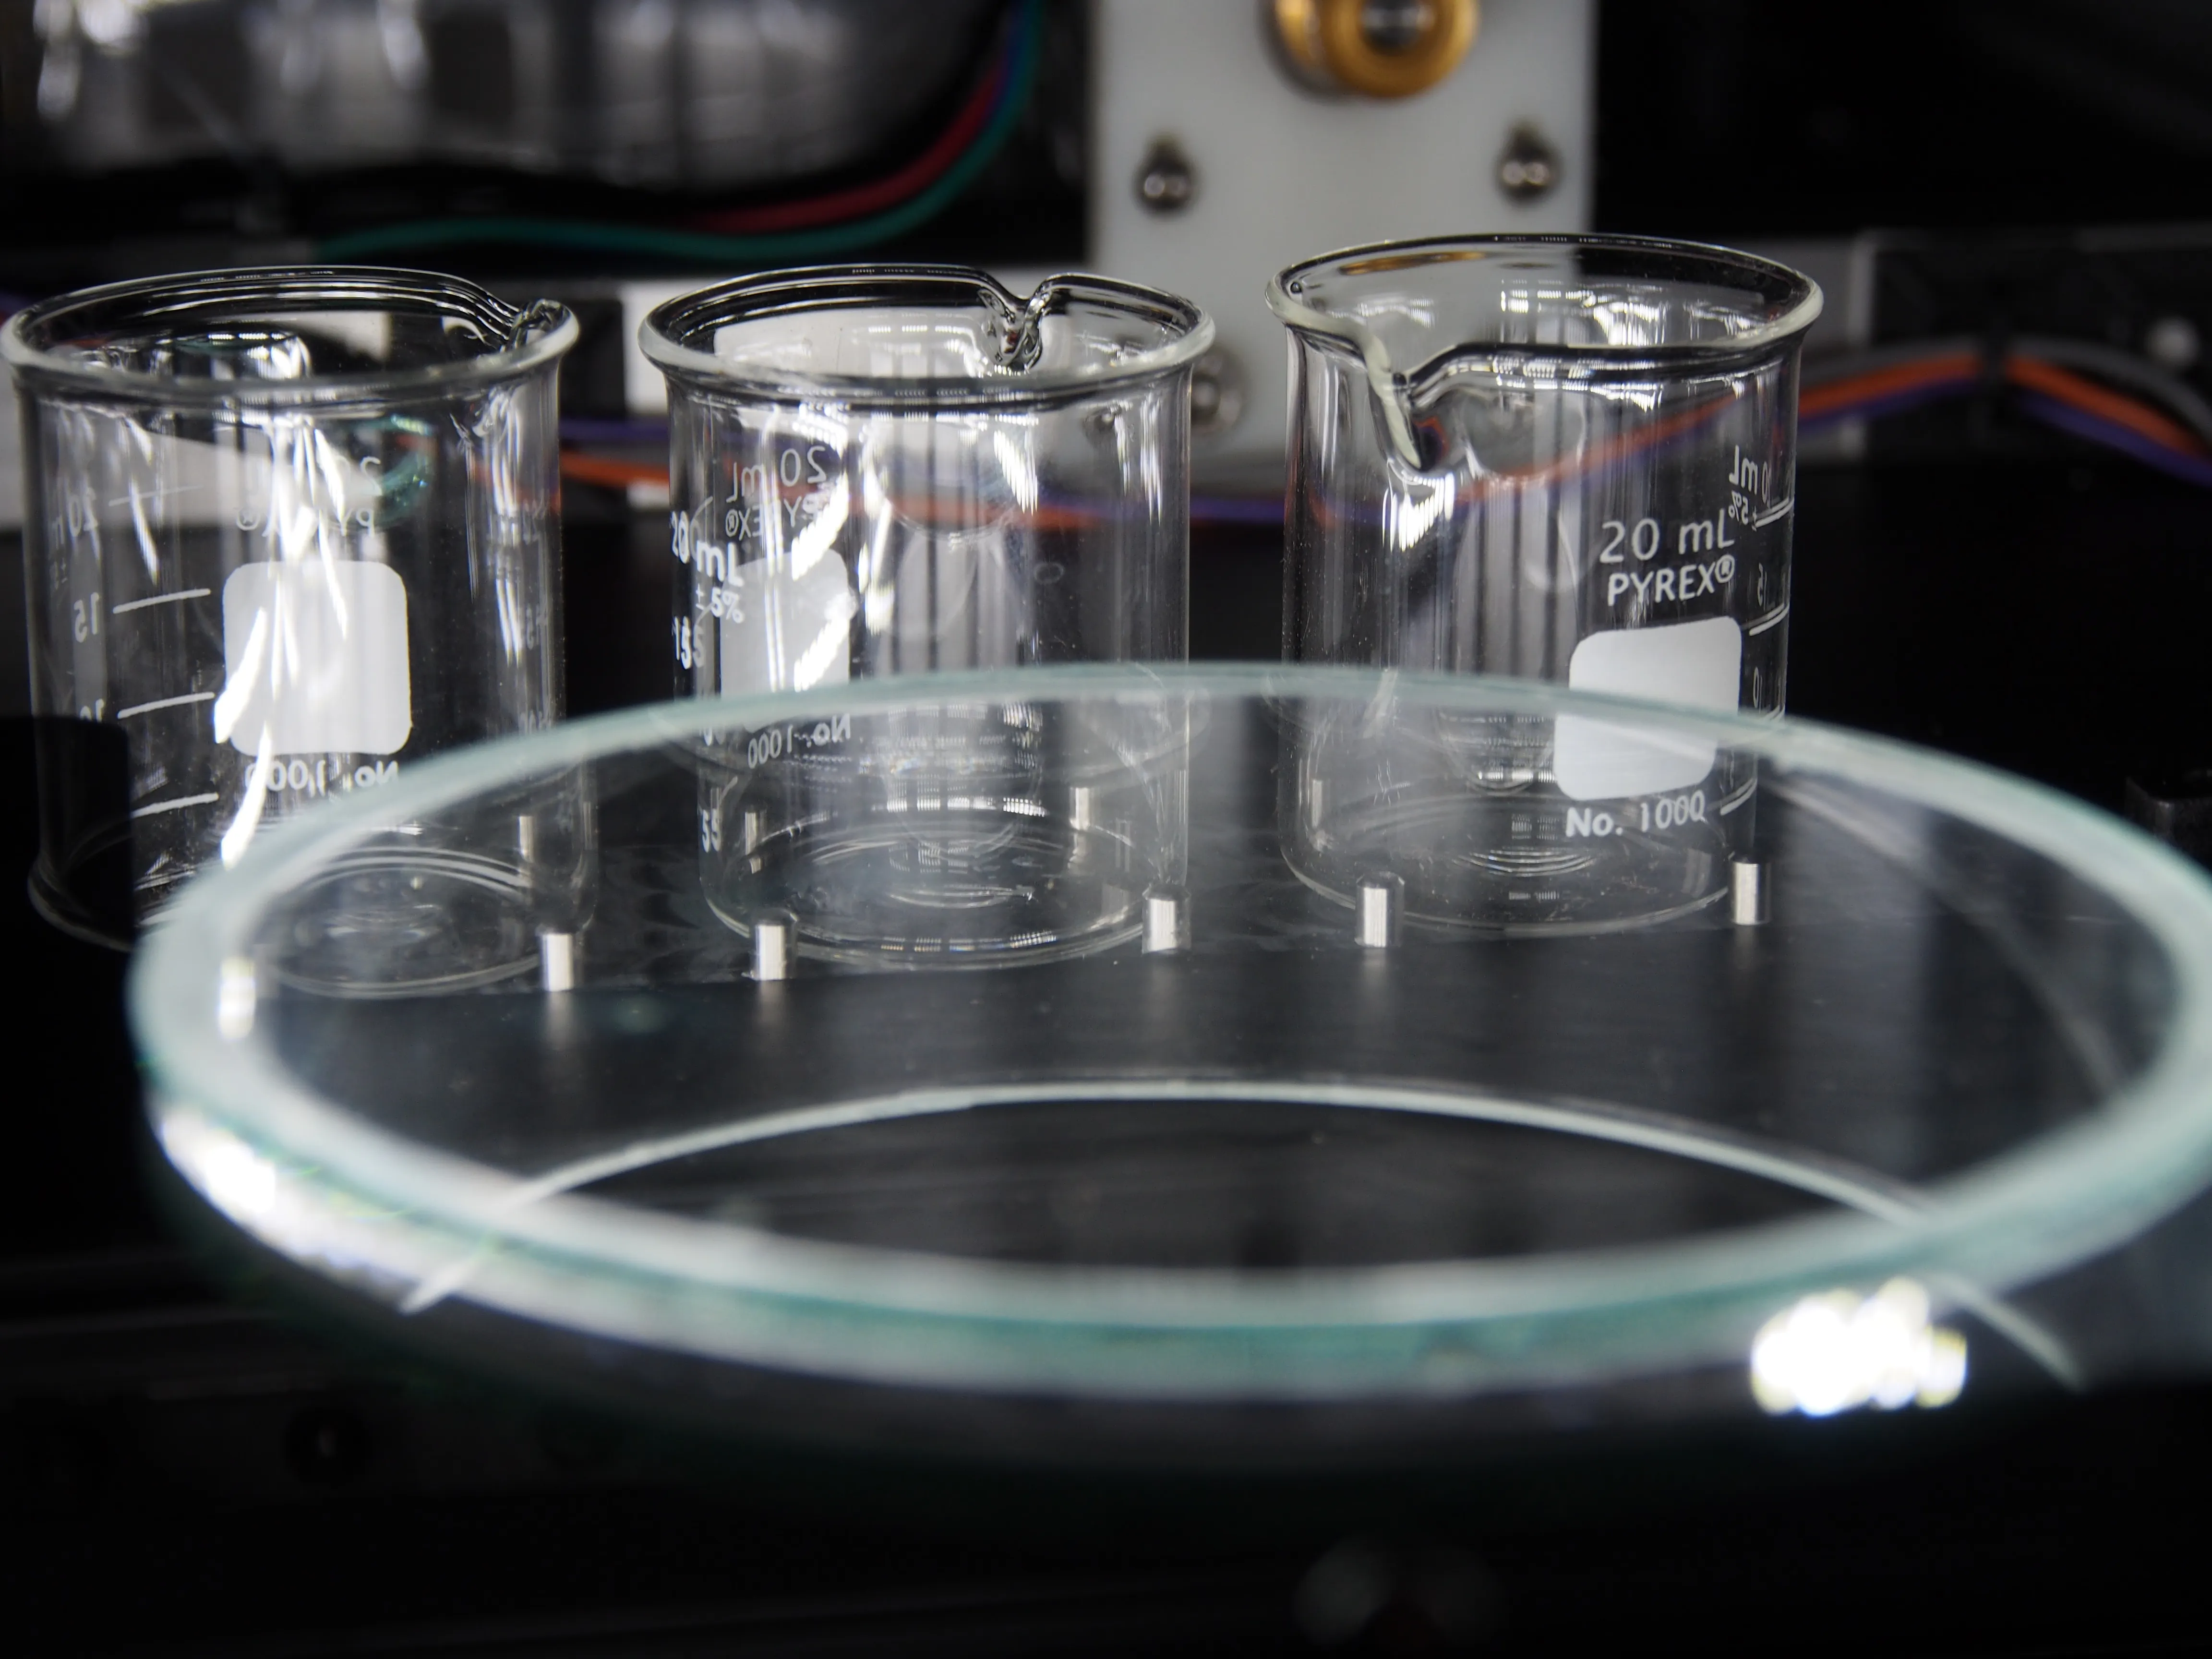
repeatable alignment for a petri dish with embryos, the 96-well plate
for placement, and a waste container to get rid of extra water in our
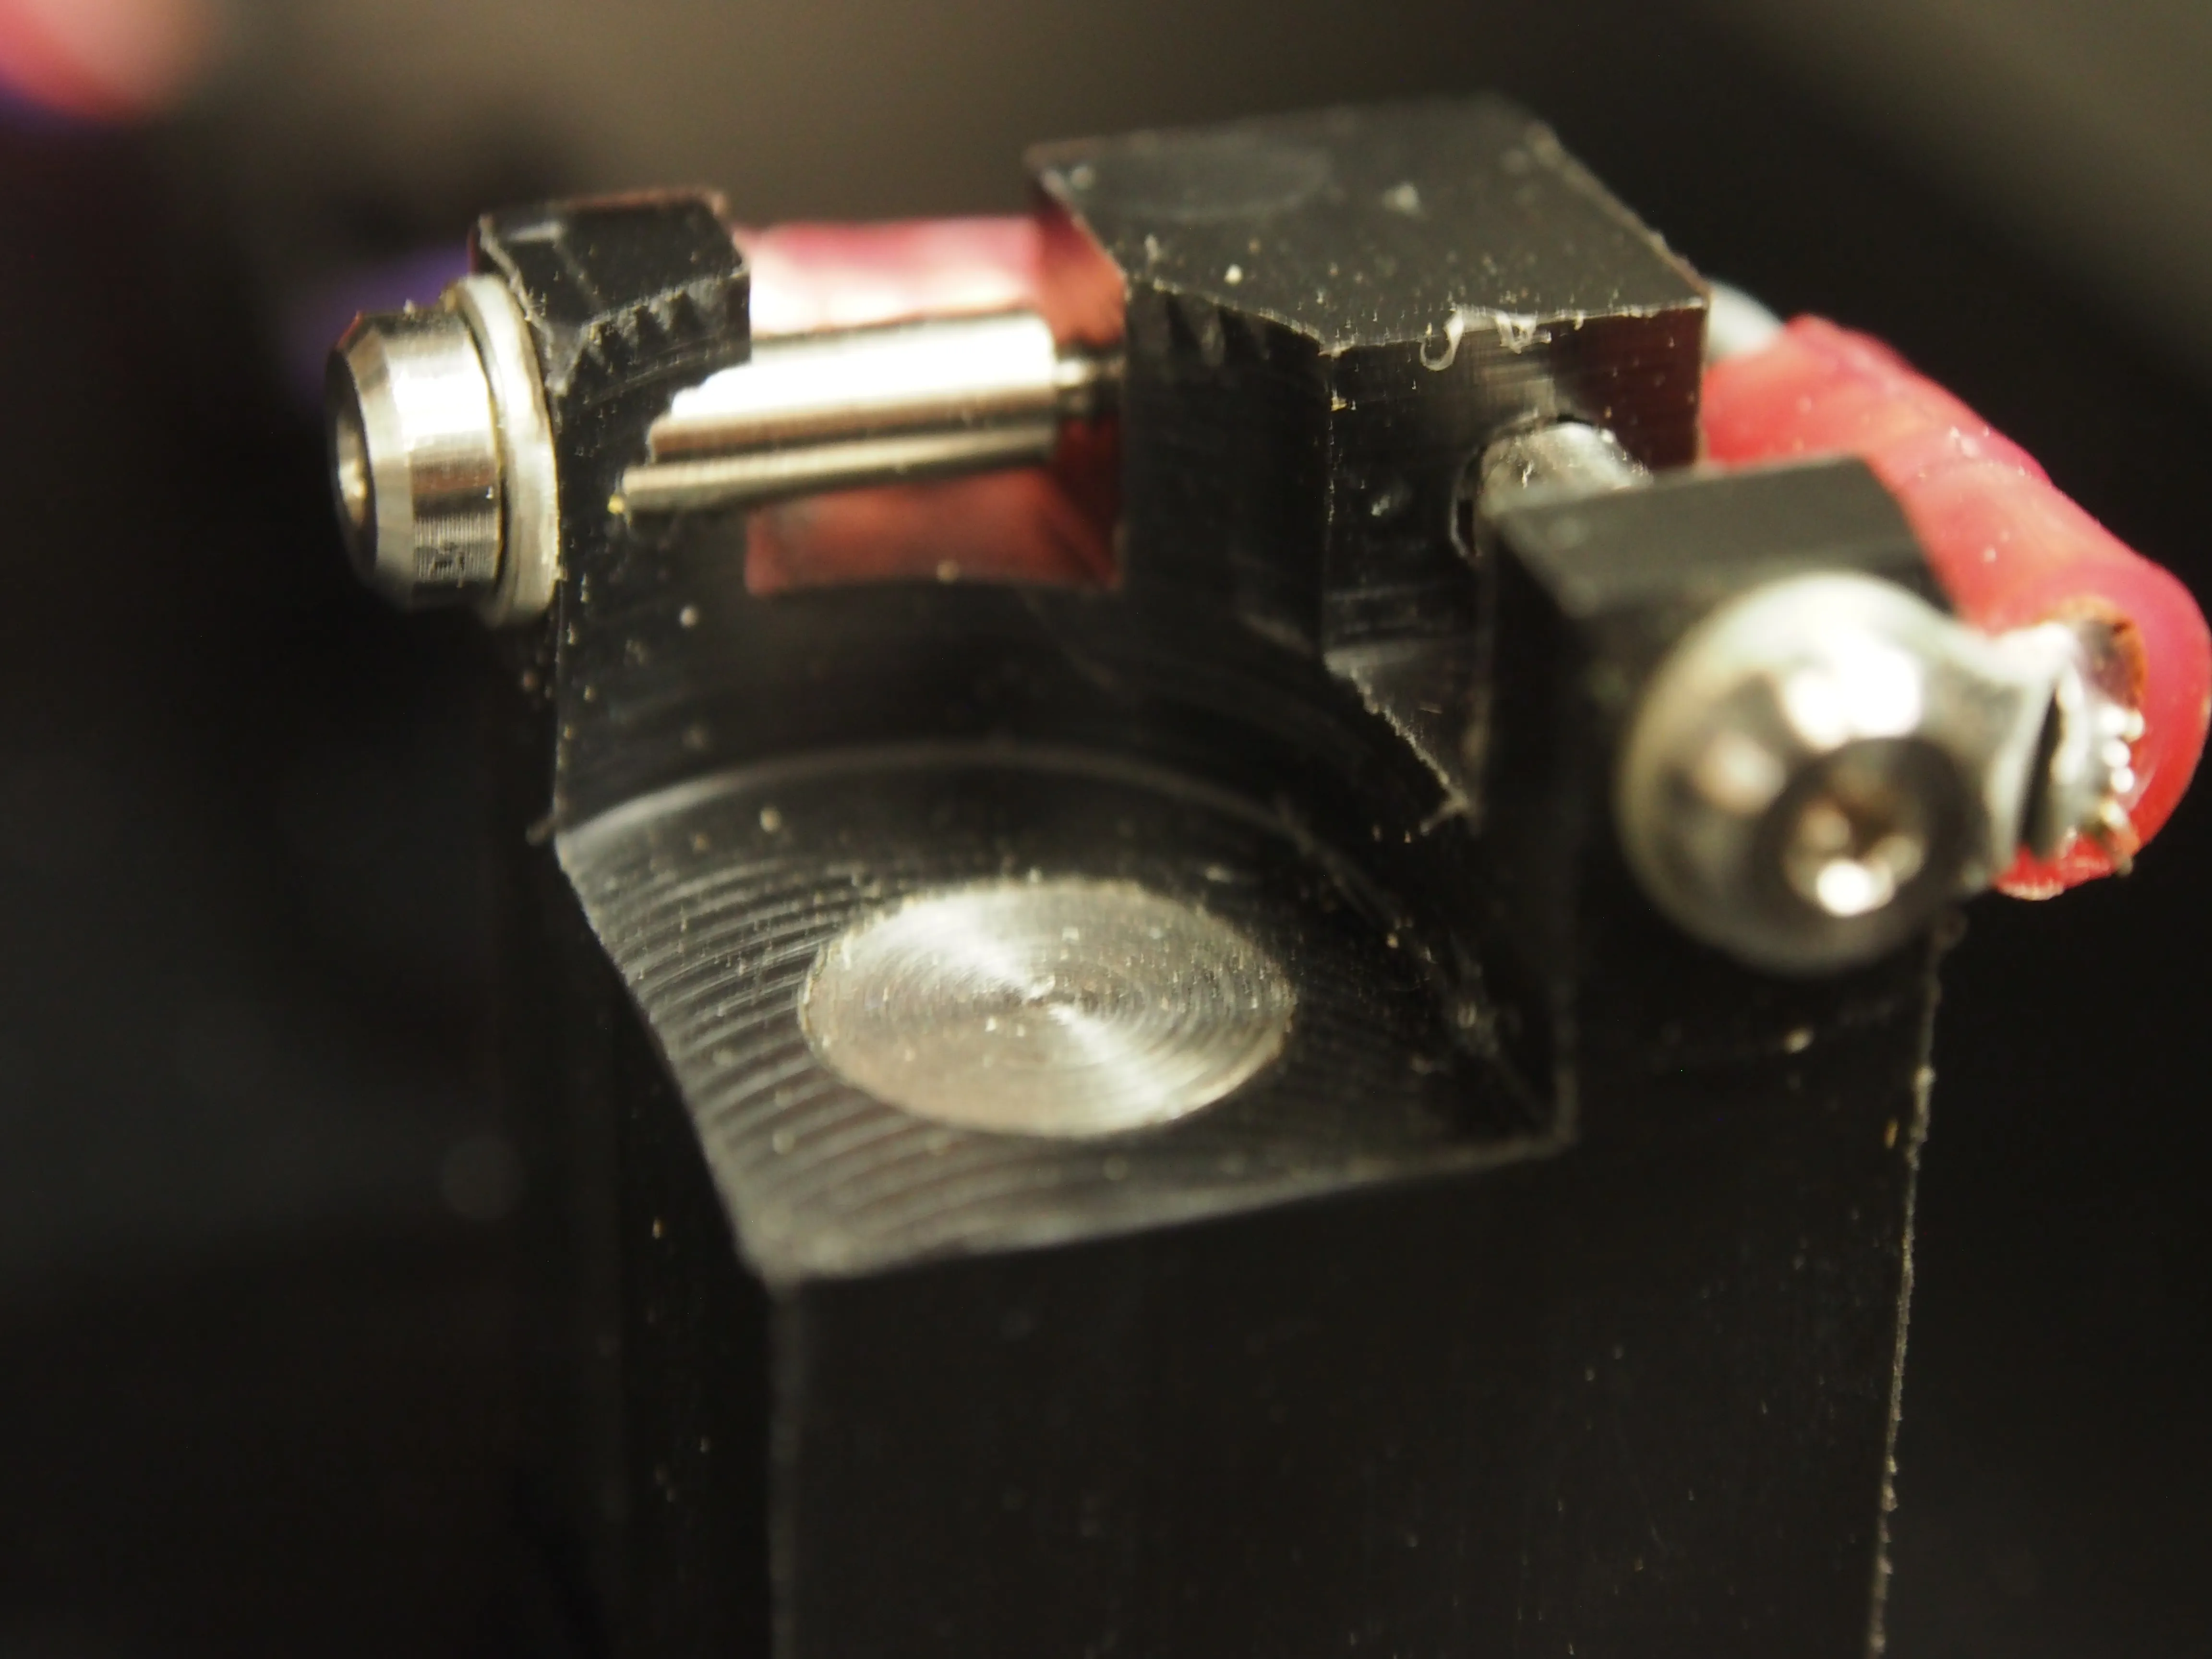
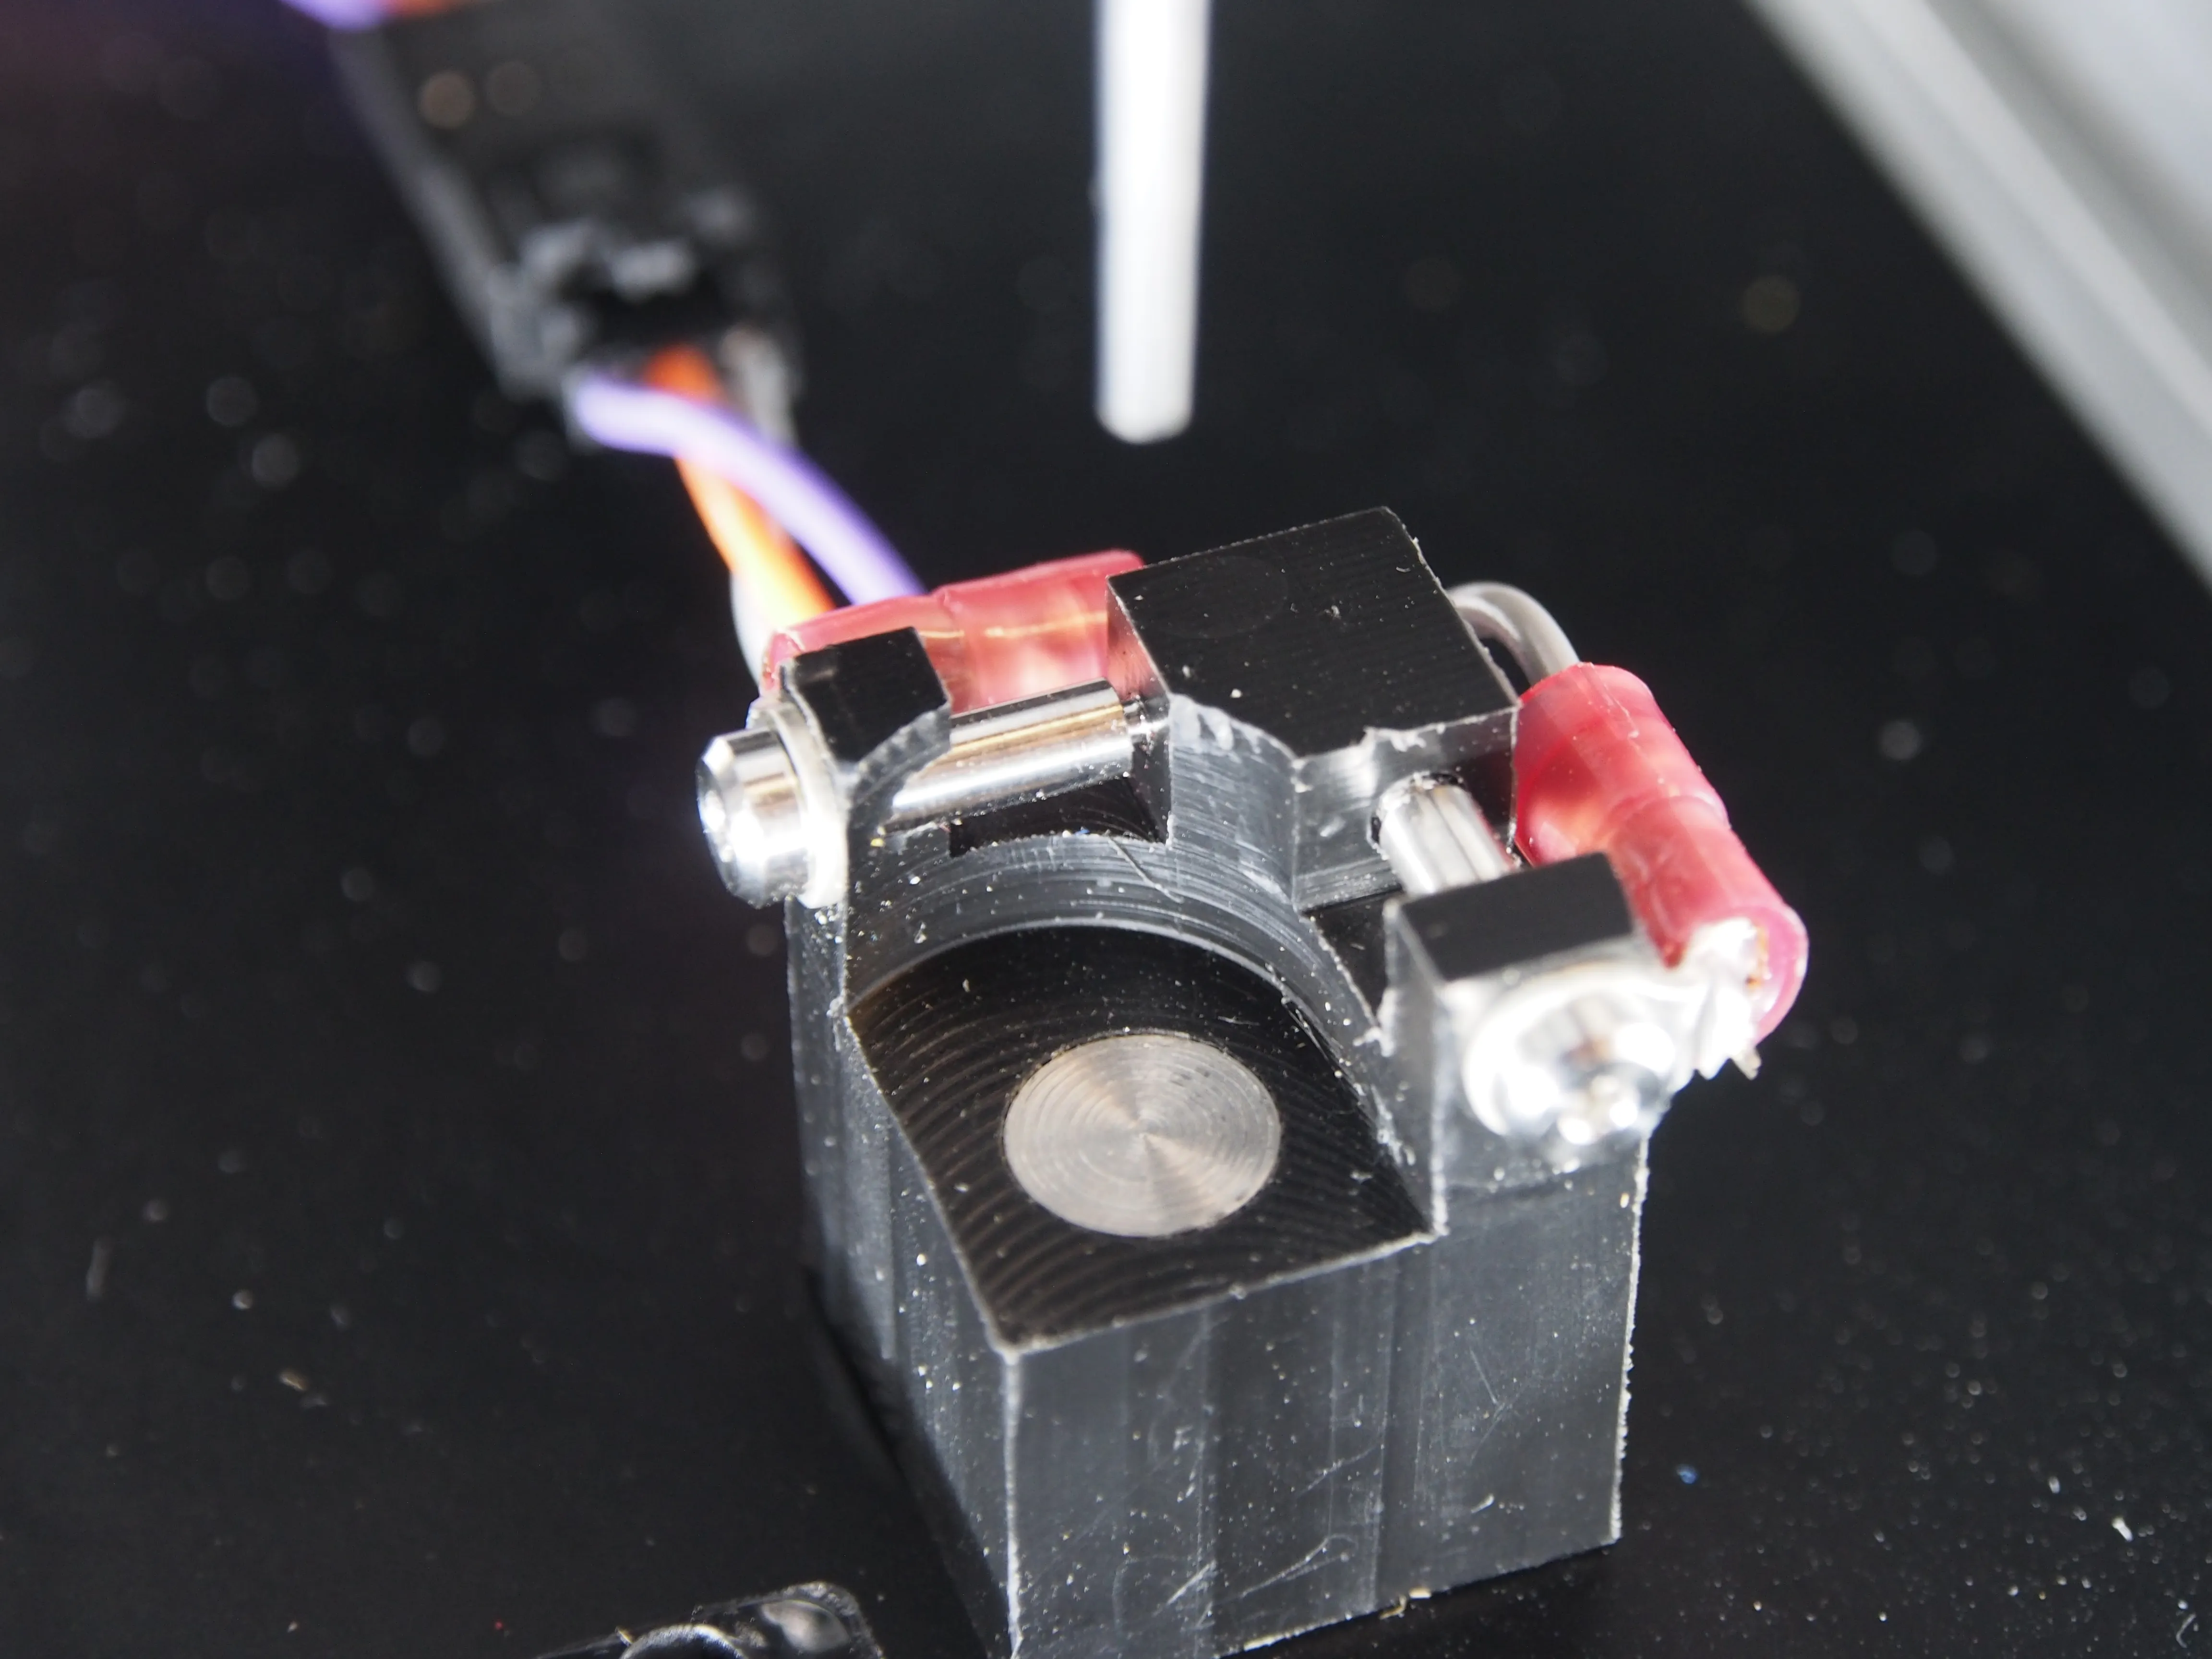
metal pipette tip that would be used to pick up the embryos. I'd also
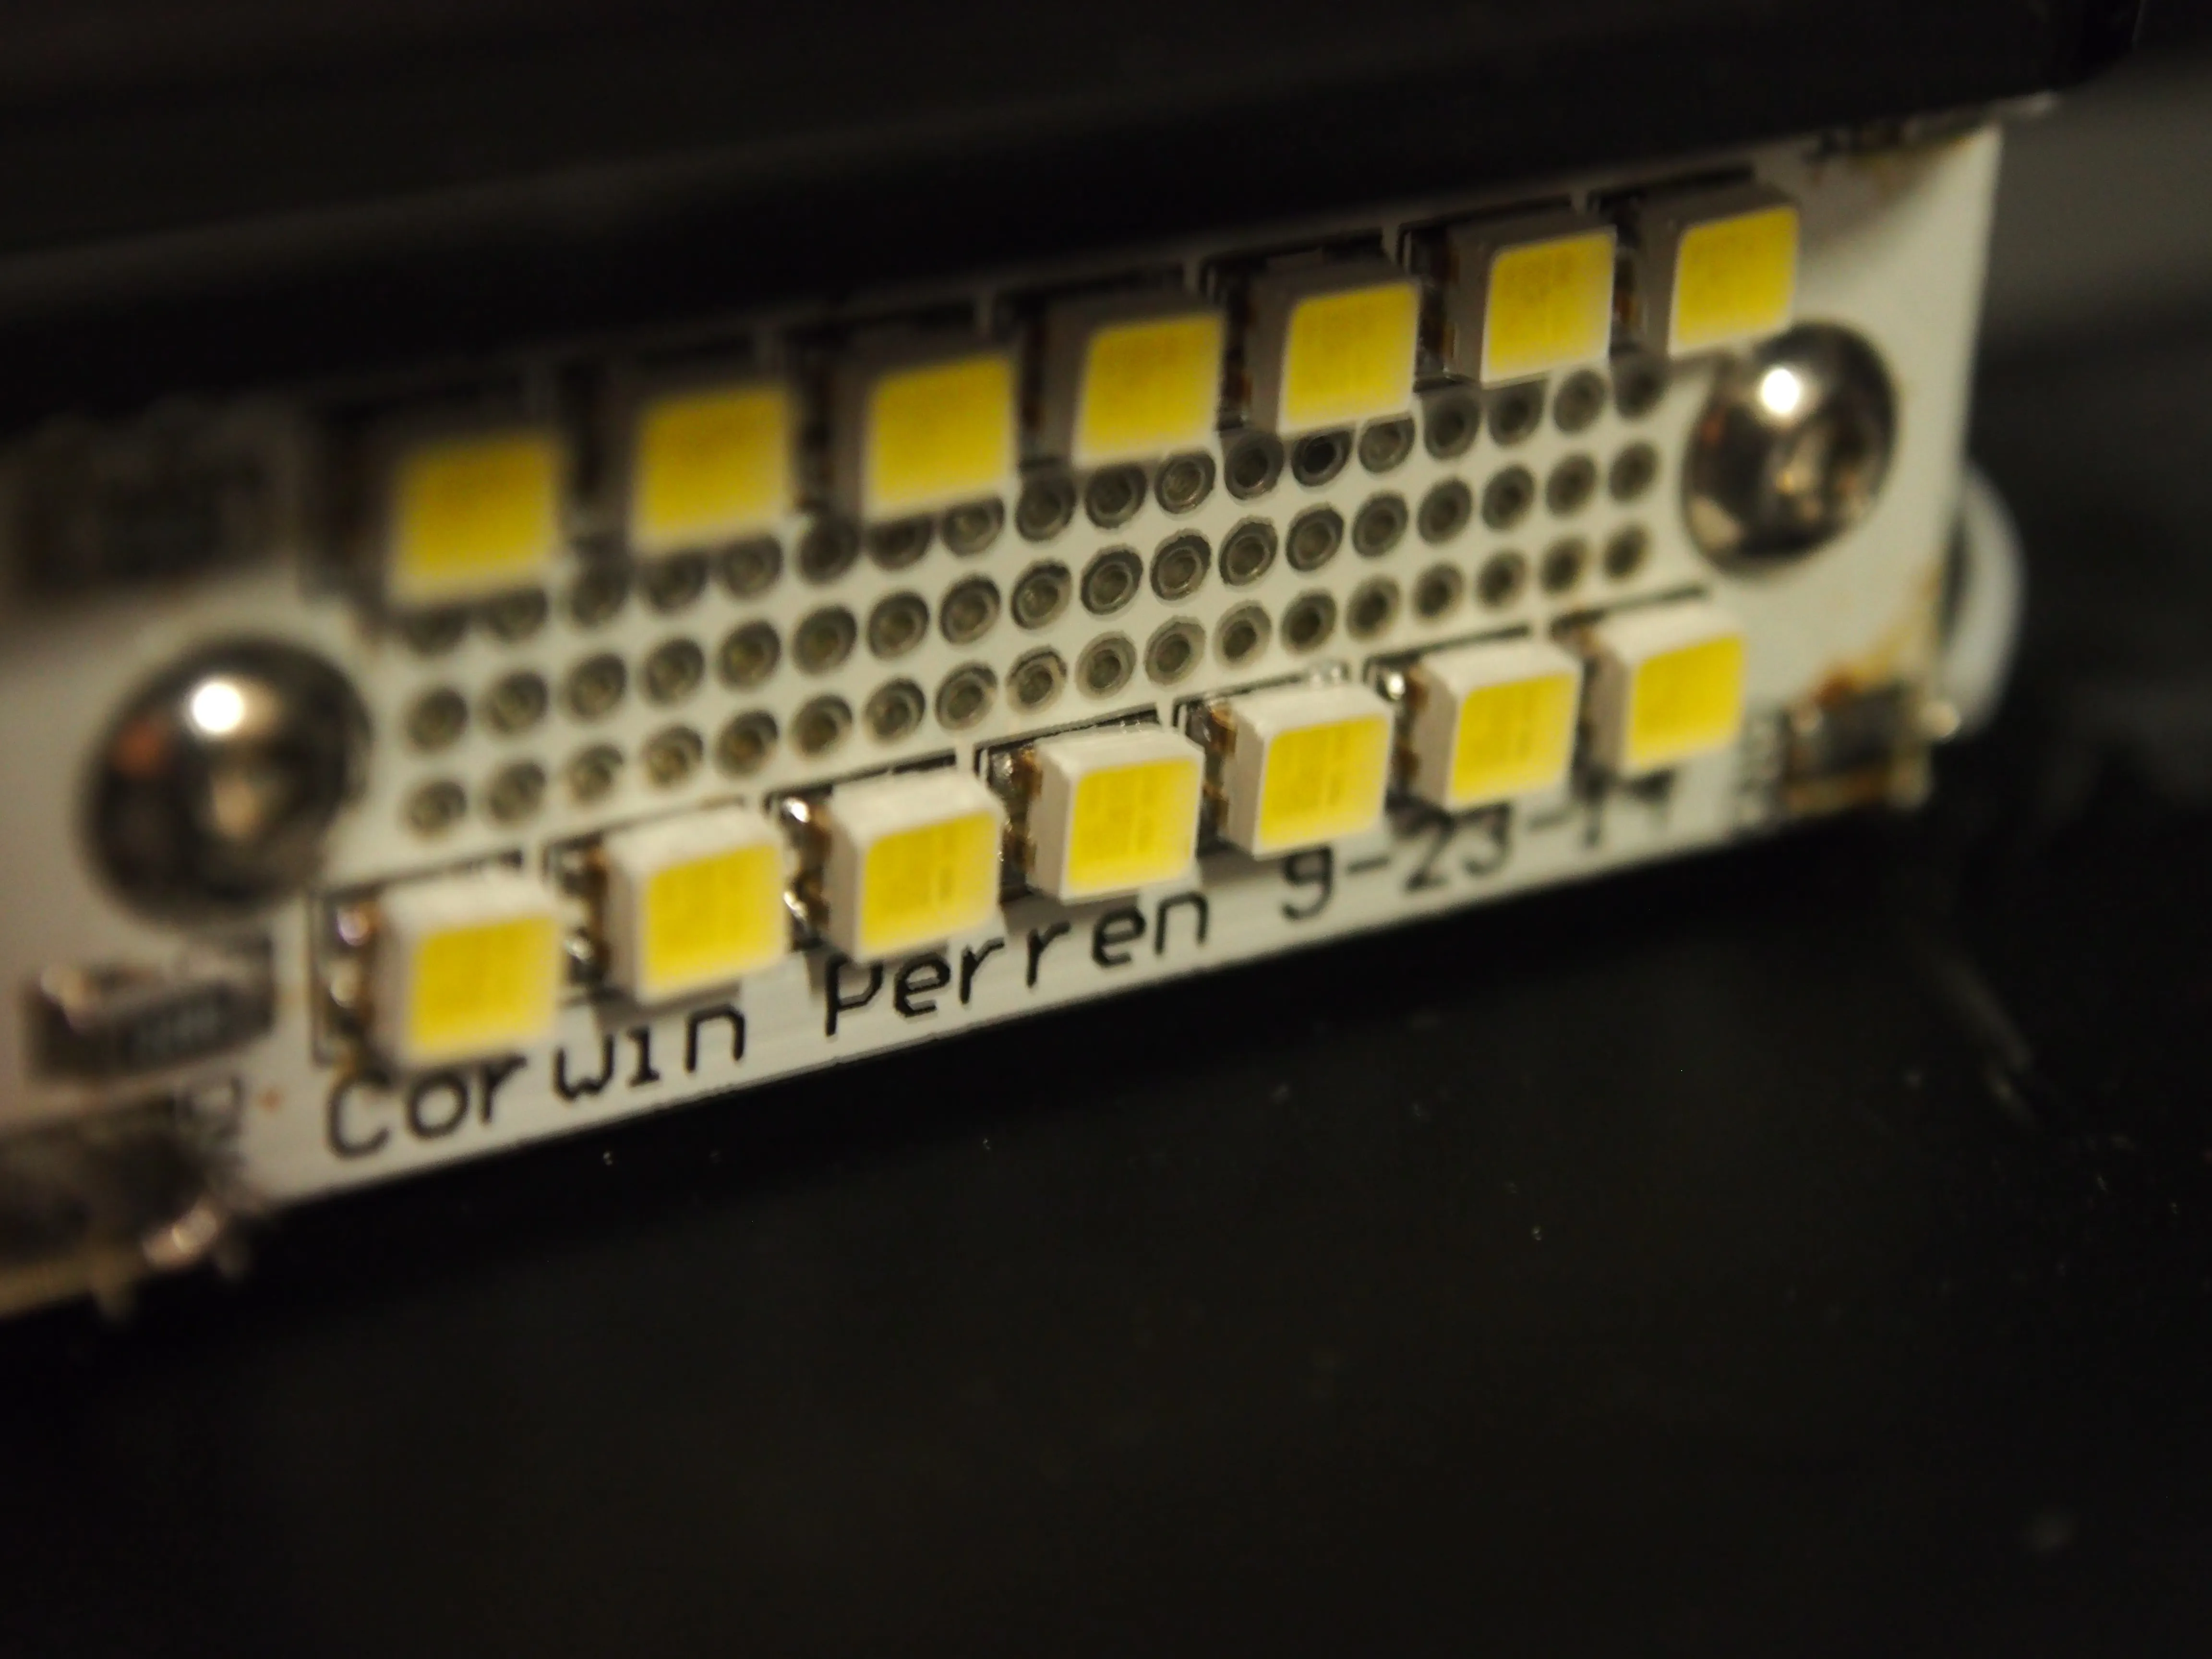
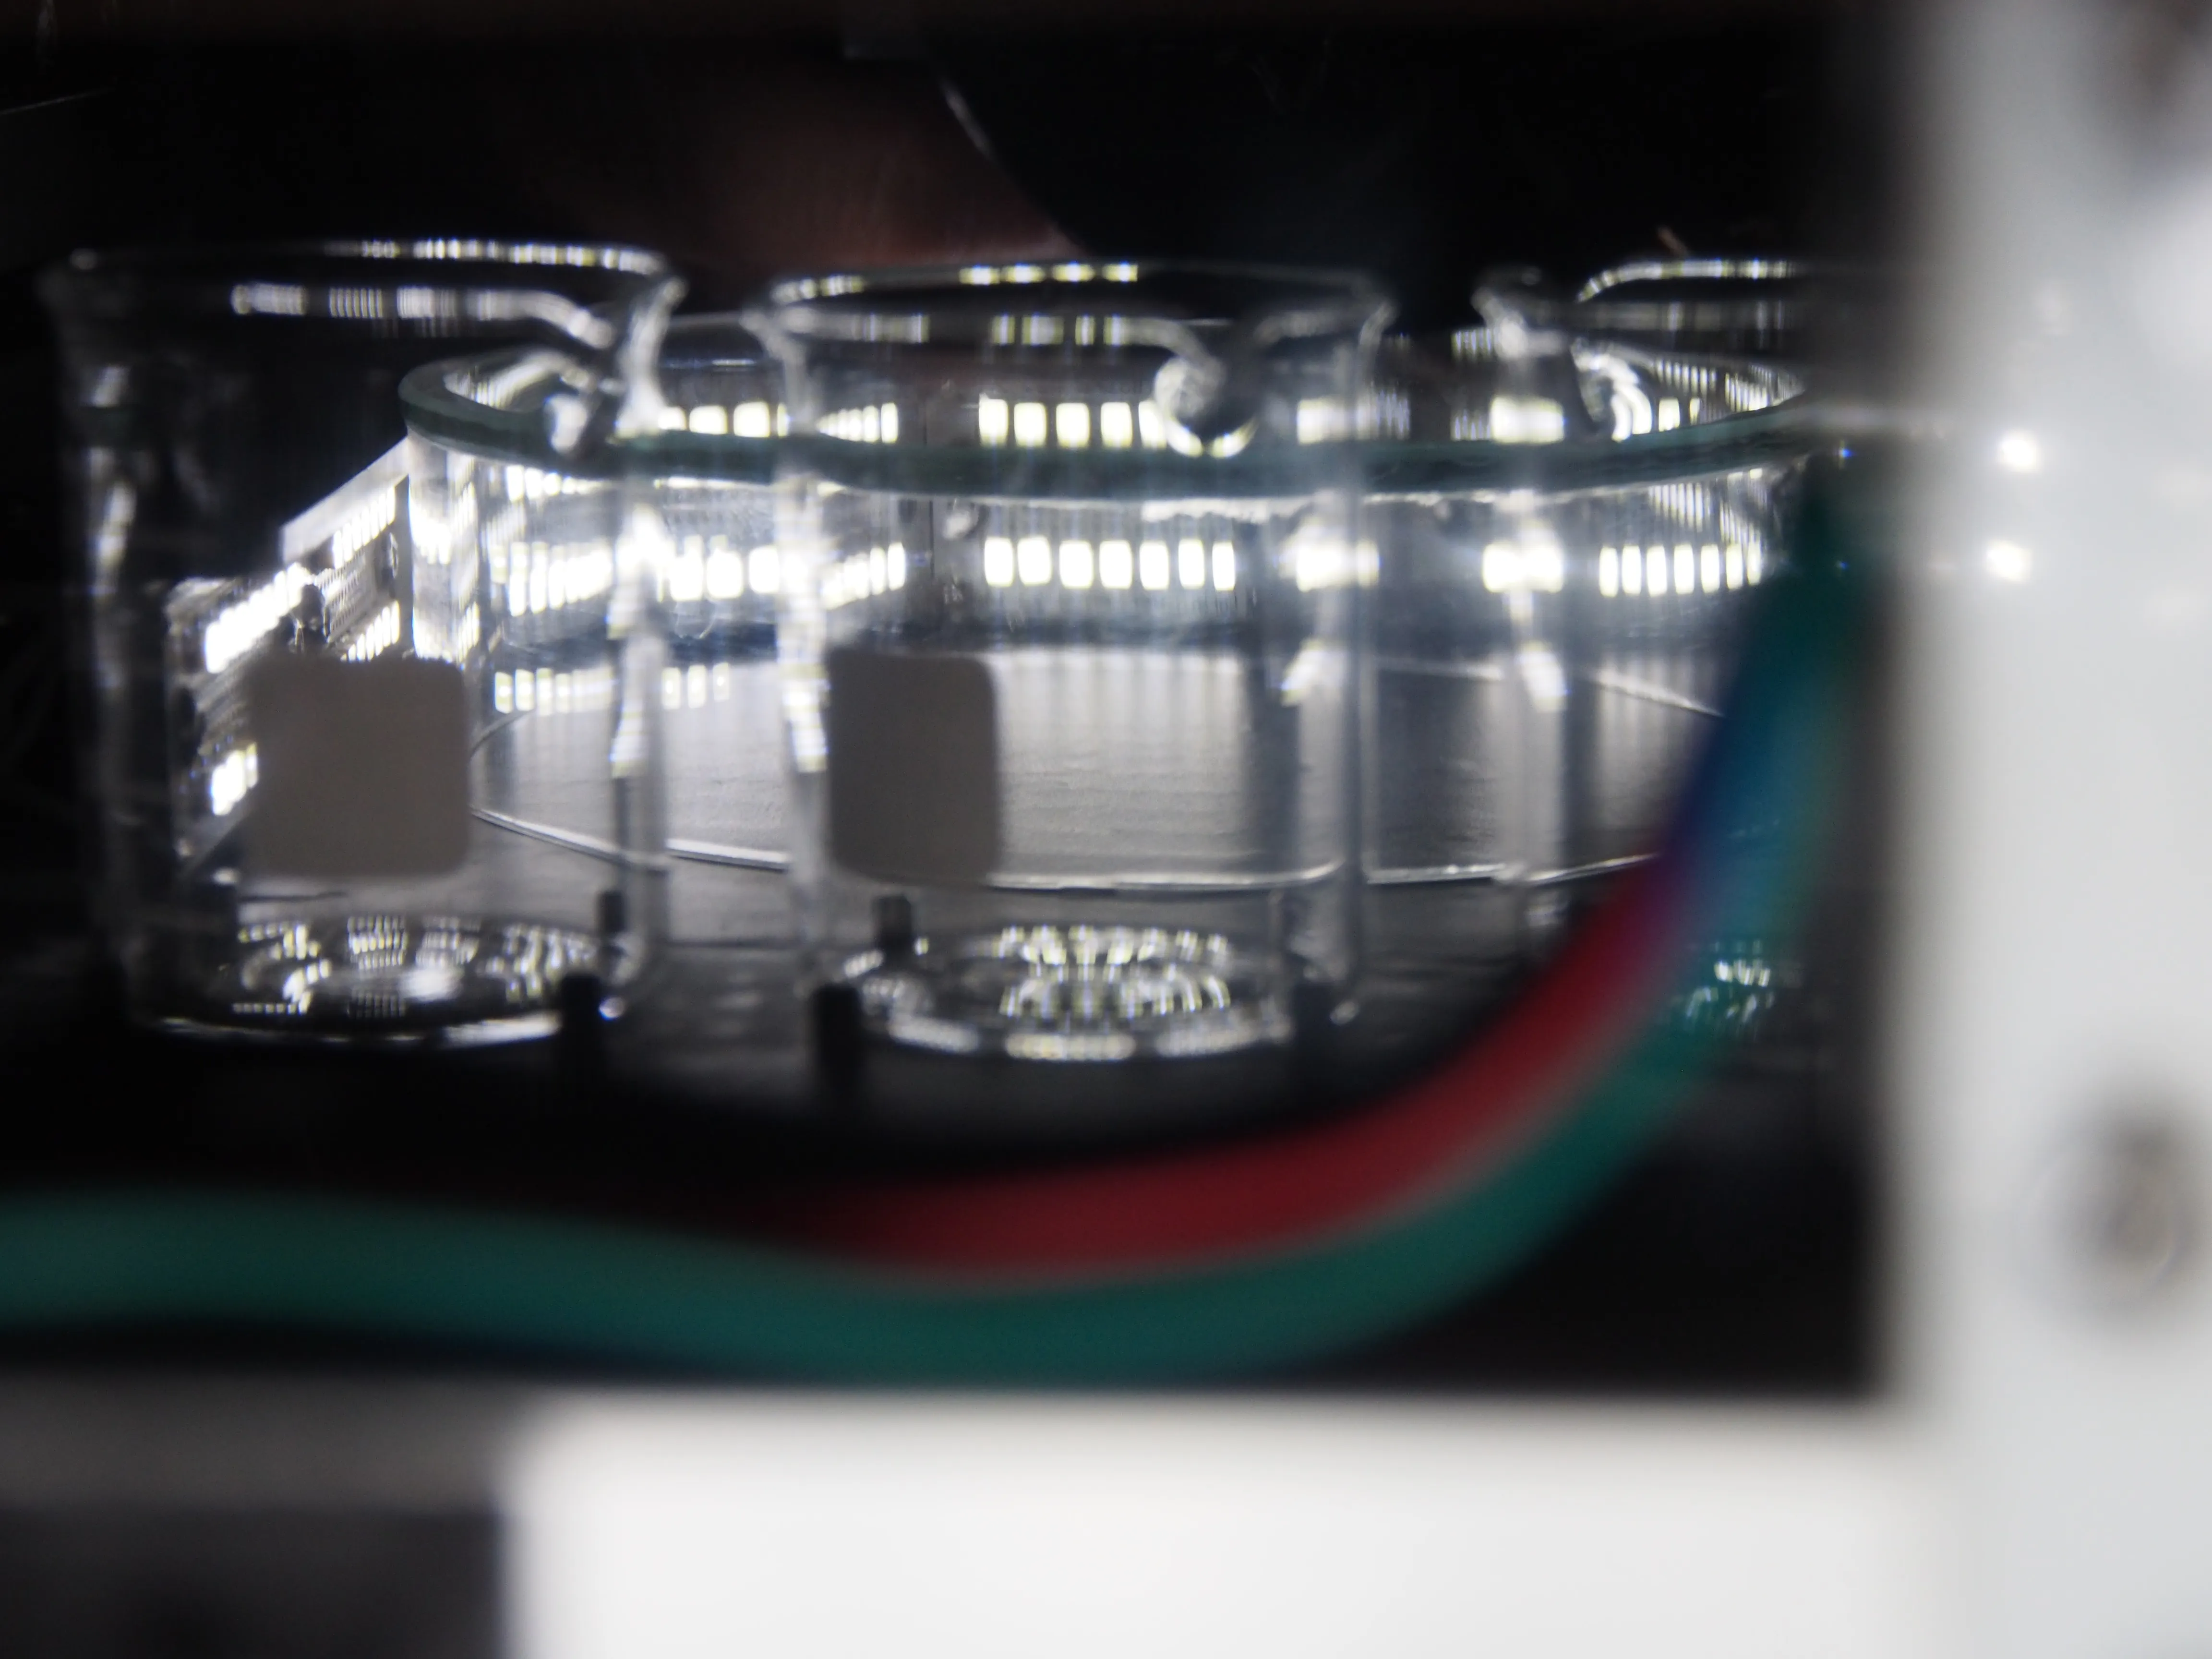
created some very bright lighting boards to mount to the unit's
extrusion, illuminating the embryos from the side, something that was
absolutely required for consistent detection with the camera. After a
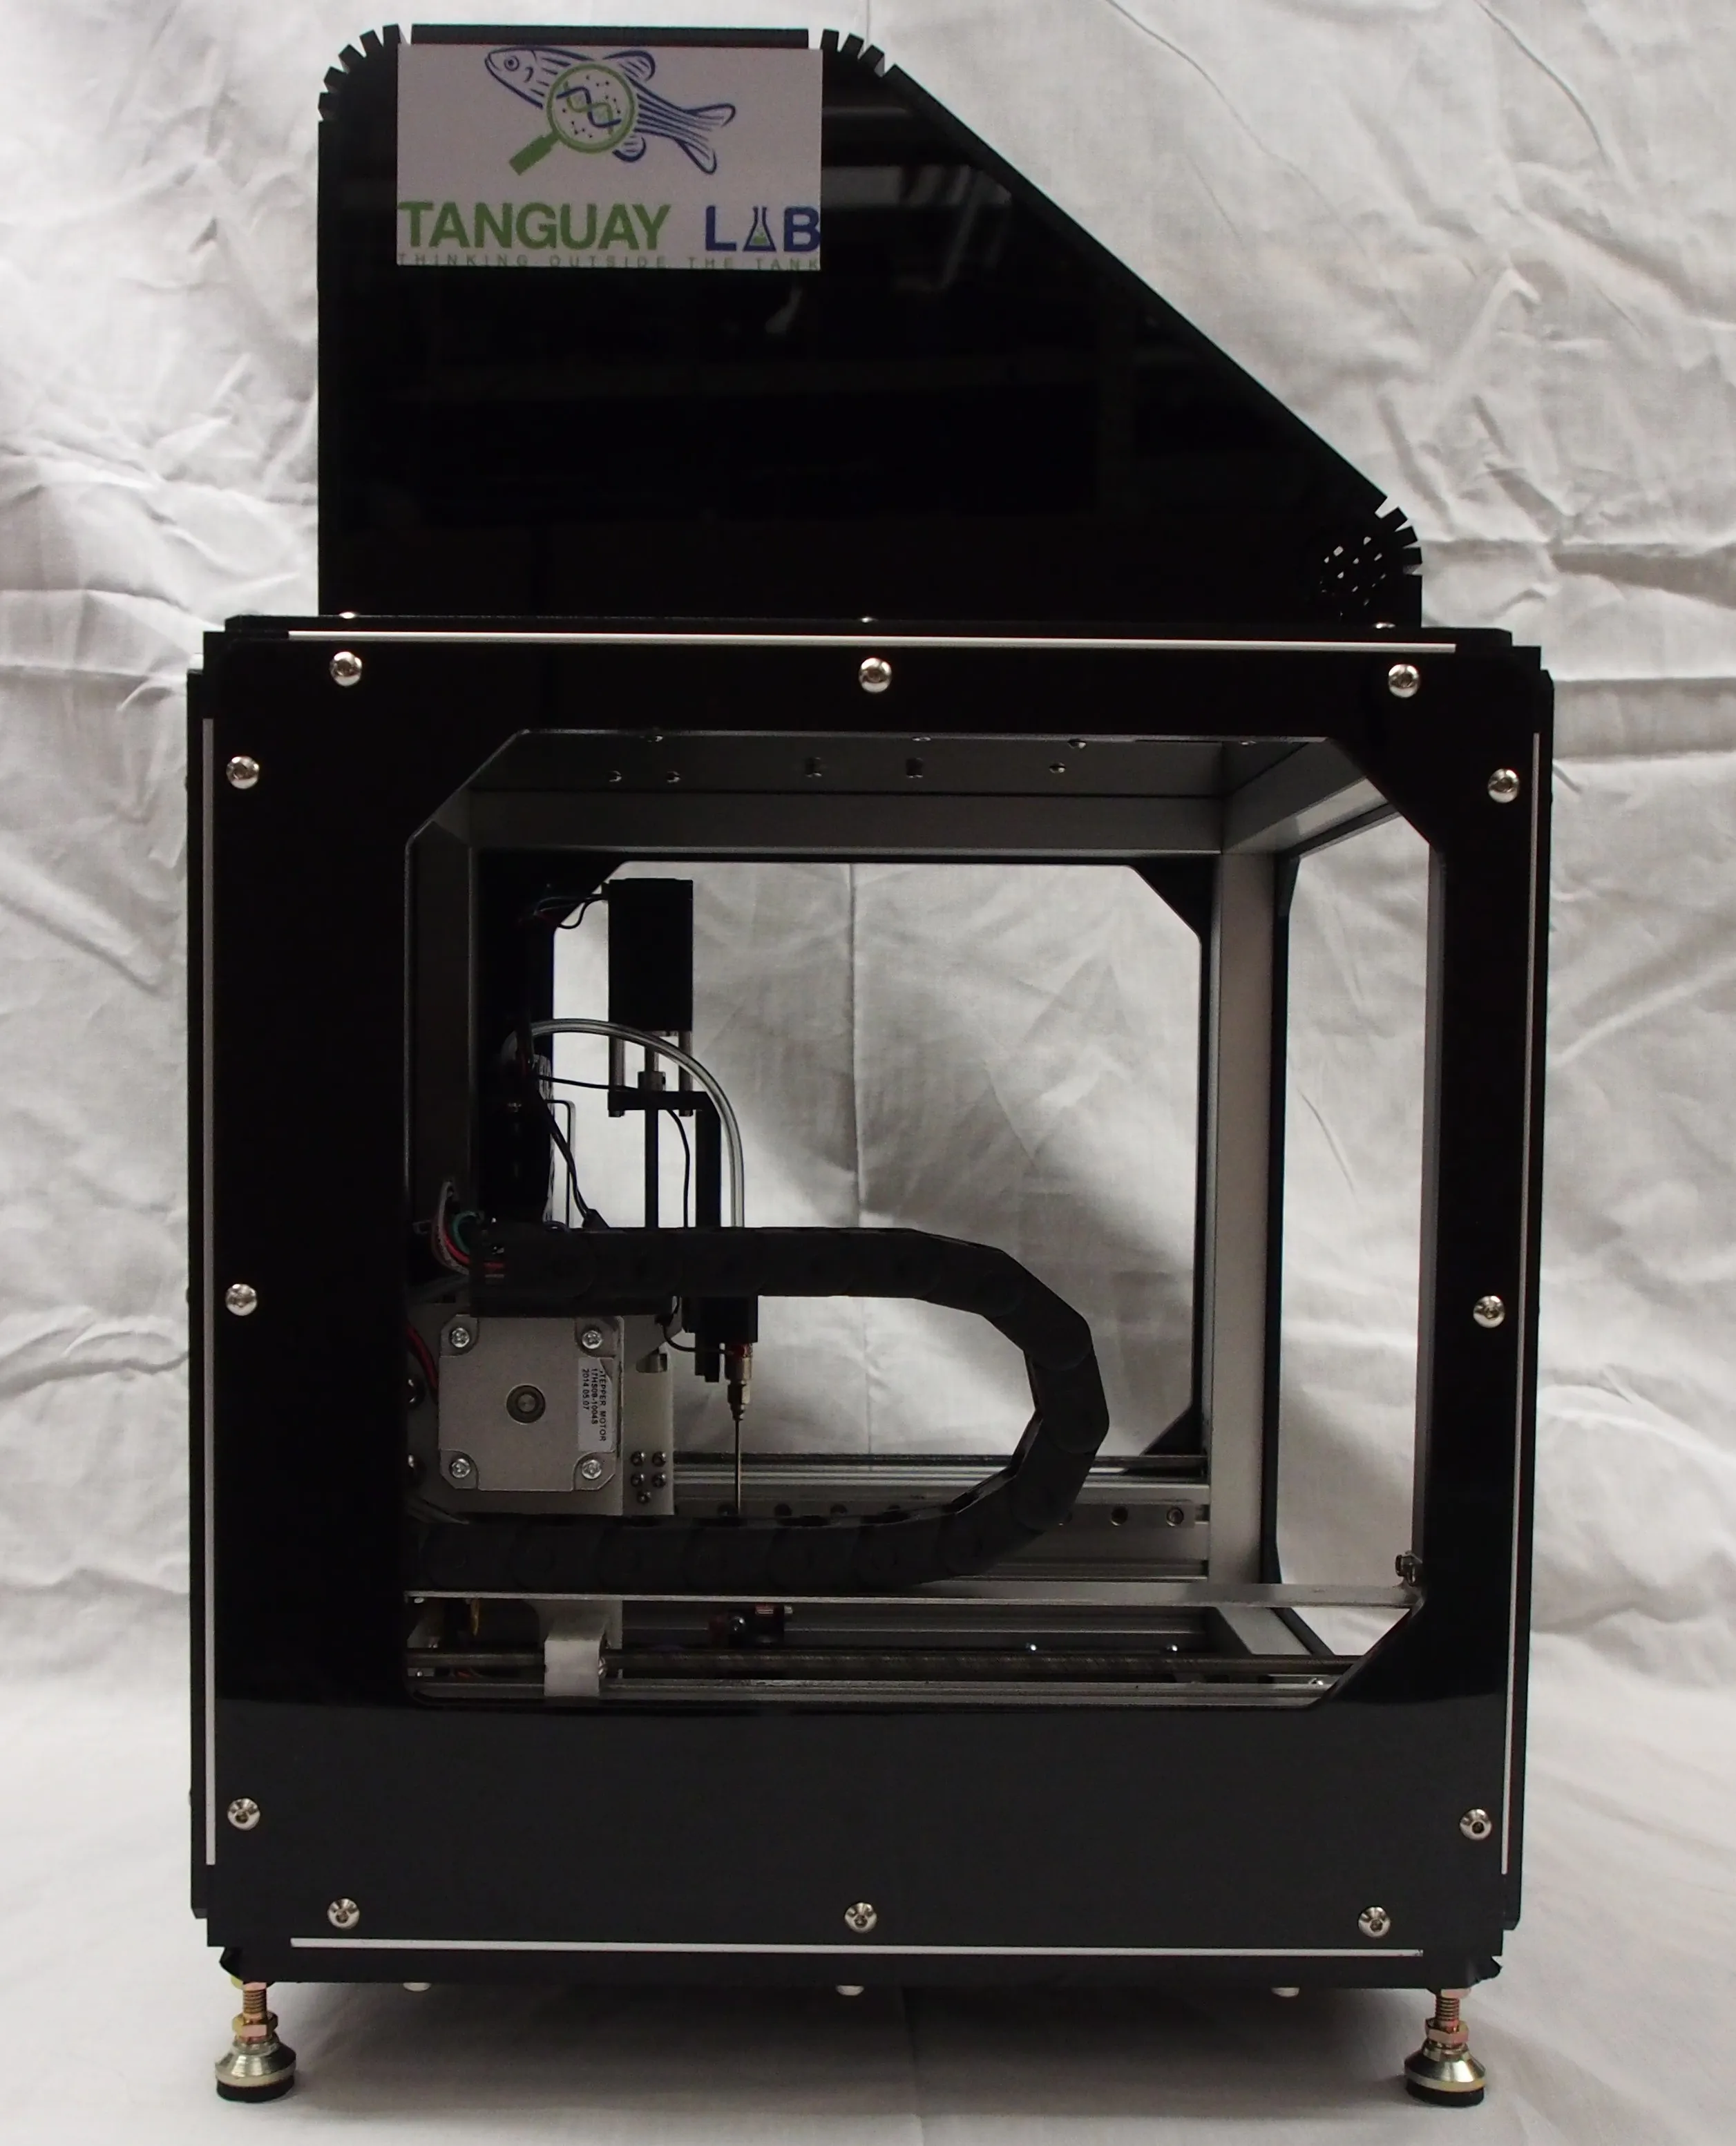
long journey, we finally delivered multiple units to the lab! Seeing
such small devices performing the same task next to the behemoths which
were the prior versions was quite amusing. You could easily fit a two by
two grid of these in the working area of each of those machines.
Overall, this was a highly ambitious project, but it developed some of
my most successful skills I gained while at OSU while accelerating the
research at the lab!
Videos
Printed Circuit Boards
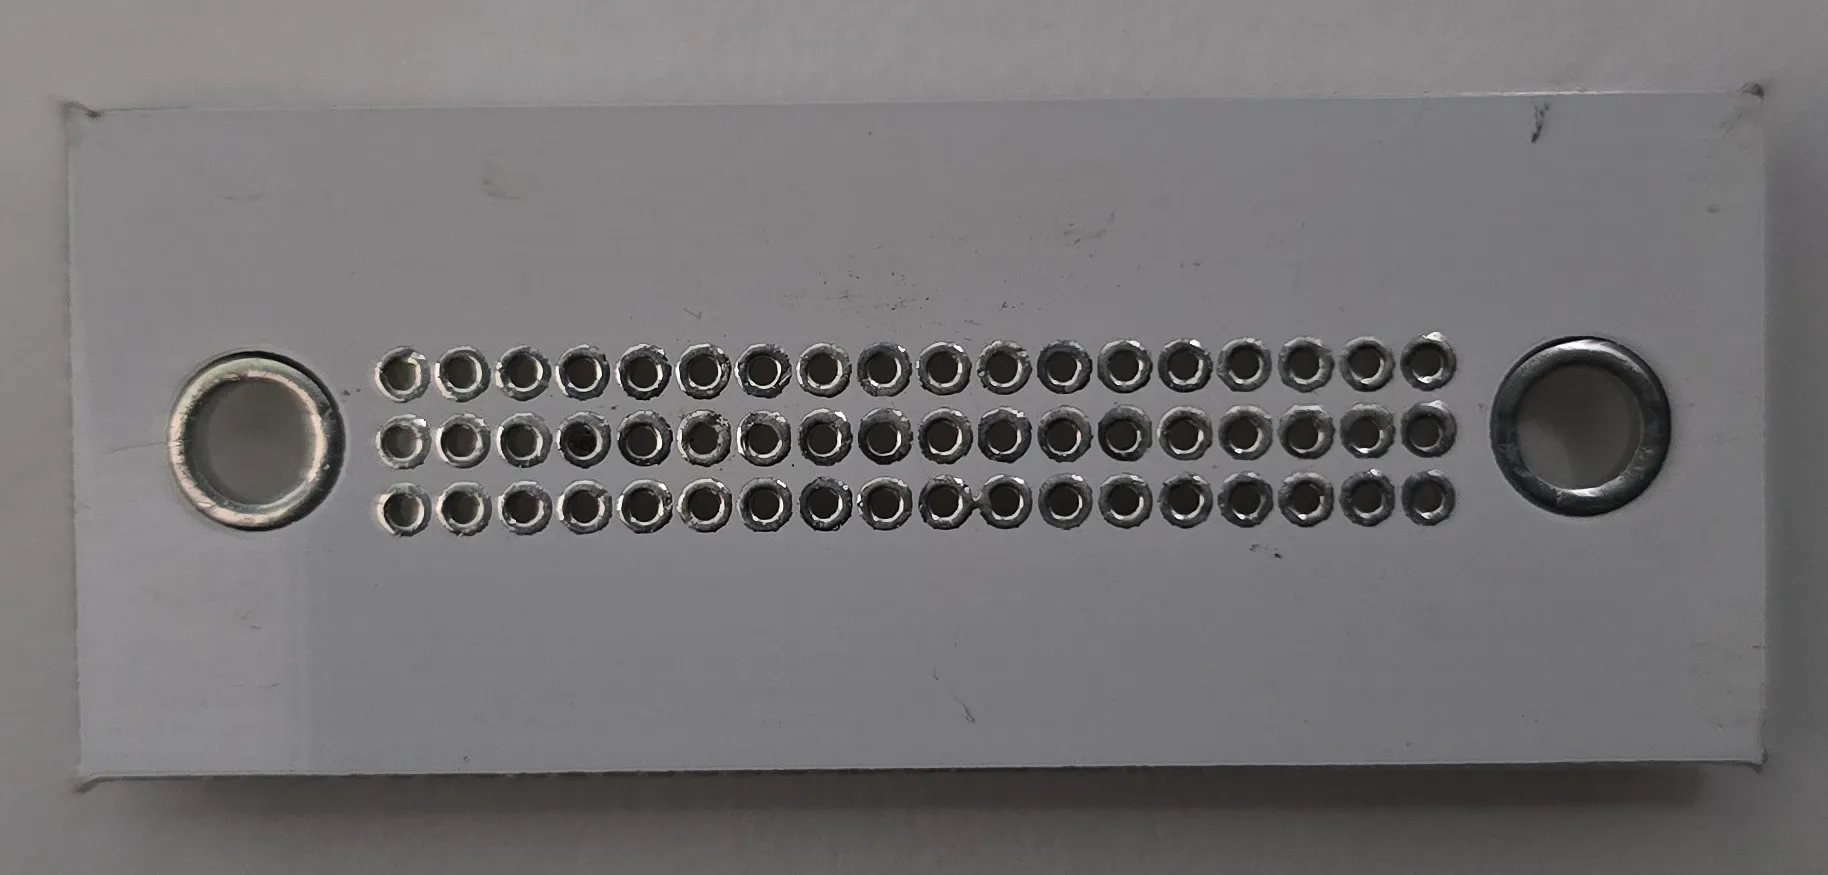
Lighting Board
Compact, bright, 24V lighting to provide high-contrast video for the pick and plate
Revision: 2.0.0
2014-09-23

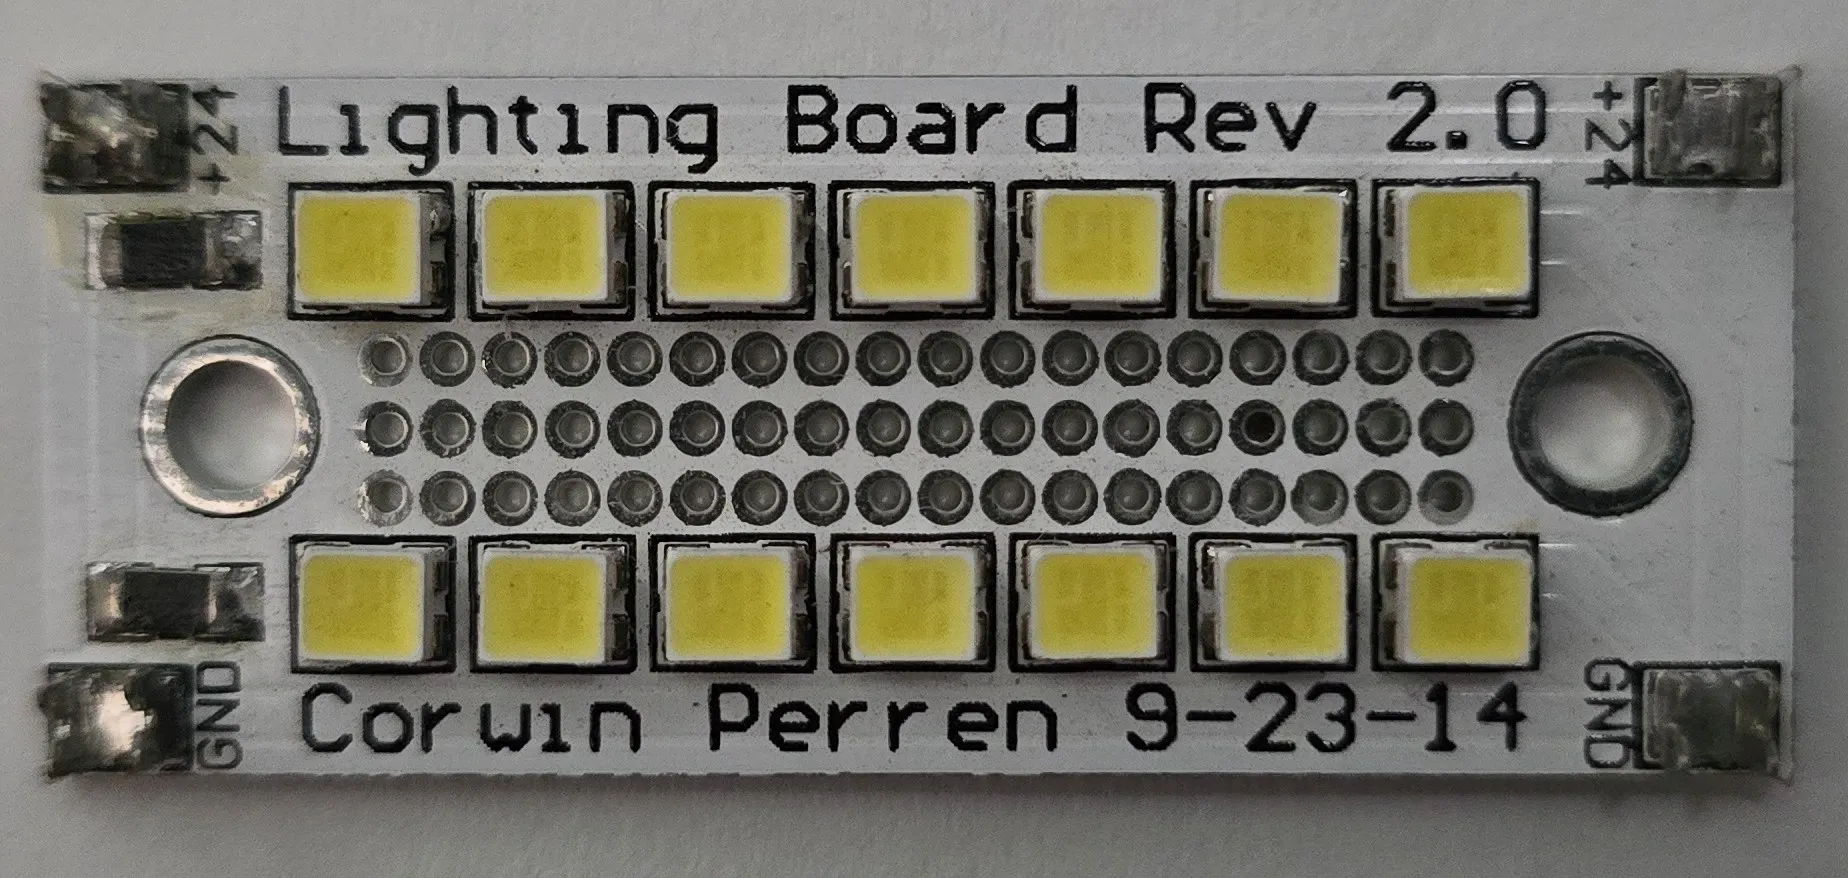
- First panelized PCB design, with built-in test features
Revision: 1.0.0
2014-04-07

- Worked, but couldn't remove heat efficiently long-term
Driver Board
Motion controller, and single-board-computer interface, for the embryo pick and plate machine
Revision: 2.0.0
2014-07-11
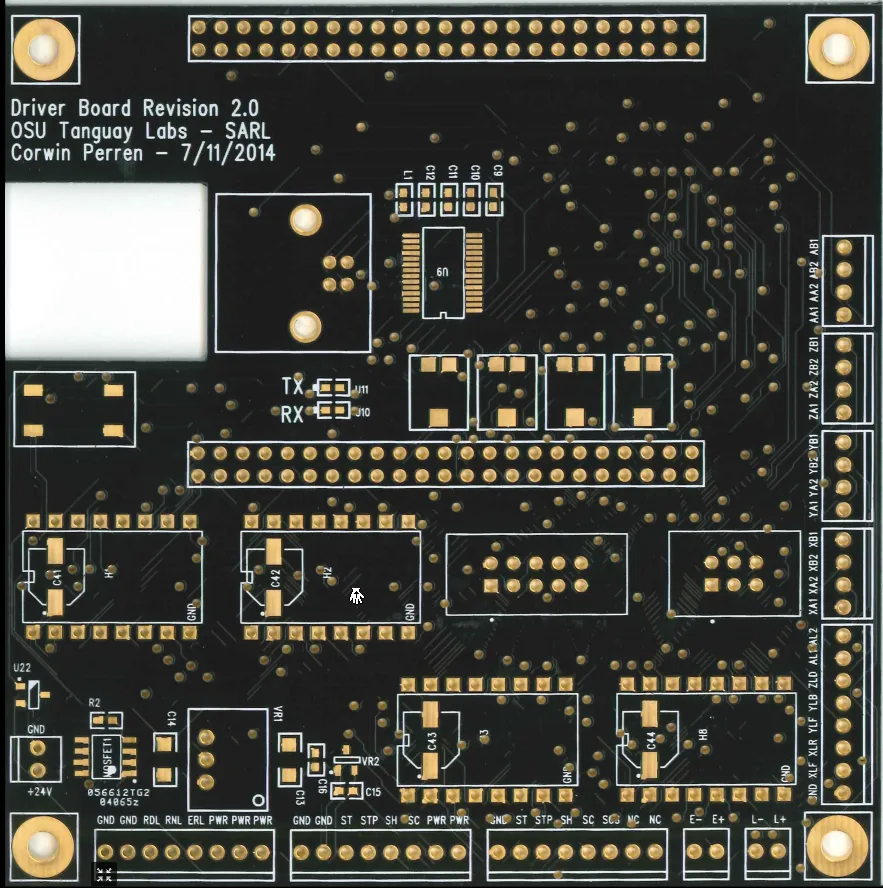

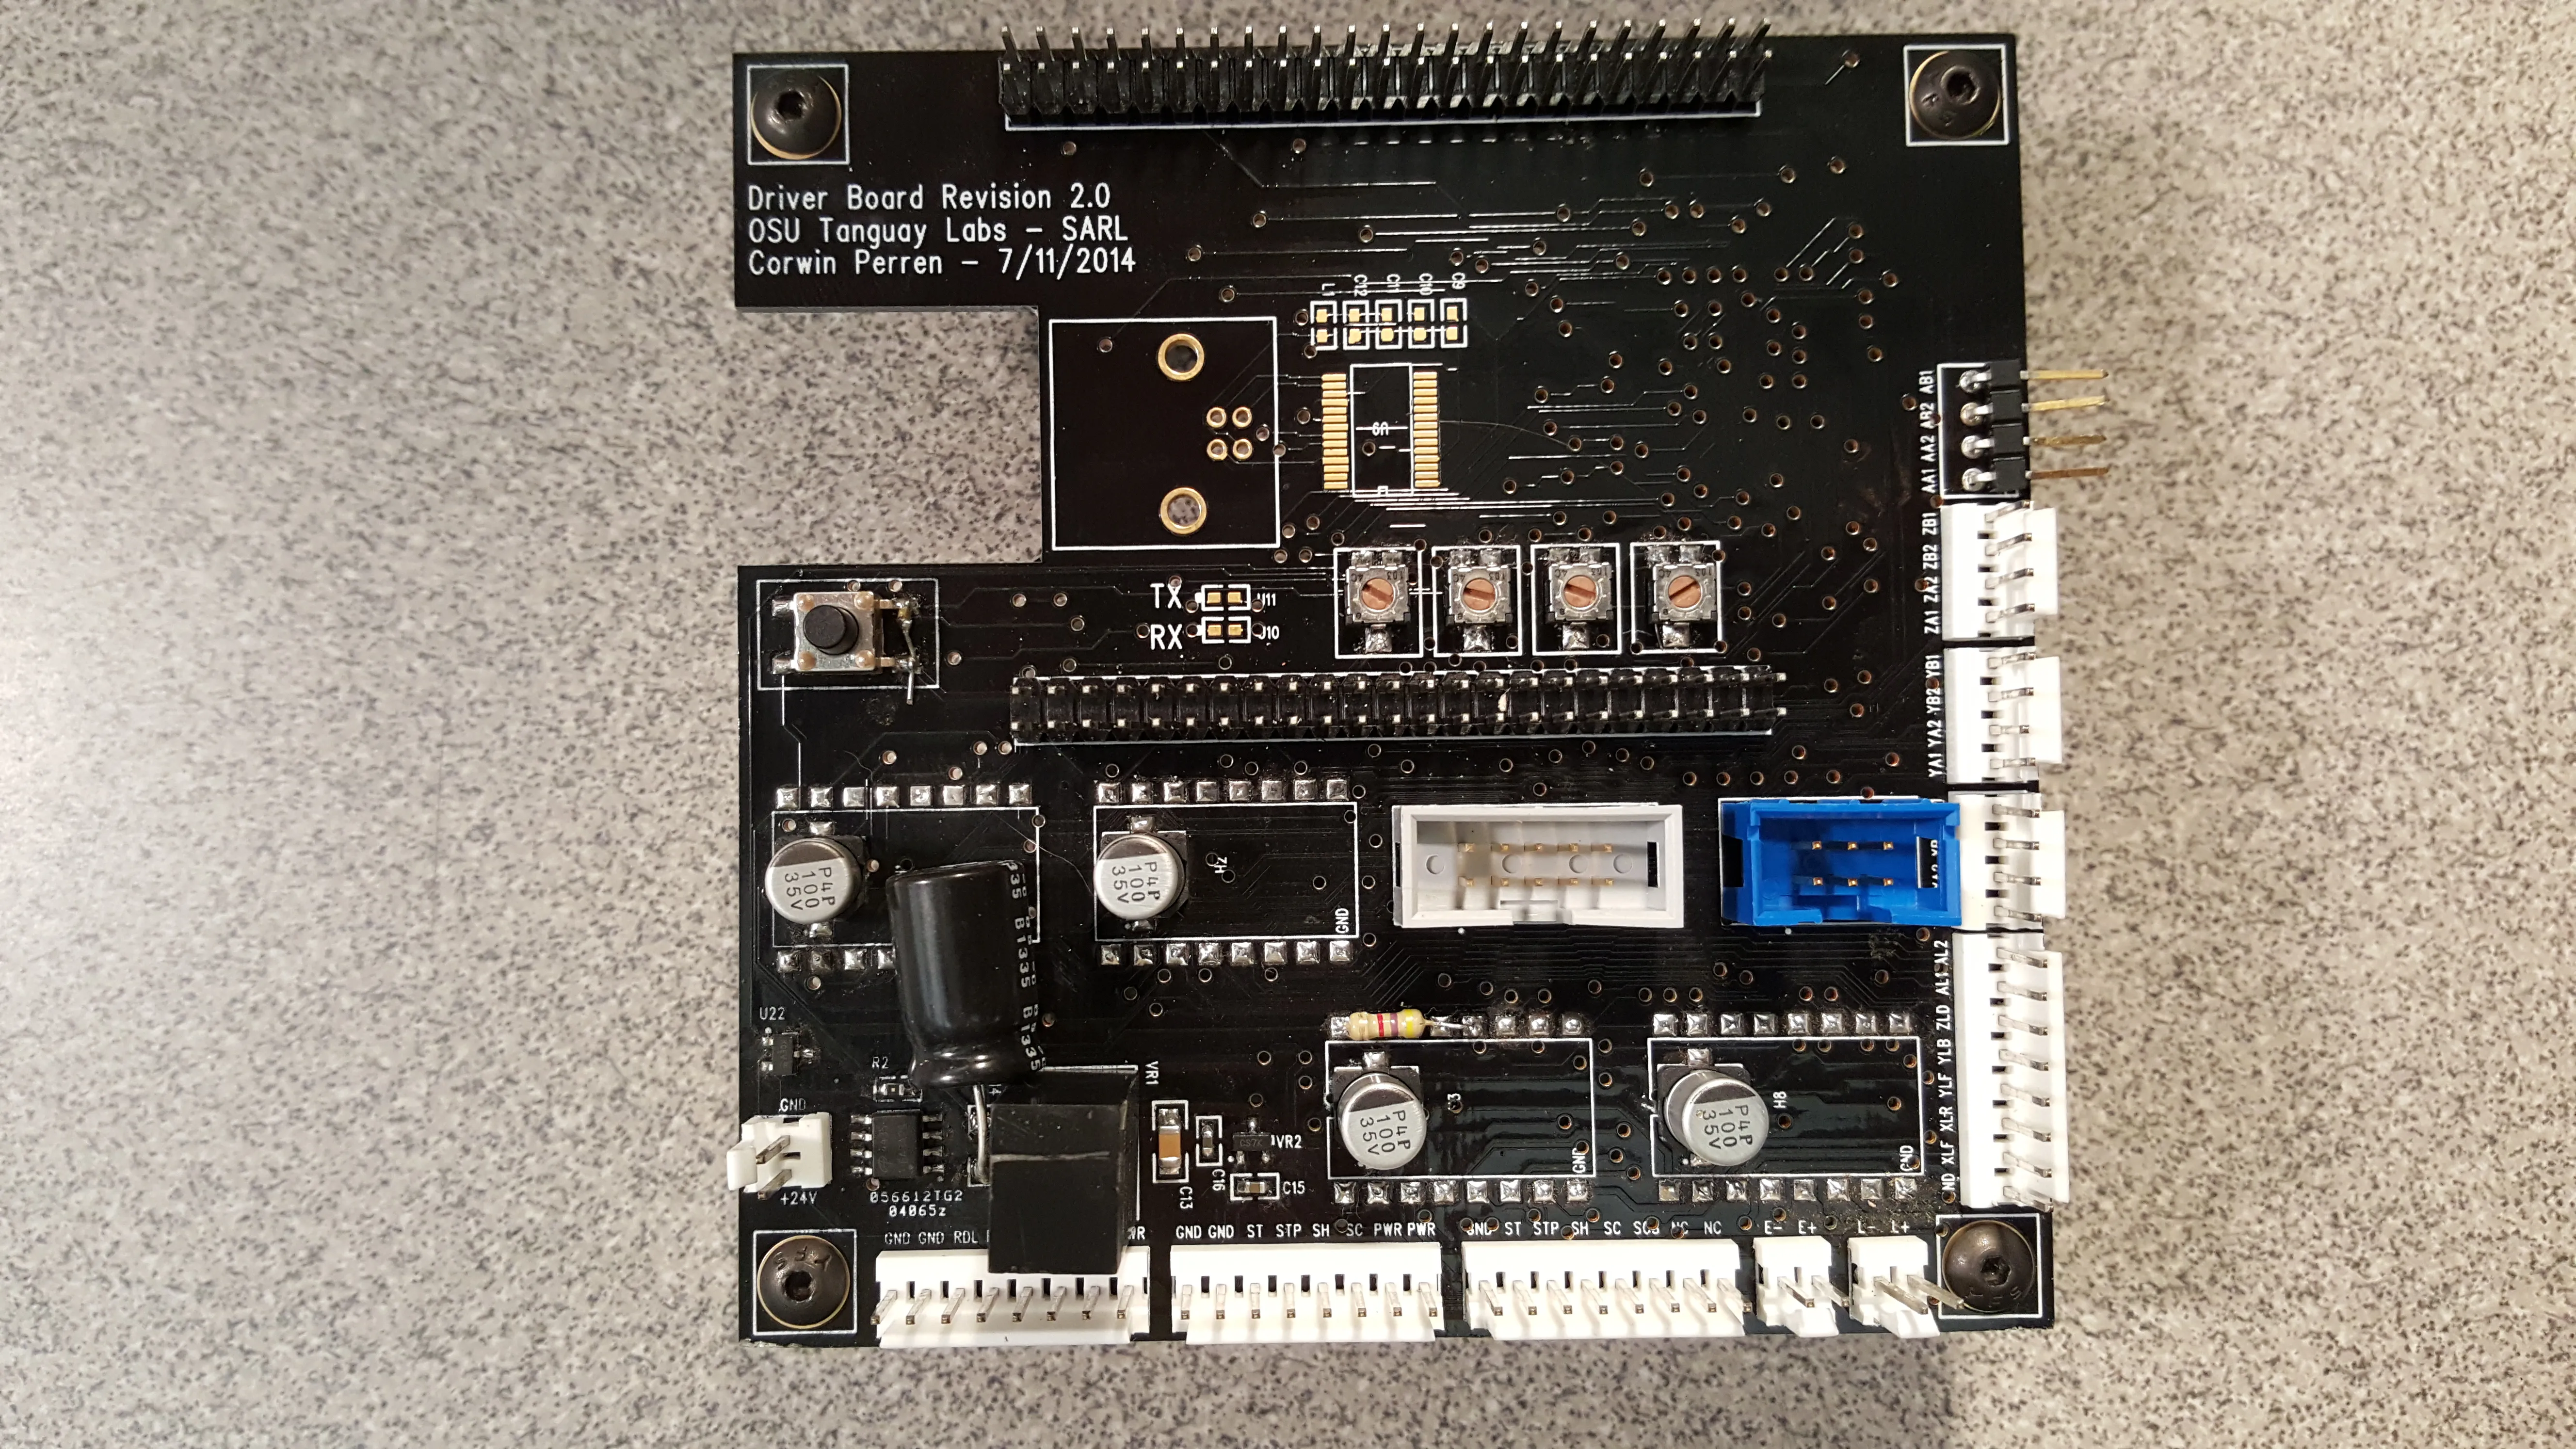

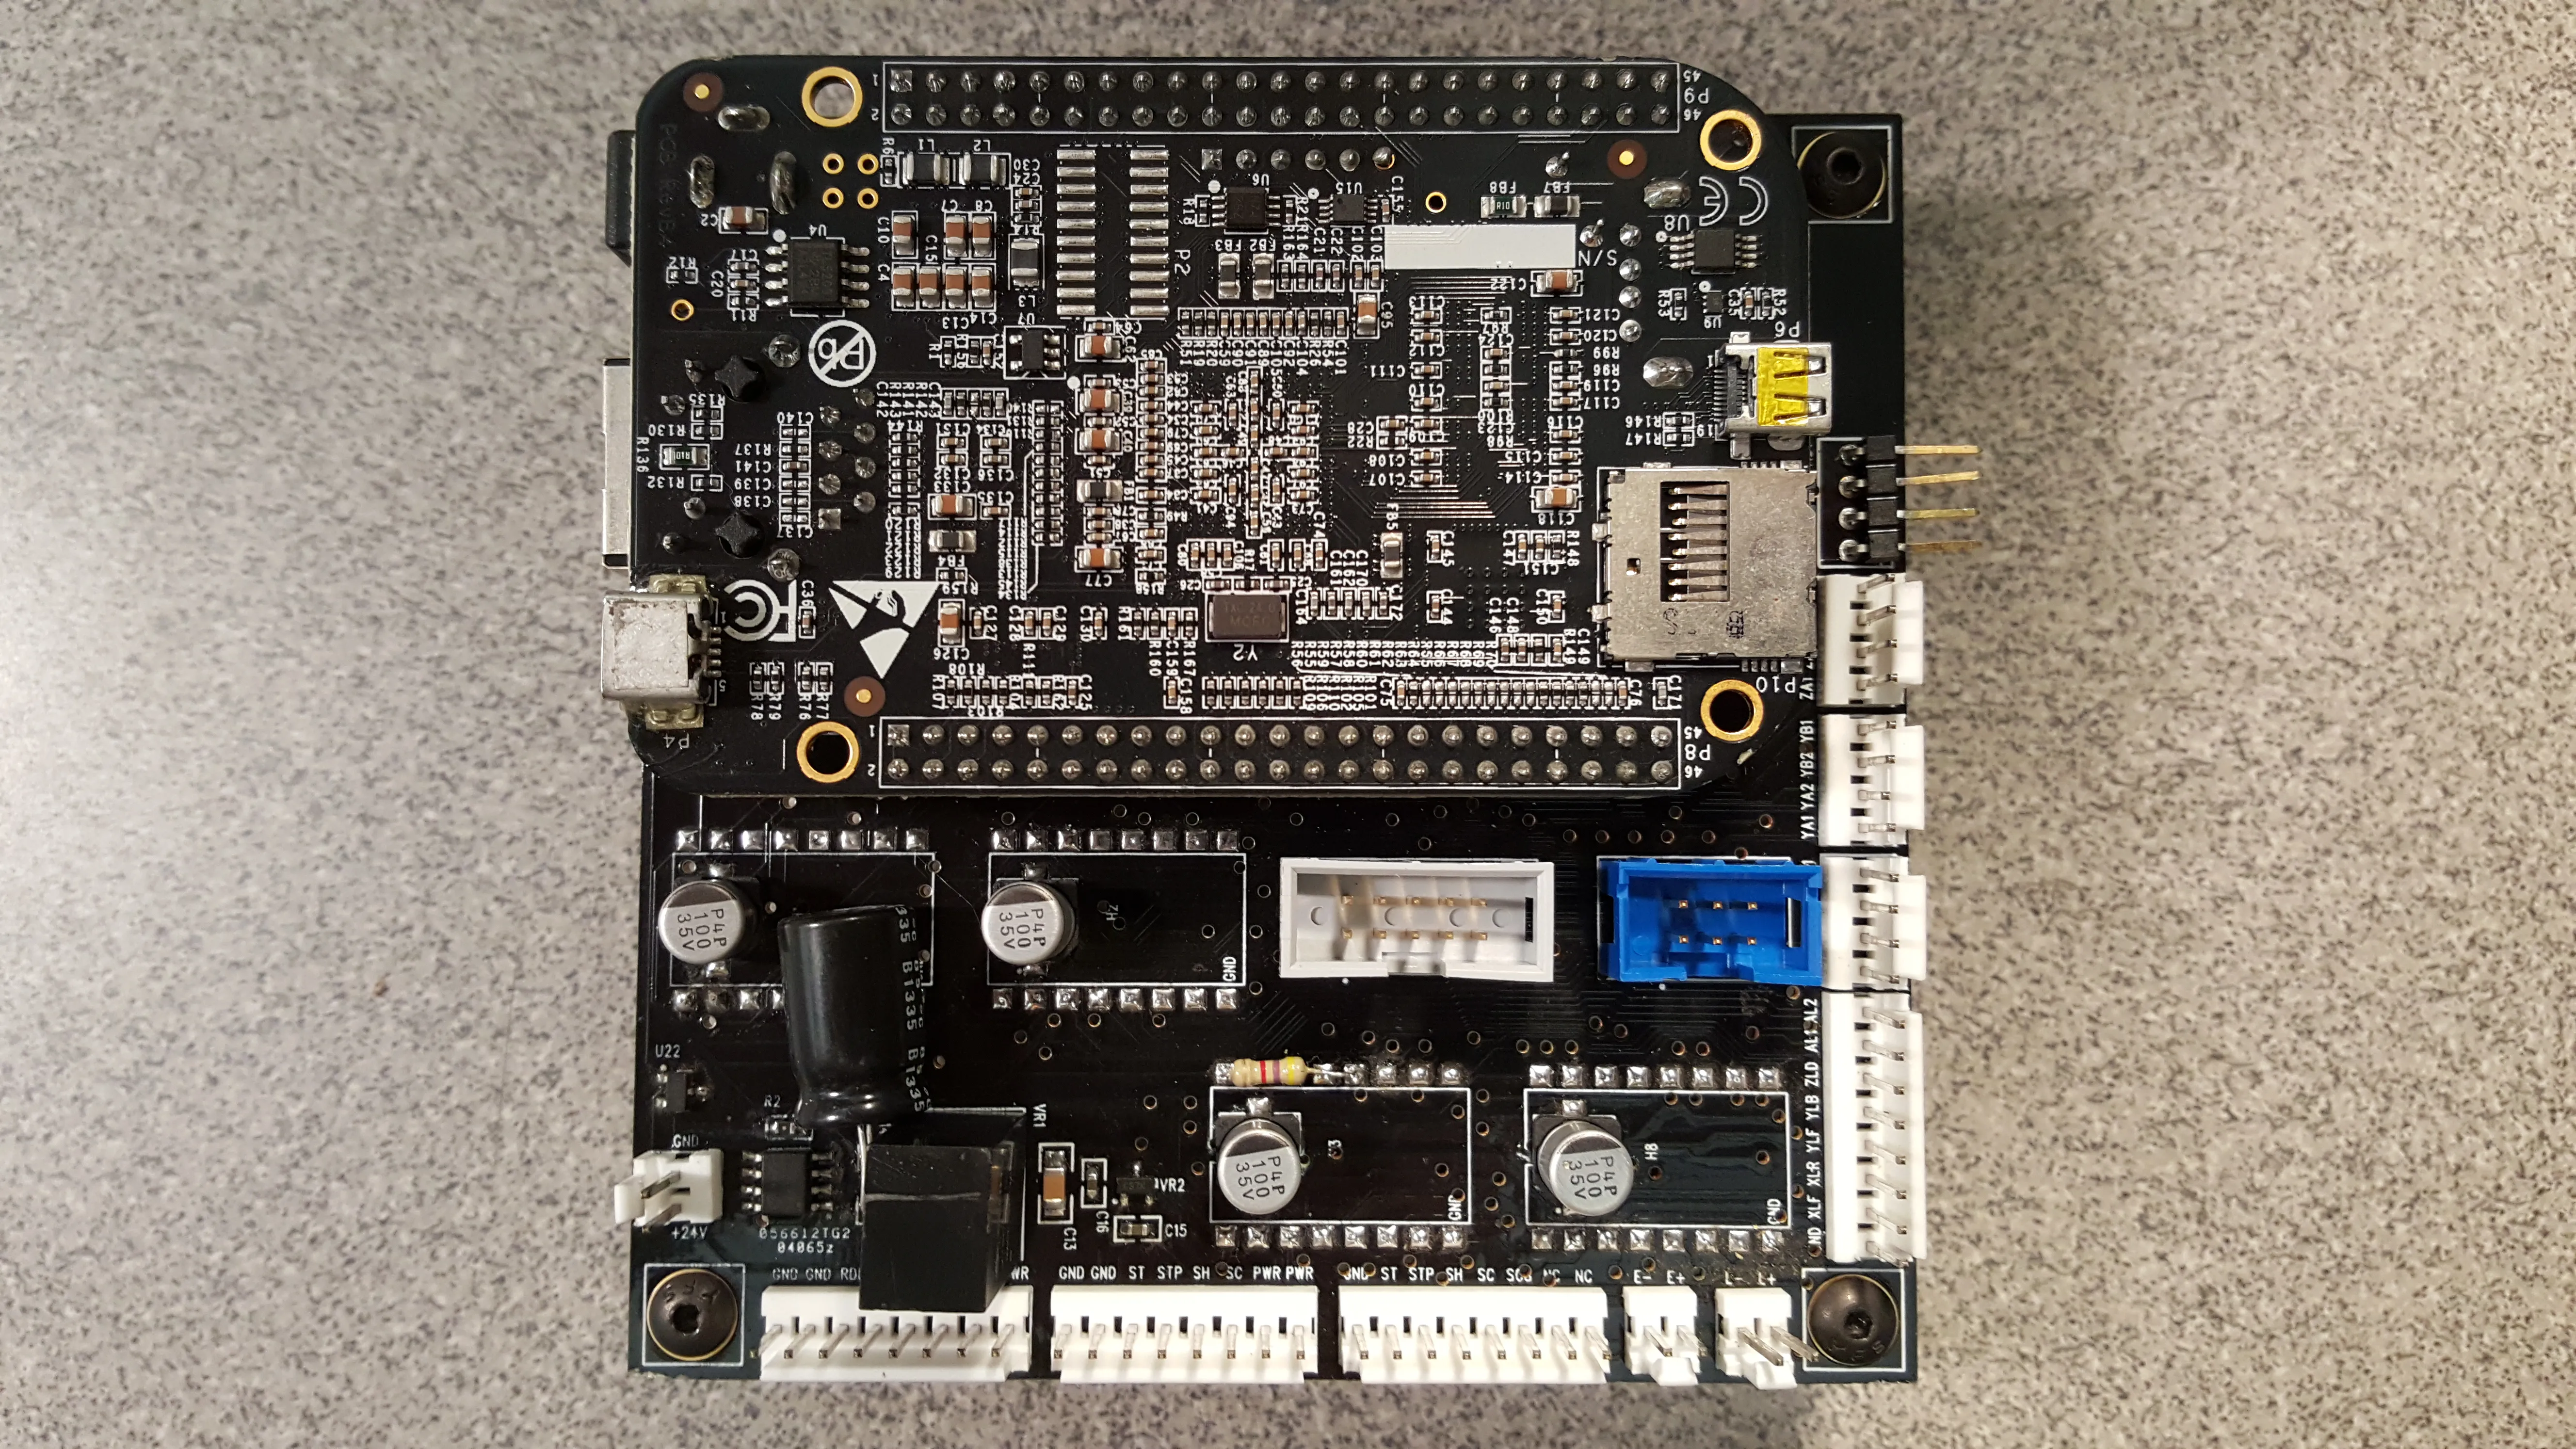
- Functional, but ultimately scrapped due to motion control complexity
Revision: 1.0.0
2013-12-02
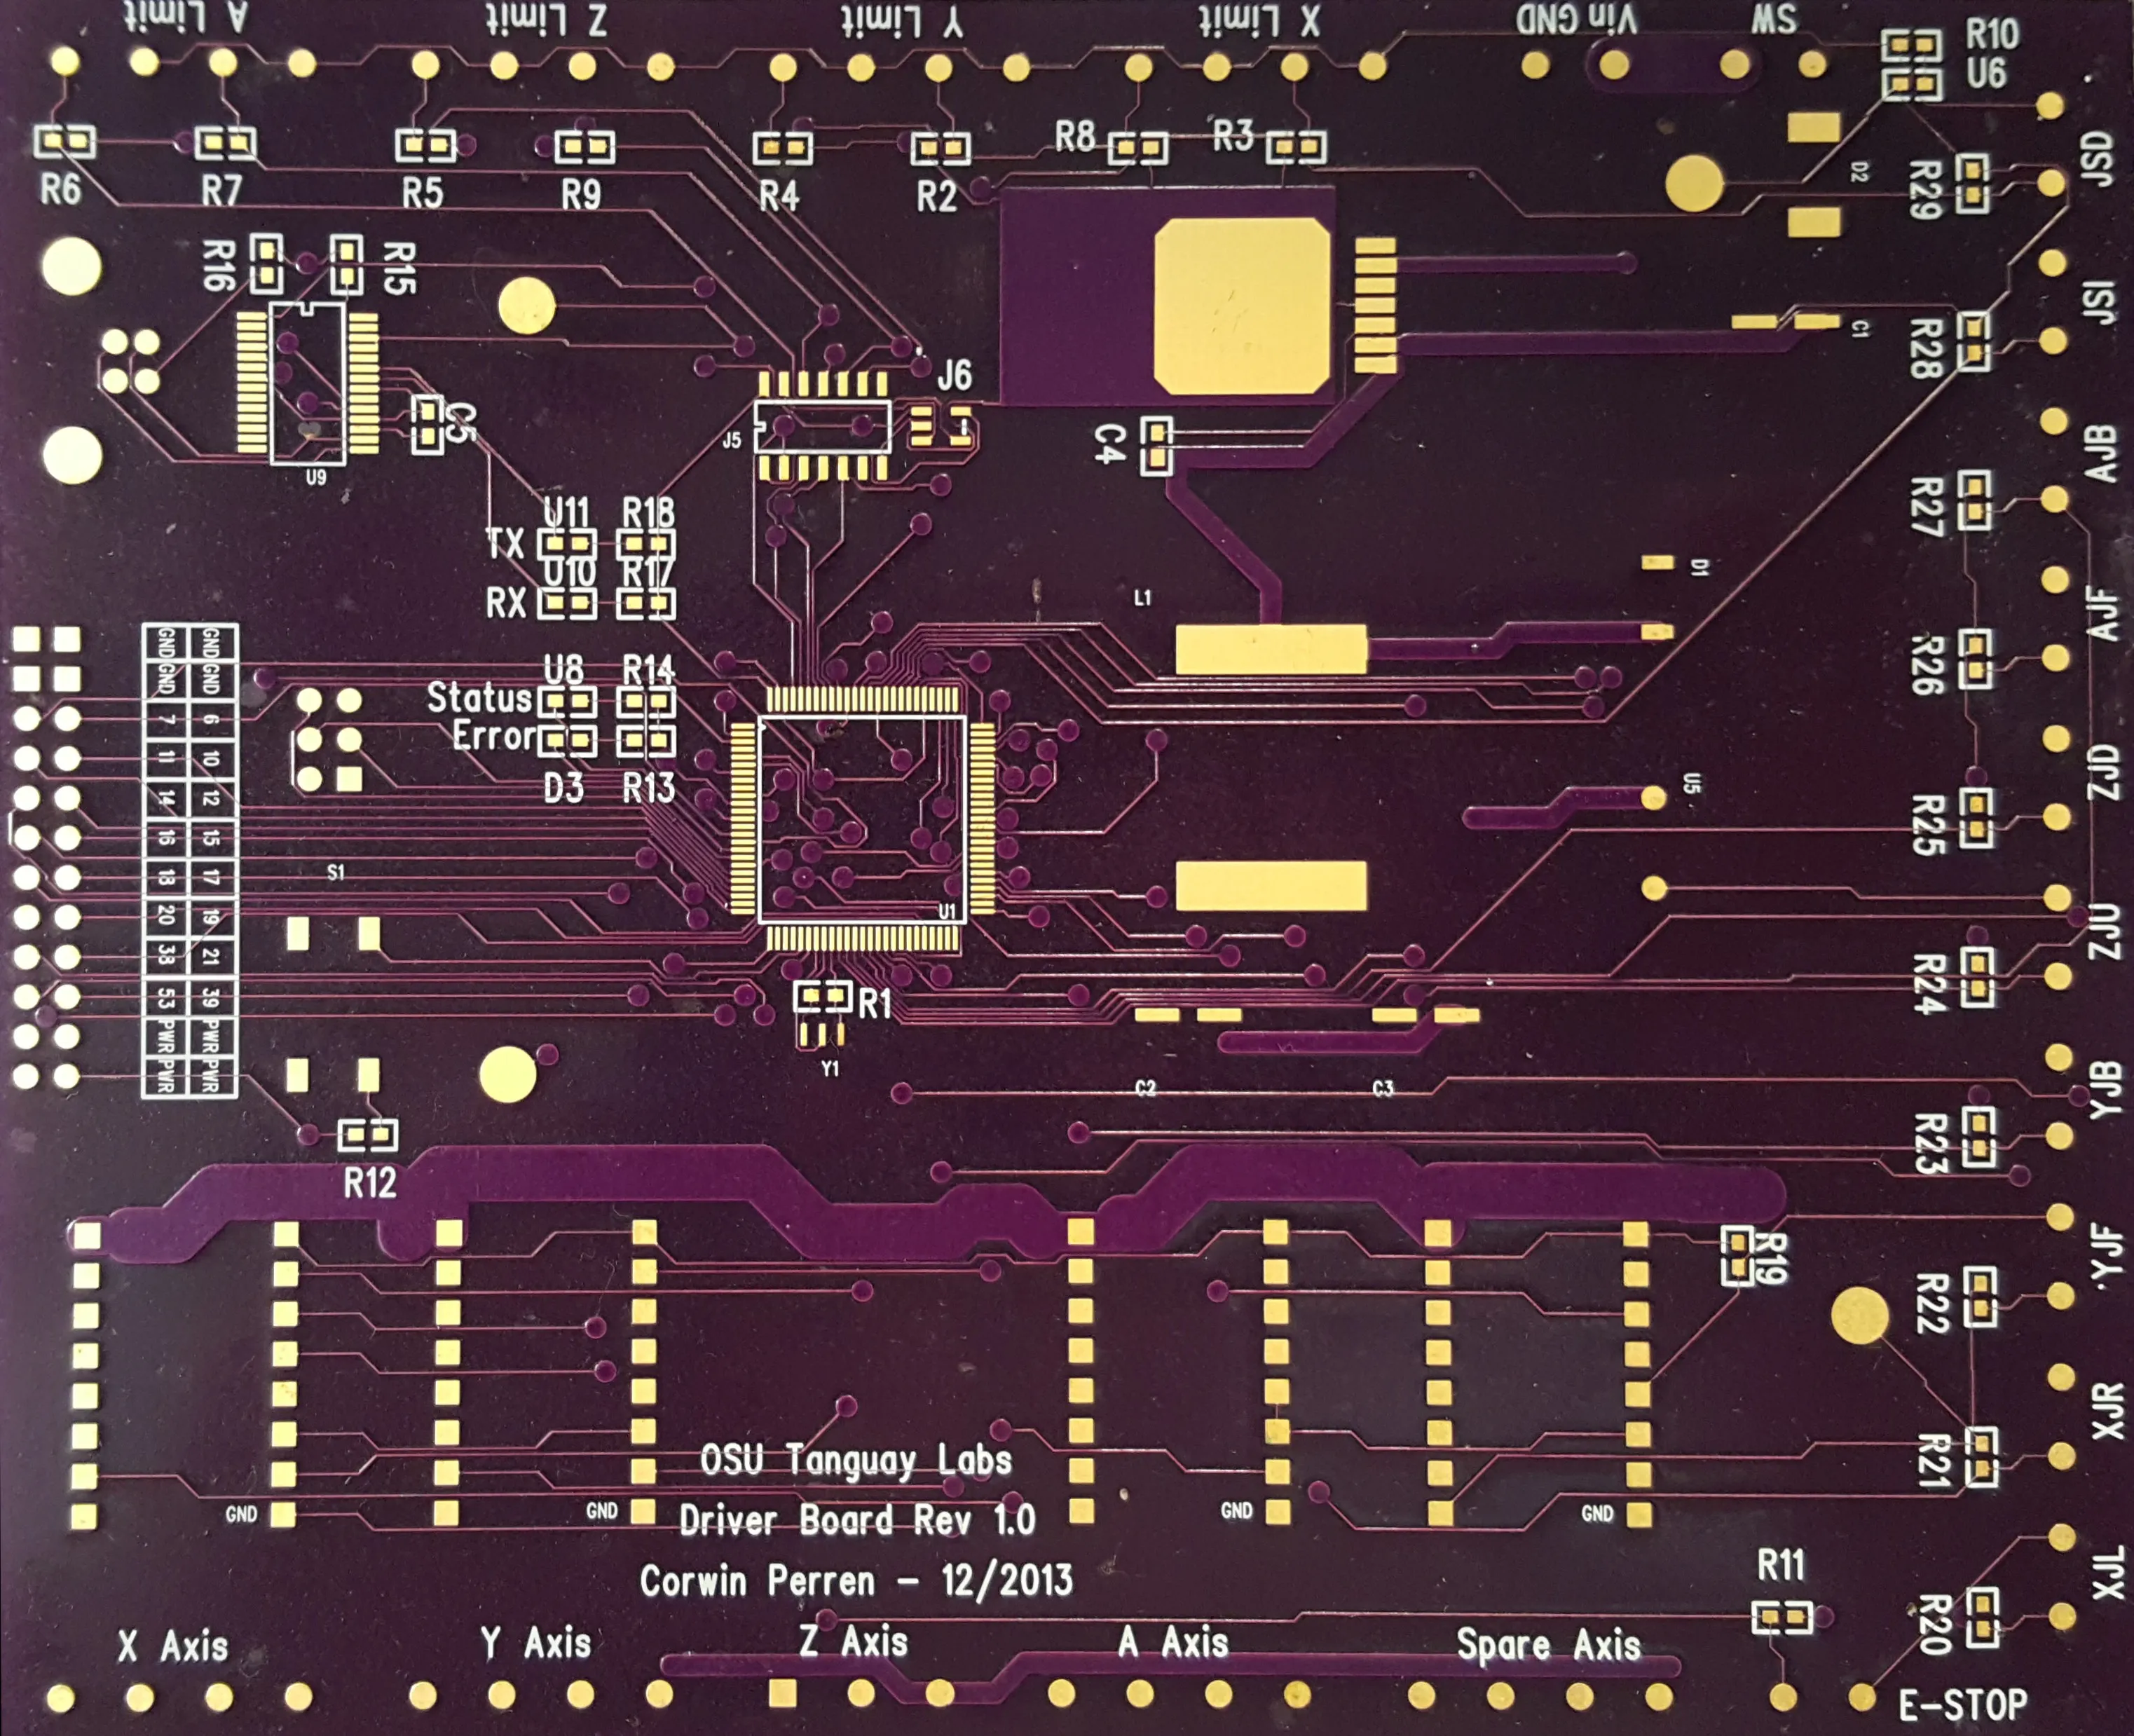
- First printed circuit board I ever designed, which was REALLY bad